Getting started with project planning on GitHub
Stop context switching. Keep your team’s project planning next to your code.
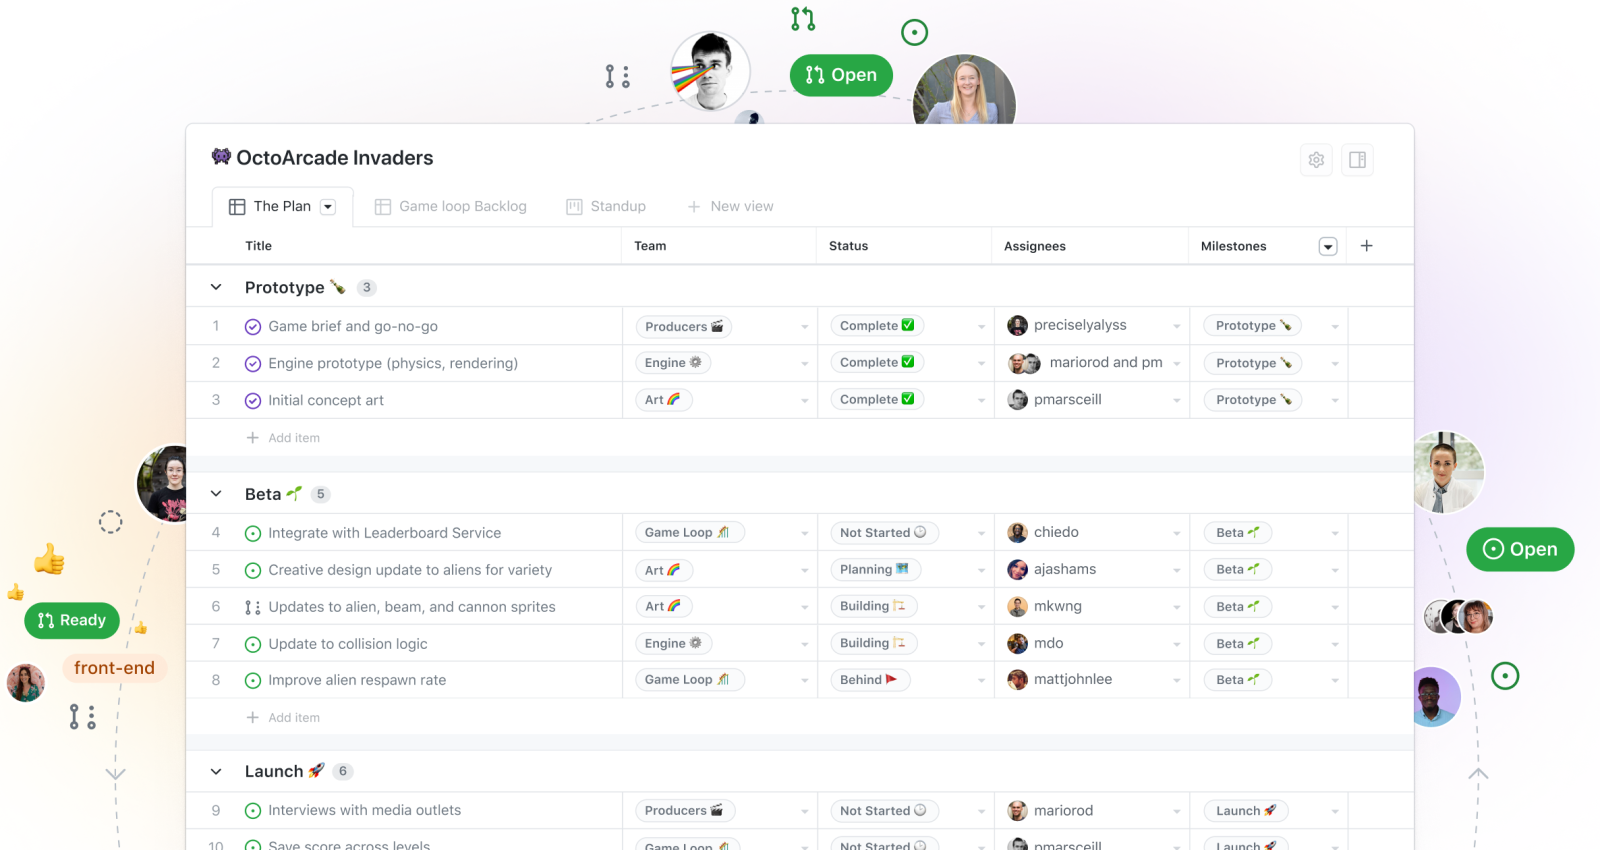
GitHub has long been the home for developers all over the world, and GitHub Issues has been the place where developers turn to kick off an idea, start a conversation, and track progress. As projects grew and became more complex, development teams often turned to dedicated planning and tracking tools to help them make sense of all that’s in-flight. However, if all this work is happening in GitHub, it probably makes sense to stop context switching and keep your team’s project planning right next to your code in GitHub.
The ability to efficiently plan and manage work on GitHub has been growing in capabilities and power in recent months. As your team takes on the new calendar year with a full roadmap of ideas to start building, we thought we’d give you some tips on how to get started. We’re going to take you through how to use the new projects experience to tackle one feature to start, and use that planning process and apply it to future pieces of work.
Creating a new project 📝
Once you’ve identified a specific feature to start utilizing the new projects experience, head over to your organization’s page, and you’ll see “Projects.” Once you click on it, you’ll see an option on the left-hand side for a “(beta)” experience. This option gives you both the table and board layouts and will allow you to switch between them with ease.
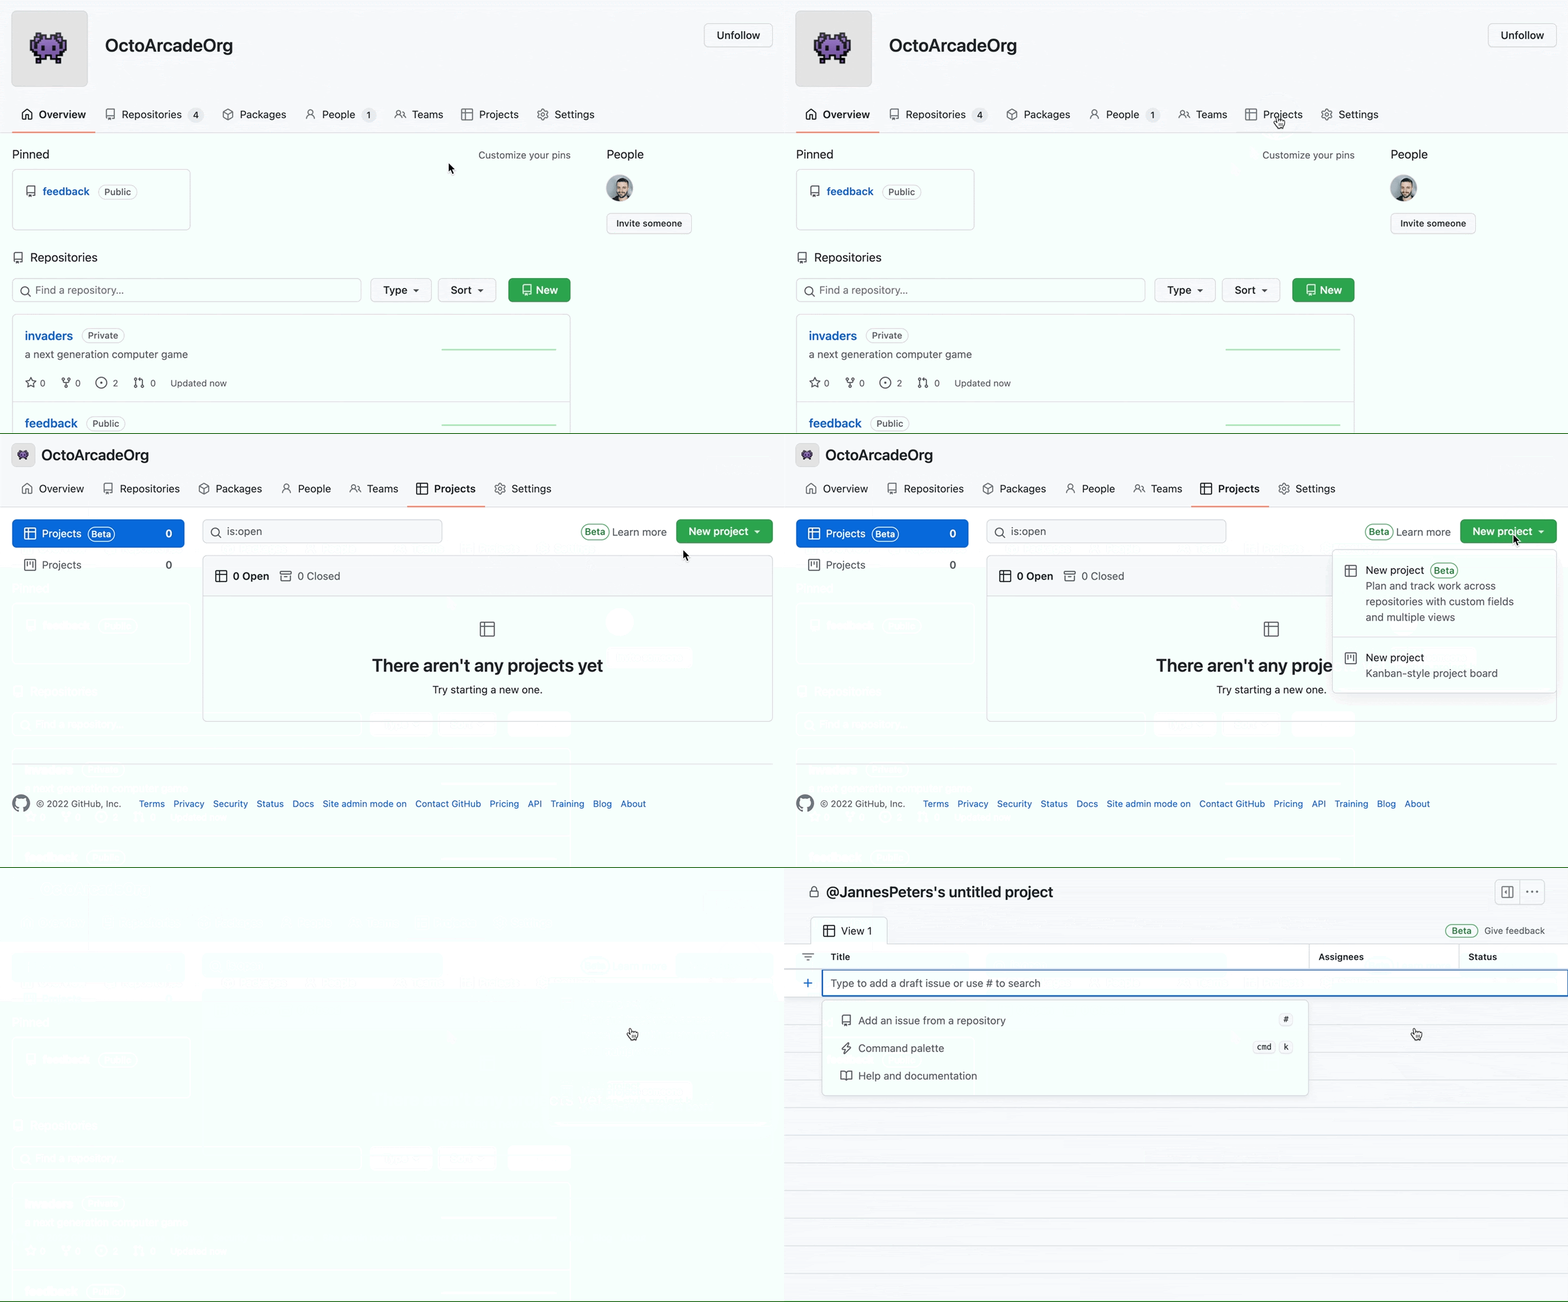
The beauty of the new projects experience is that it’s built with flexibility in mind. We don’t want to lock you into a specific planning methodology. We know that everyone works differently, and how you plan and manage work is unique to you.
So, with a blank slate in front of you, the best place to start is by adding GitHub Issues that are a part of the project you’re going to track for the feature your team is building. You can do this by using “#” and adding the issues you need. From our own experience, we’d recommend starting off with a project with a shorter timeline for delivery, like a six-week project deliverable. This will help you set a quick and repeatable tempo for your teams moving forward.
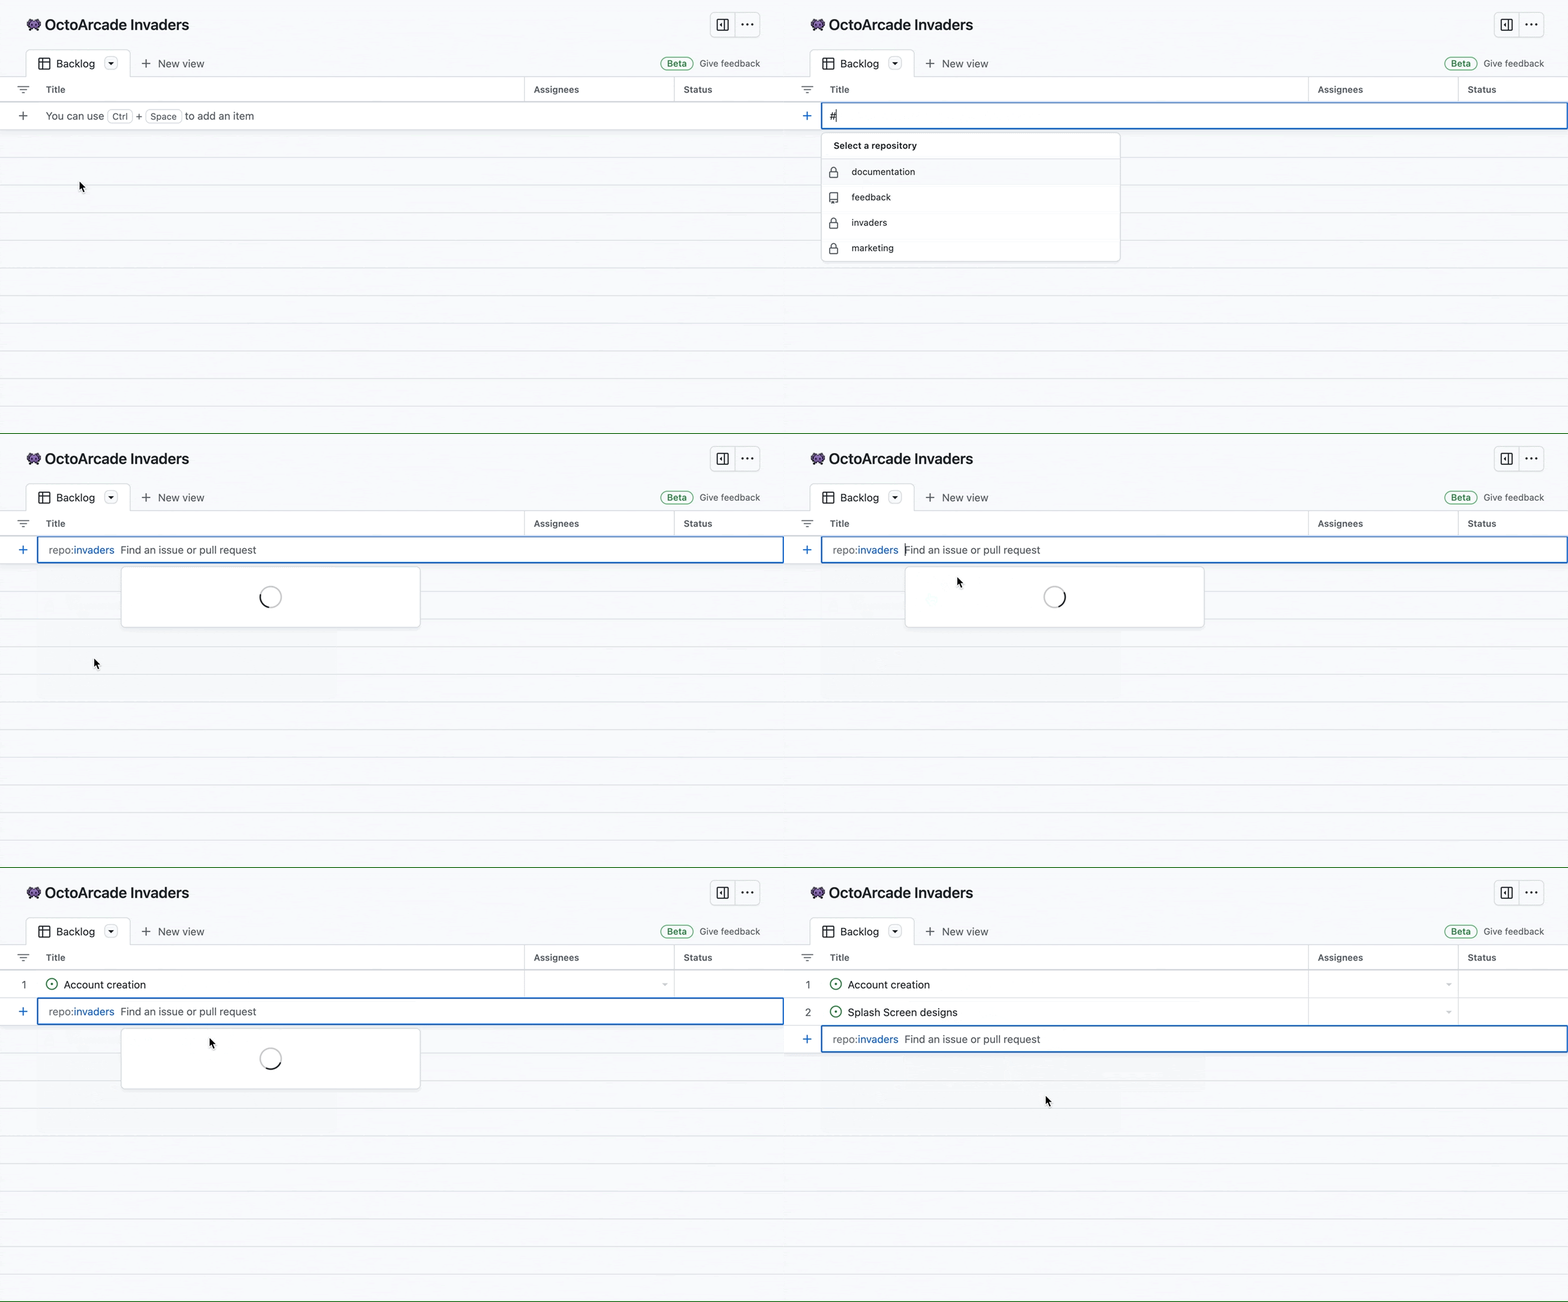
💡 All your tables and board will automatically update all the statuses of your issues and pull requests, updating new assignees, and more.
Get organized 🗃
Now comes our favorite part—organizing! Both the table and board view give you a lot of freedom when it comes to how you want to organize and customize your projects. Your default view is going to be your high-level plan, a table, or board layout with everything in it. Once you’ve got all the relevant issues and pull requests inputted, we’ll start to adjust and add new custom fields. This metadata helps classify your work items in all the different ways that are helpful for your team.
The initial layout will give you a few core fields that are typically important to track, such as title, assignees, status, etc. Also, if you’re looking to track a six-week deliverable as we do, it’s a good idea to start by adding an iteration field to track iterations weekly associated with your deliverable. Once you have those determined and properly linked to your issues, you can take a full look at what’s open, what’s being worked on, and even see what linked pull requests are associated with given pieces of work.
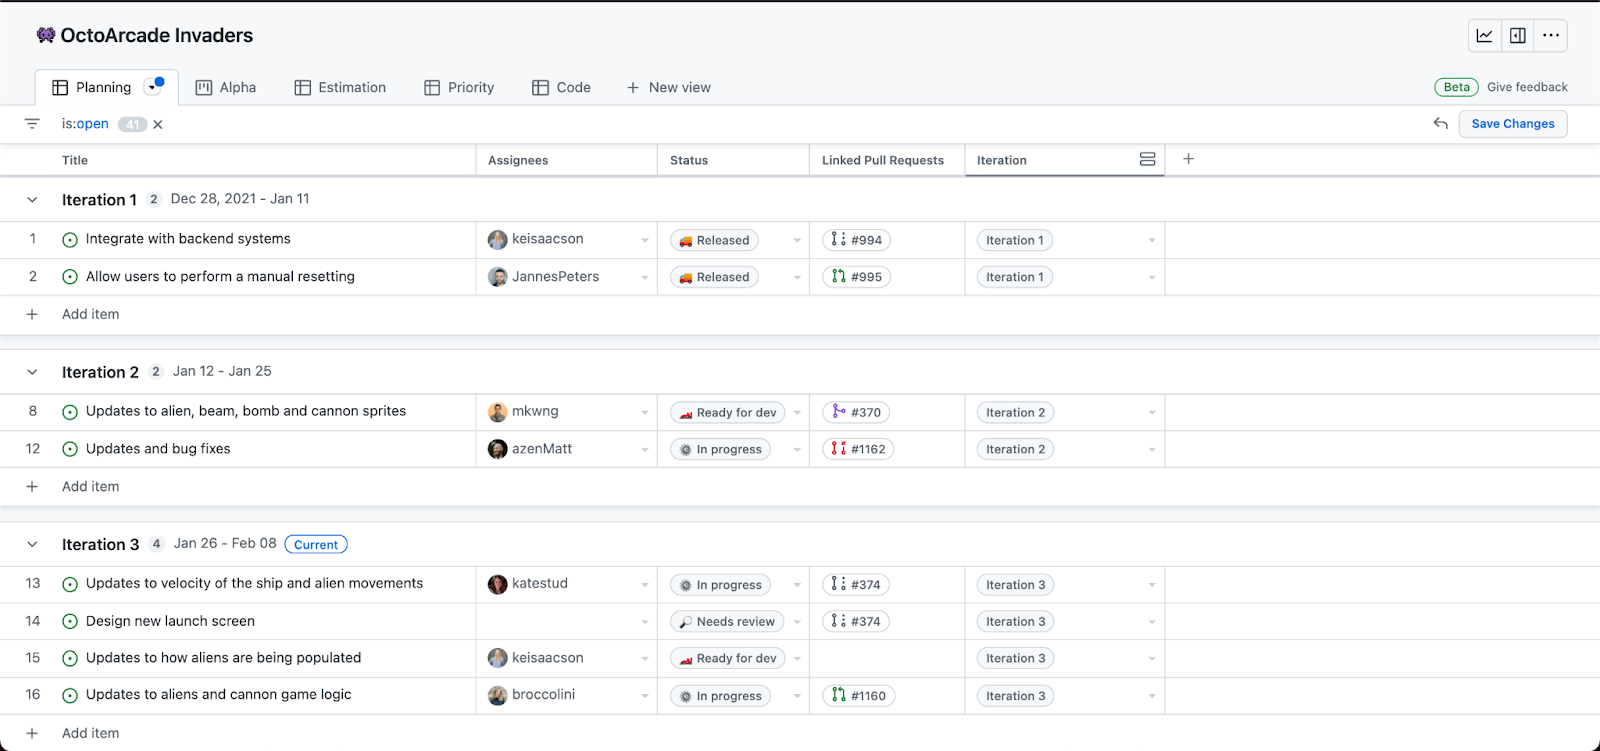
Check out even more ways you can get customizing here. Also, recently added, is the ability to view any customized field in board view! 🎉
Make it yours 👀
From here, once you have your initial table/board set up, you can go even further in what you’re looking at by adding different views. Filters are great, but views give you ways to save different tabs so that it’s easy to maneuver to the specific parts of your project you care most about (like if you want to save a view that shows what individual teams are working on). Check out how we do this with our public roadmap where we list out different products so our customers can quickly see what’s upcoming for what they care about most.
A good first step for when you’re building out your plans on GitHub is to use the iteration field to create a new view. For us, this is important, because you can quickly see all that’s happening right now. To create a new view by iteration, you can either use the “+ New view” next to your first layout, or use the command palette: “Command” + “K” (for Mac) or “Ctrl” + “K” (for Windows/Linux). Hit the dropdown arrow in the new view’s tab, and under “Configuration” select “group by: iteration” to create a powerful planning view for your team.
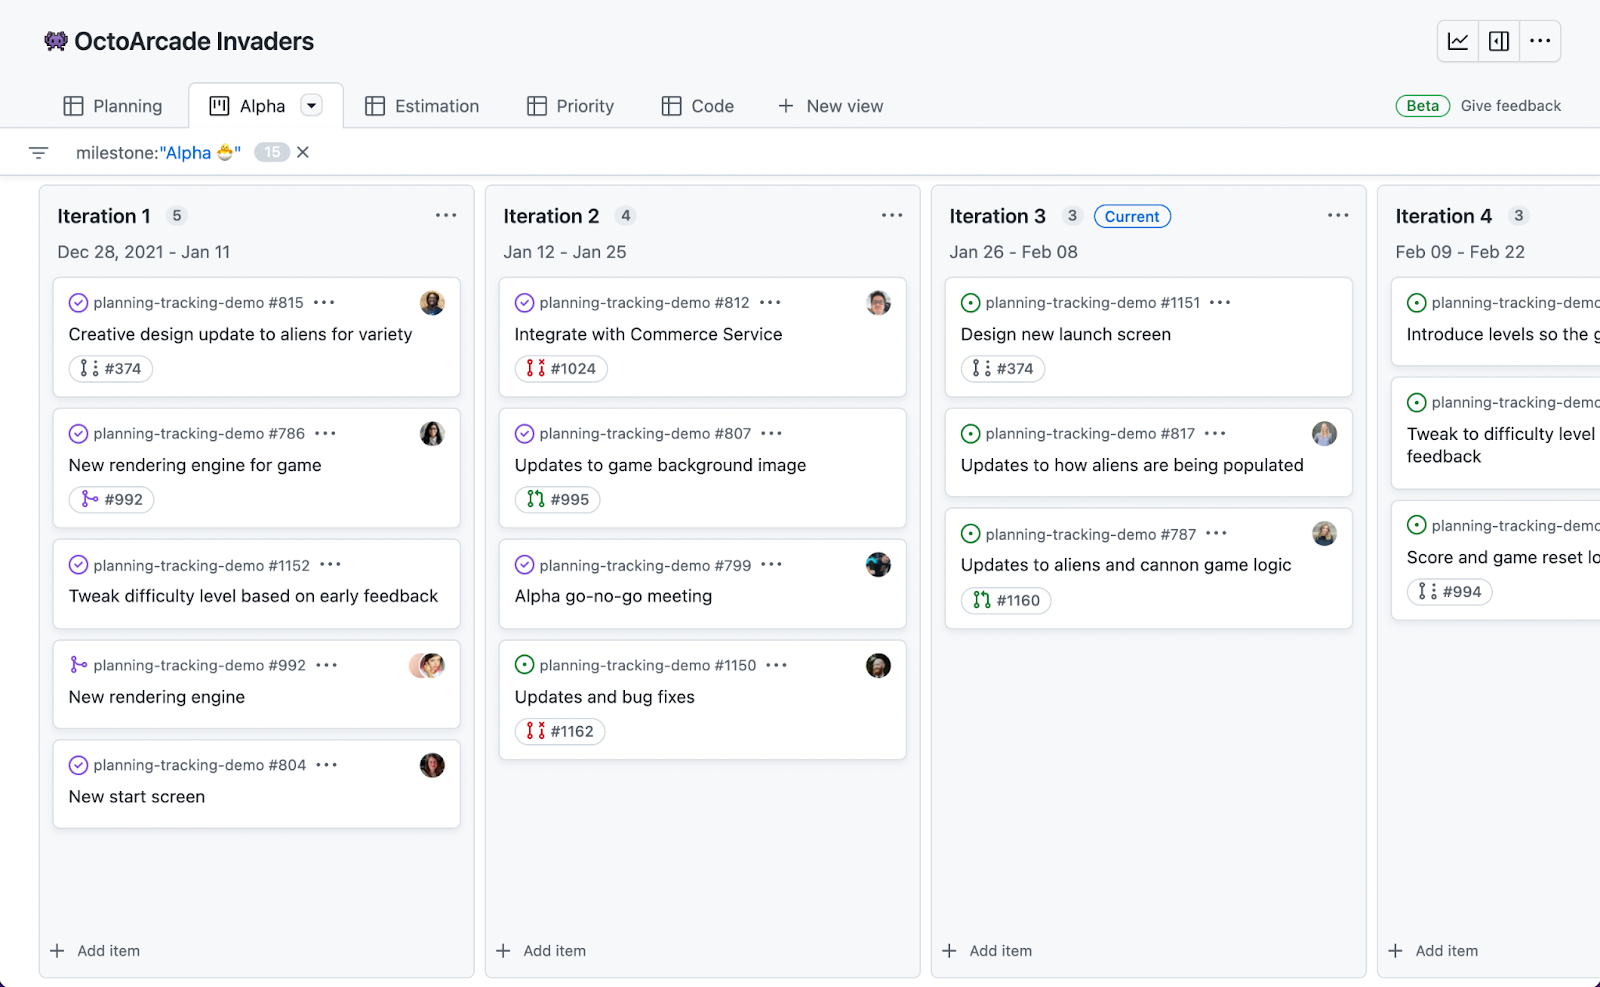
💡 When your project is looking good, but you realize there’s a new work item that needs to be added, you can open a draft issue directly from your project table or board. See some of the latest functionalities with draft issues here.
Rescope, reuse, recycle 🔄
The reason we recommend using the projects experience on GitHub to plan for shorter time frames is that you’ll be able to create shorter cycles with your team, increase your tempo, and release on a more consistent basis. We think these shorter cycles lead to more focus for teams (it has for us!) and are easily repeatable for other teams in your organization. Once your deliverable is complete, you close out a given project and can have that as an artifact your team and others within your organization can use moving forward.
Once your team is feeling comfortable, you can start to bring together these smaller cycles to ladder up to bigger objectives. We think approaching planning and tracking too far removed from the work can be the wrong way to approach it. If we can ensure that developers have a solution that feels natural and comfortable for them and is in shorter, more manageable cycles, it will flow seamlessly into your organization’s goals.
Do you want to learn more?
We hope this helps you get a head start on moving your project planning over to GitHub. If you’re interested in learning more or giving us feedback, check out these links:
- Our latest ships (we’re always improving!): https://github.blog/changelog/label/issues/
- GitHub Issues Docs: https://docs.github.com/en/issues (check out the quickstart guide!)
- Where to give us feedback: https://github.com/github/feedback/discussions/categories/issues-feedback
- What’s coming on the roadmap: https://github.com/orgs/github/projects/4247/views/7
Tags:
Written by
Related posts

7 learnings from Anders Hejlsberg: The architect behind C# and TypeScript
Anders Hejlsberg shares lessons from C# and TypeScript on fast feedback loops, scaling software, open source visibility, and building tools that last.

Context windows, Plan agent, and TDD: What I learned building a countdown app with GitHub Copilot
Learn how I managed context to keep Copilot focused, used the Plan agent to sharpen vague requirements, and required Test Driven Development practices to catch bugs before users.

Agentic AI, MCP, and spec-driven development: Top blog posts of 2025
Explore the GitHub Blog’s top posts covering the biggest software development topics of the year.