To learn more, view documentation for Dependabot alerts.
Erin Havens
Erin Havens is a Product Manager at GitHub, focused on security products. 100+ ships across products like Secret Protection and Dependabot (and counting).
Dependabot alerts can give you the ability to secure your project by keeping dependency-based vulnerabilities out of your code. Here are some tips to more efficiently prioritize and take action on your alerts, so you can get back to building.

Dependabot alerts can give you a superpower–the ability to secure your project by keeping dependency-based vulnerabilities out of your code.
However, while all potential vulnerabilities can be an issue and warrant attention, not all vulnerabilities pose equal risk to your project. For example, some vulnerabilities have the potential to be critical, but don’t pose as much risk due to how you’re using the dependency. So, how do you assess risk across all your alerts and prioritize accordingly? Here are some tips to more efficiently prioritize and take action on your alerts, so you can get back to building.
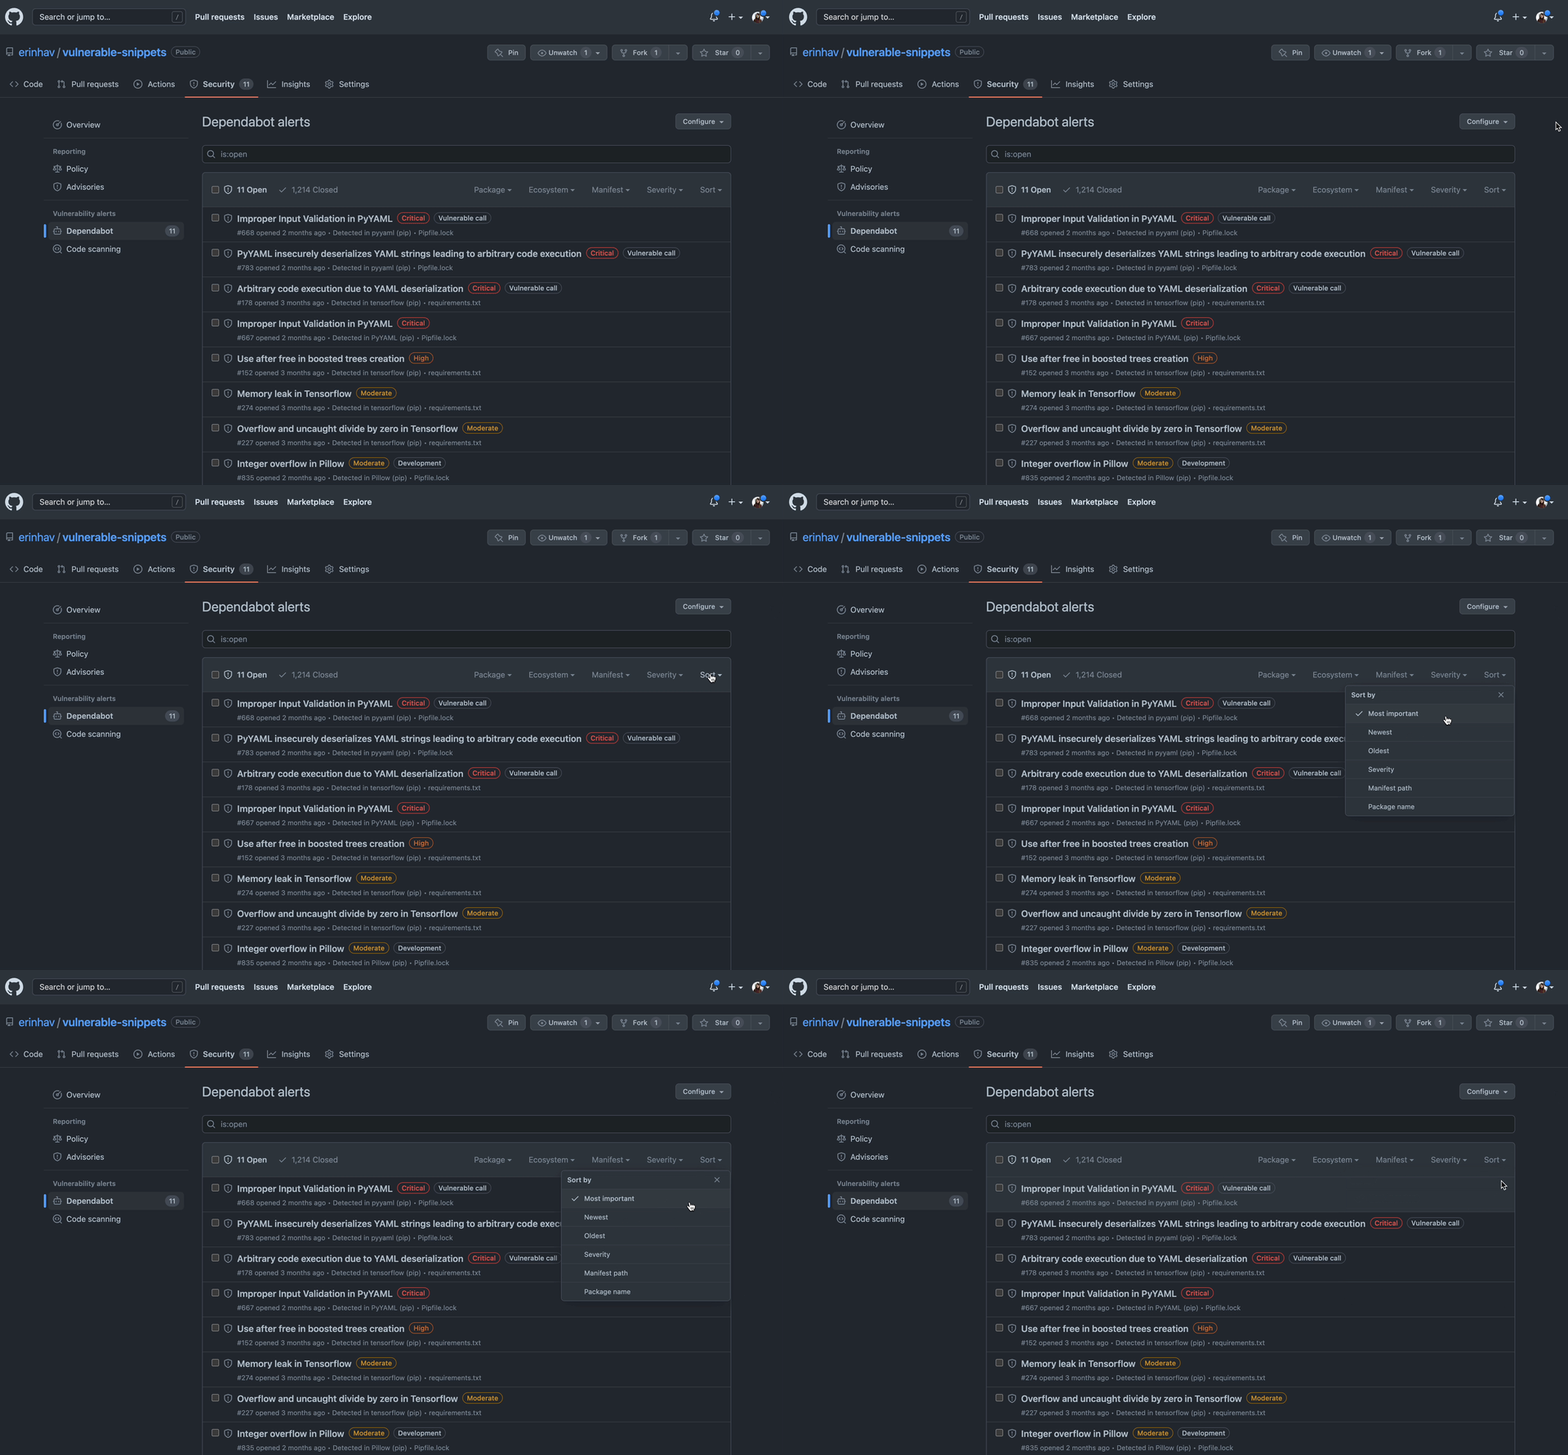
Many developers have a tendency to first sort by alert severity in order to prioritize. Counter-intuitively, an alert’s severity rating (critical, high, medium, or low) may not directly translate to importance. This severity rating is based on the advisory’s Common Vulnerability Scoring System (CVSS) score and doesn’t take into account how the dependency is being used by your application, or how it relates to other dependencies in your dependency tree. As a result, some “critical” vulnerabilities may actually be low risk to your project!
By default, Dependabot alerts are sorted with a “Most Important” sort, which not only takes into consideration the potential risk to your project, but also considers factors to infer how relevant the vulnerability may be to your project. For example, this sort calculation takes into consideration whether you’re calling a vulnerable function, as well as dependency scope (like if an alert is a devDependency).
This calculation also takes into account the actionability of the alert; for example, alerts with available patches (like a version with a fix) are featured higher than alerts without a patch.
Development teams who have the easiest job remediating Dependabot alerts all share a best practice: they periodically assess risk across their dependency tree by considering the health of these dependencies and how they’re used.
It’s useful to take a look across your dependency tree to see how vulnerabilities are linked or nested—maybe there are many alerts that stem from a single dependency. In that case, it could be worth considering alternatives to that dependency.
In the details page for any Dependabot alert, you can see a number of alerts linked, meaning that they would also be resolved with that singular package version upgrade. You can click that link to view a filter of all those alerts.

If you’re relying on open source dependencies, some are better maintained than others. Some projects are maintained by solo developers and rarely updated, while others are maintained by larger teams of collaborators who hold themselves to a high security bar. As a result, you can save yourself time and frustration by considering the health of the dependencies that you rely on (before depending on them).
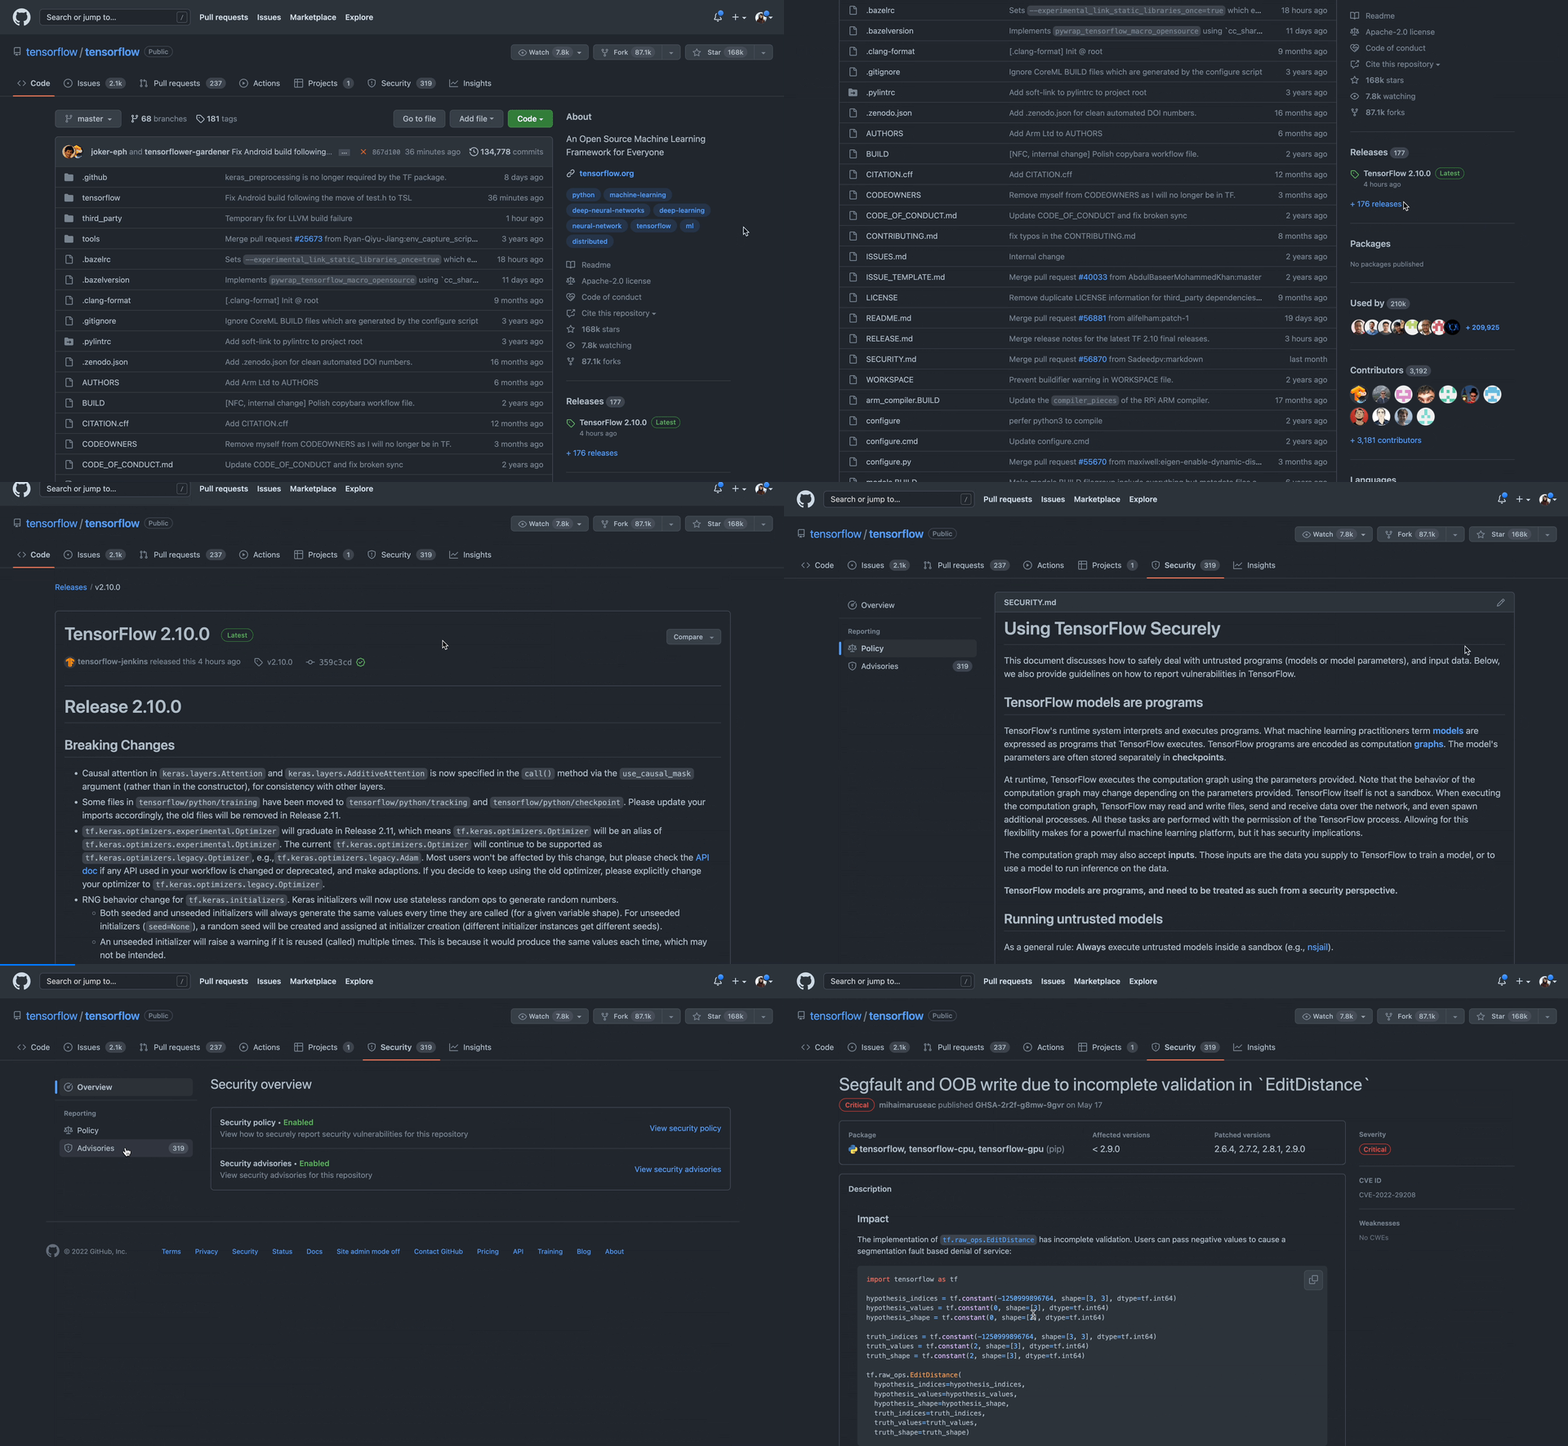
If the project is hosted on GitHub, you can review the popularity and activity of the package, including information about the latest release. You can also navigate to the dependency’s Security tab—some well-maintained open source packages will publish information about using their package securely, in addition to security policies and advisories published by the project’s maintainers, if published through GitHub.
Did you know that Dependabot can be used not only to upgrade dependencies for security vulnerabilities, but also to keep your dependencies up-to-date more generally (one of the easiest ways to keep your project secure)?
With Dependabot versions updates, you’ll continually receive patches and bug fixes to keep your project healthy, while avoiding the build-up of technical debt and ensuring project sustainability in the long term. To get started, you’ll need to set up a dependabot.yml—configuration file to control how you receive these pull requests. To learn more about configuring Dependabot version updates, check out our documentation.
Often, you’ll install packages in your development environment that you don’t want in your production environment. Many production dependencies pose higher risk than dependencies only needed during development.
Dependabot takes a secure-by-default approach and alerts on vulnerabilities from your development dependencies. To make assessing these alerts easier, Dependabot alerts detect whether your dependencies are production or development dependencies and expose that information via labels and filters, as well as in the “Most Important” calculation for ranking of alerts.
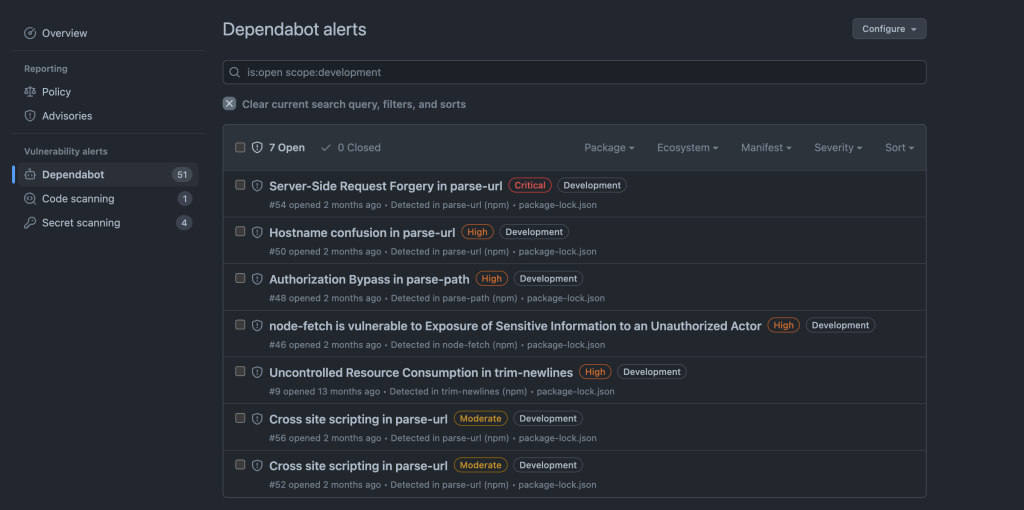
Marking development dependencies is supported in the following ecosystems as of the date of this post:
| Language | Ecosystem | Dependency Scope |
|---|---|---|
| Ruby | RubyGems | ✅ |
| JavaScript | npm | ✅ |
| JavaScript | Yarn | No, defaults to runtime |
| PHP | Composer | ✅ |
| Go | Go modules | No, defaults to runtime |
| Java | Maven | ✅ test maps to development, all else default to runtime |
| Python | Poetry | ✅ |
| Python | pip | ✅ for pipfile, for requirements.txt scope is development if the filename contains “test” or “dev”, else it is runtime |
| .NET | NuGet | ✅ only for .nuspec when tag != runtime; for all other cases defaults to runtime |
| Rust | Cargo | ✅ |
In addition to information about the dependency (for example, dependency scope, manifest, package name), Dependabot alerts also include information about the type of vulnerability, like CVSS severity. This information is not only indicated with the alert, but also available as filters.
Filters are useful as they can be combined to help you quickly identify low risk or false positive alerts and dismiss them in bulk. Keep in mind that ignoring alerts carries risk.
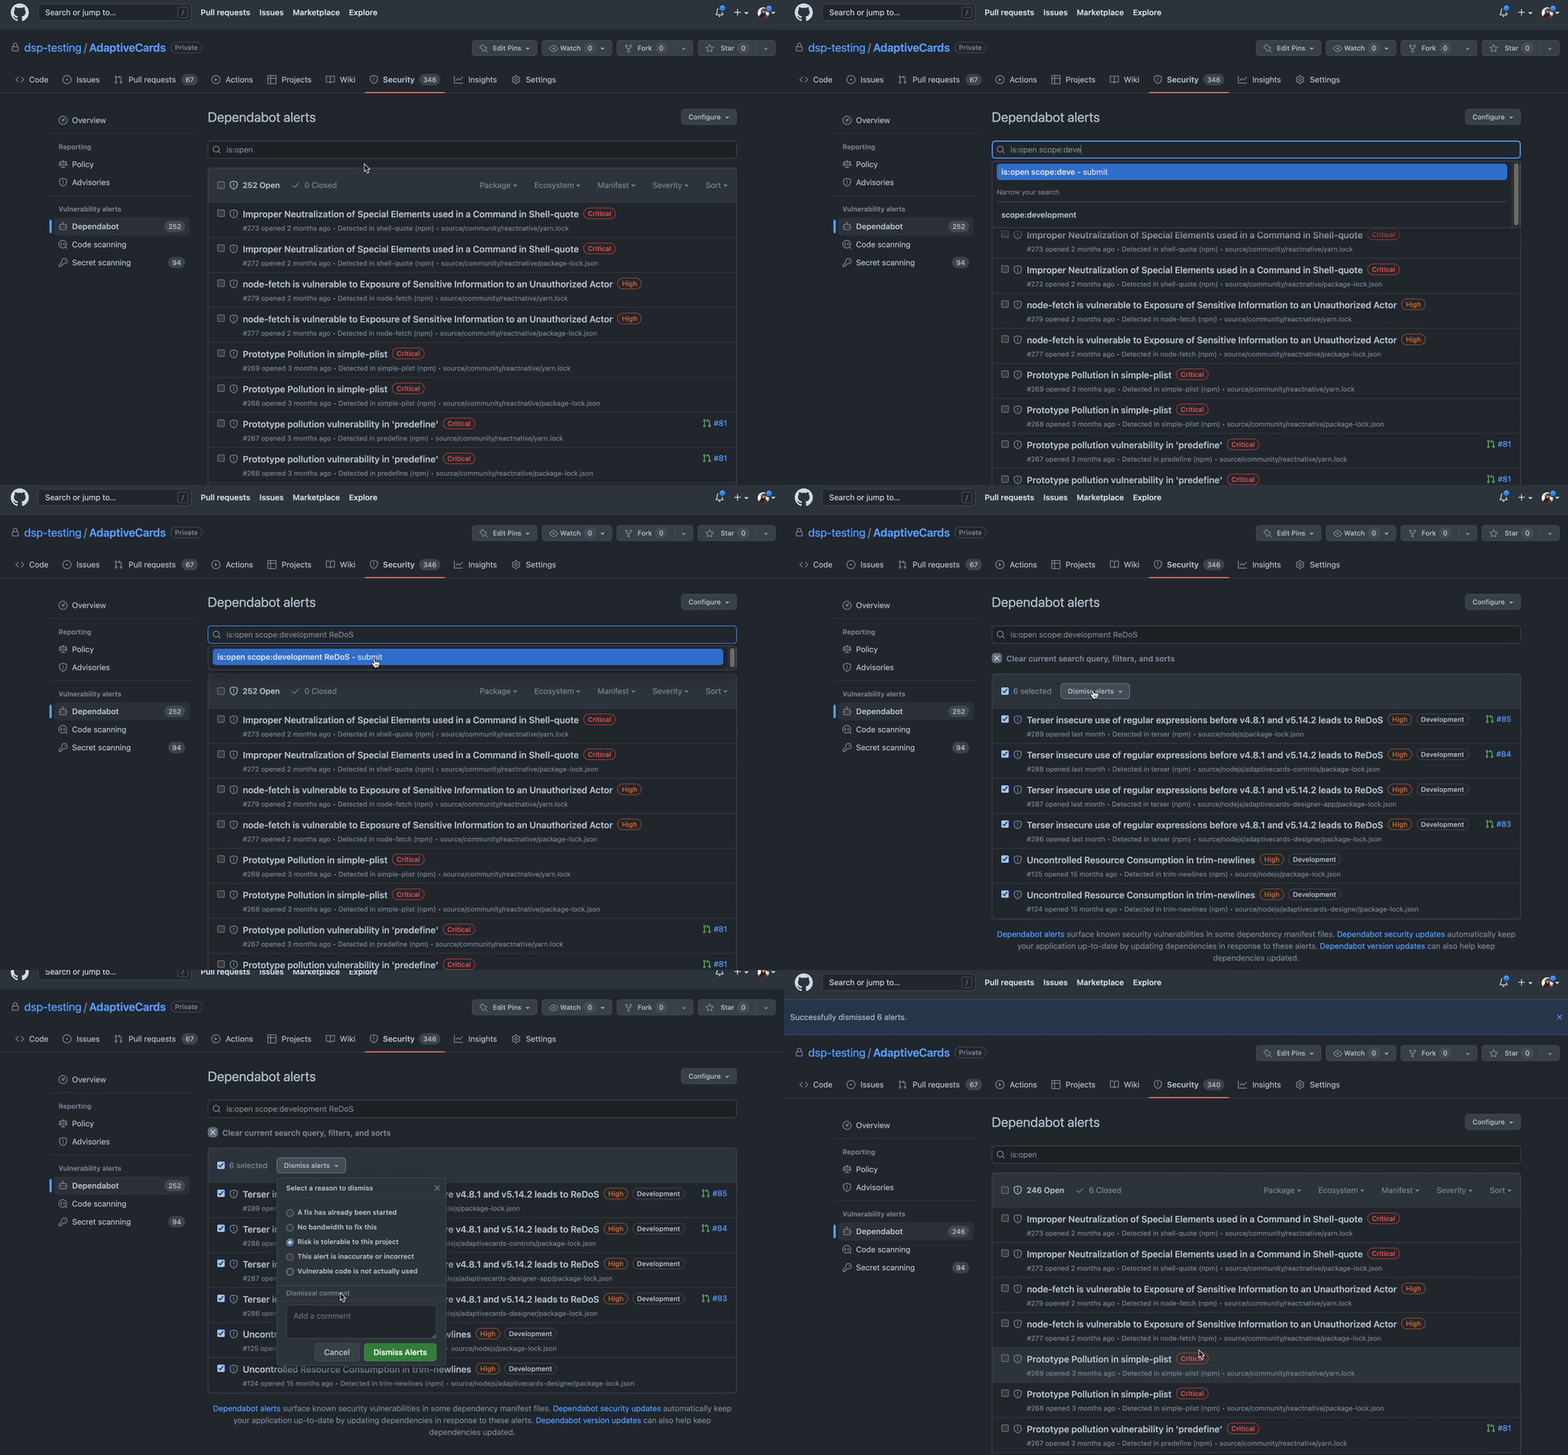
It’s easy to get overwhelmed by the number of vulnerable dependencies in your project. It can help to start with the quick wins.
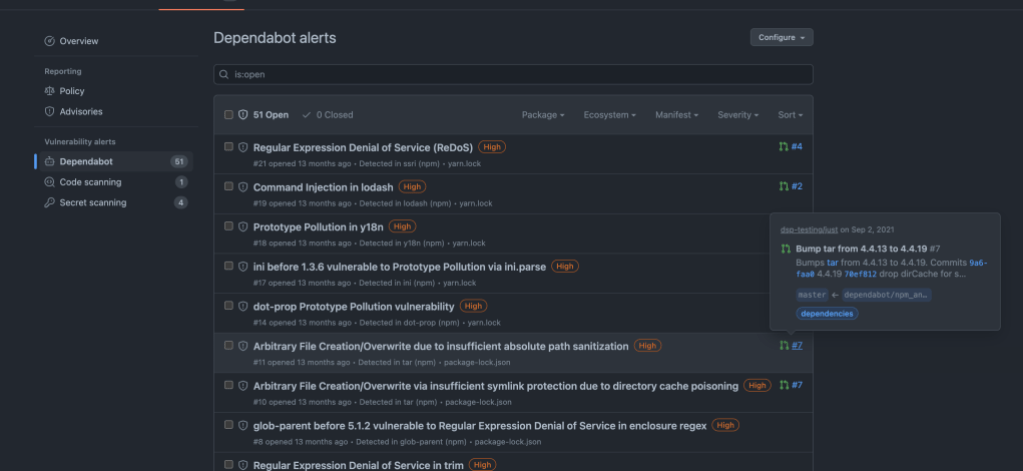
Some dependency upgrades resolve many vulnerabilities at once–it can feel great to start with those upgrades and make a lot of impact at once. In the details page for an alert, you can see a number of alerts “linked” (would be resolved) with that singular package version upgrade. If you choose to manually generate a pull request to upgrade this vulnerability, these pull requests will also be indicated in the alert list view, which makes it easy to quickly visually parse the list and get a sense for those potentially quick wins.
As a final note, if you don’t want to manually generate Dependabot pull requests from the alert details page, you can enable Dependabot security updates from your project’s settings to automatically open these pull requests for you and further save you the additional effort!
Those are the five tips for prioritizing across your Dependabot alerts (and a bonus!). Hope these insights save you time–and, of course, help you keep your projects more secure.
To learn more, view documentation for Dependabot alerts.

DjVuLibre has a vulnerability that could enable an attacker to gain code execution on a Linux Desktop system when the user tries to open a crafted document.

The GitHub dependency graph maps every direct and transitive dependency in your project, so you can identify risks, prioritize fixes, and keep your code secure.

Use these insights to automate software security (where possible) to keep your projects safe.