Sylwia Budzynska
Sylwia is a security researcher at GitHub Security Lab, where she works with finding vulnerabilities in open source software, helping secure the foundations on which all modern software is built upon.
Learn the basics of CodeQL and how to use it for security research! In this blog, we will teach you how to leverage GitHub’s static analysis tool CodeQL to write custom CodeQL queries.
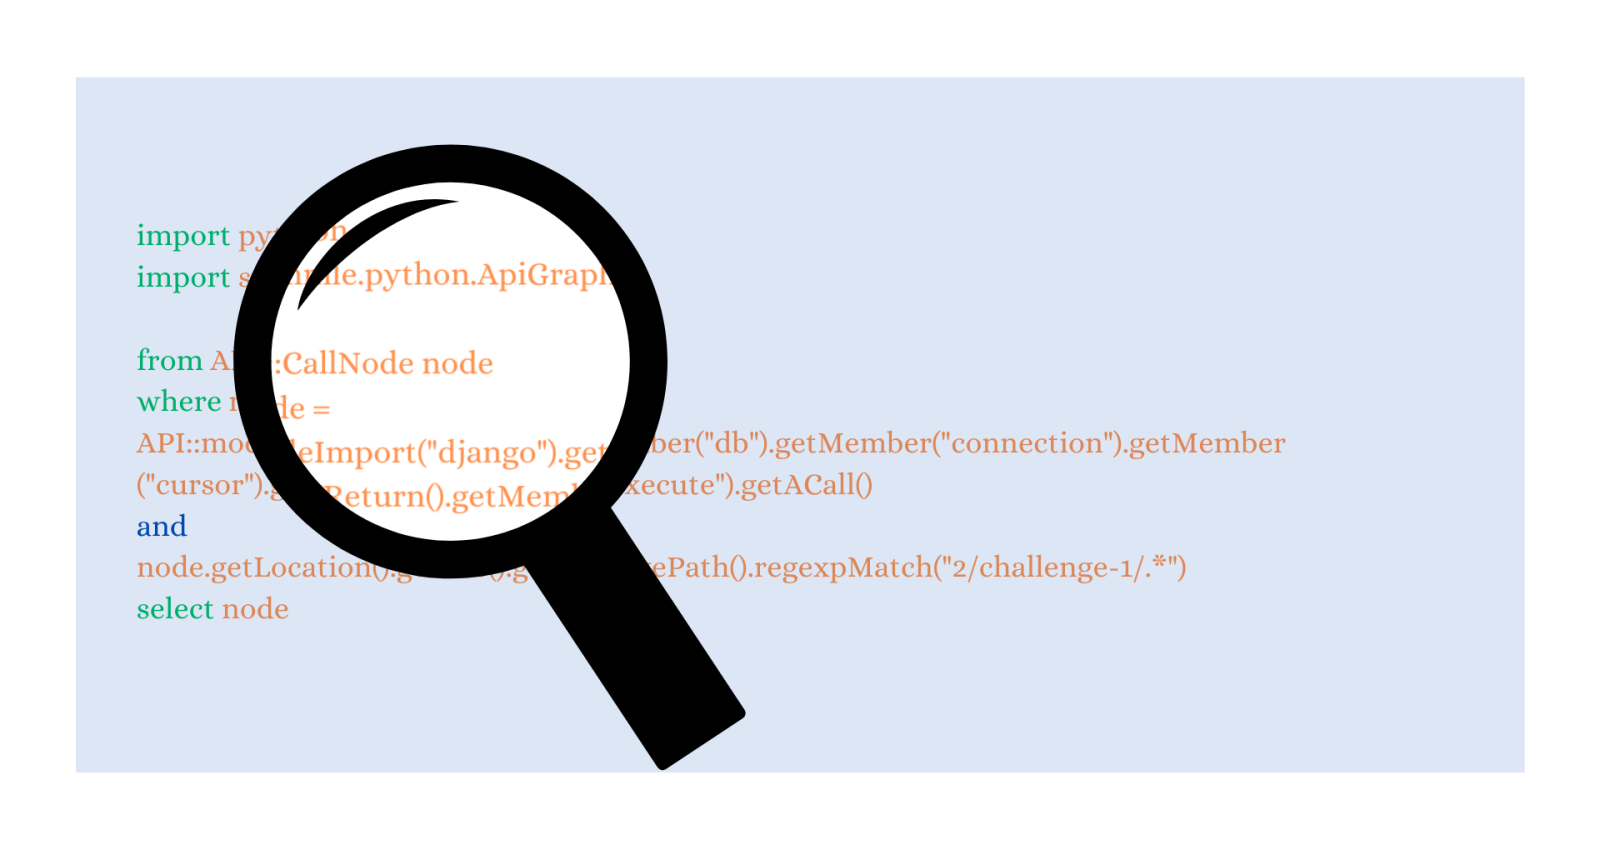
CodeQL is a static analysis tool that can be used to automatically scan your applications for vulnerabilities and to assist with a manual code review. In this blog, we will look closer at CodeQL and how to write CodeQL queries. If you are not familiar with static analysis or would like a refresh, check out the first part of the blog post series—CodeQL zero to hero part 1: The fundamentals of static analysis for vulnerability research. If, on the other side, you already know a bit of CodeQL and would like to use it for security research, check out the third part—CodeQL zero to hero part 3: Security research with CodeQL.
Below, we include voluntary challenges, but it is highly recommended to do them while reading through the blog to get a better understanding of CodeQL, how to use it, and learn a few new tips and tricks about the tool.
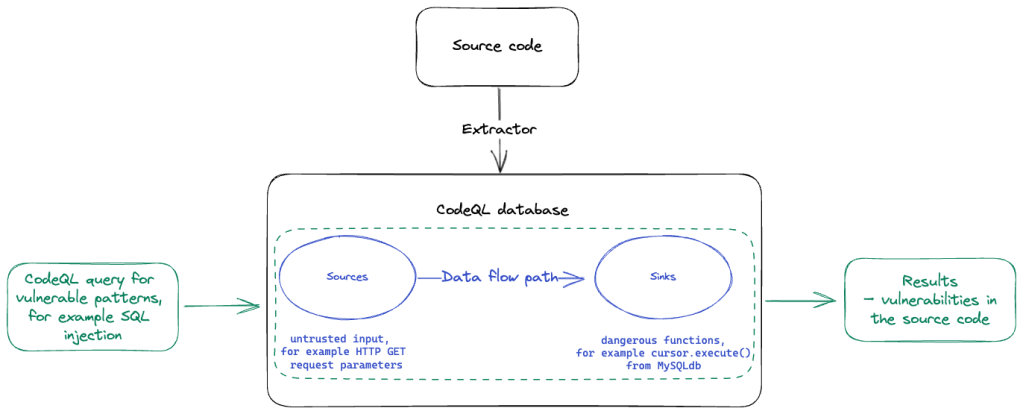
The first part of the CodeQL zero to hero series introduced some of the fundamental concepts of static analysis for vulnerability research—sources, sinks, data flow analysis, and taint analysis (taint tracking). Data flow analysis is a static analysis method that is commonly used to track untrusted inputs in the code (sources) and find if they are used in dangerous functions (sinks). The connection between a source and a sink is called “data flow.” The data flow analysis and taint analysis methods are used by many static analysis tools, including CodeQL.
The blog also introduced some common structures used in static analysis methods, such as Abstract Syntax Tree (AST), Control Flow Graph (CFG), and others. You don’t need to know all of them, but reviewing the first blog will help you in the long run, since mentions of these structures will appear in this and next blog posts.
Now, before diving into using CodeQL, let’s have a quick look at what we can do with CodeQL.
CodeQL offers automated scanning for vulnerabilities and can also be used as a tool to explore codebases and to assist with manual testing. There’s a number of uses for CodeQL, for example:
We will expand on these bullet points in this and in the coming blogs.
CodeQL is a powerful static code analysis tool developed by Semmle (acquired by GitHub in 2019) and based on over decade of research by a team from Oxford University. CodeQL uses data flow analysis and taint analysis to find code errors, check code quality, and identify vulnerabilities. Currently, the supported languages include C/C++, C#, Go, Java, Kotlin, JavaScript, Python, Ruby, TypeScript, and Swift.
The key idea behind CodeQL is that it analyzes code as data by creating a database of facts about your program and then using a special query language, called QL, to query the database for vulnerable patterns.
Once we have the CodeQL database, we can ask it some questions (queries) about patterns that we want to find in the source code. For querying a CodeQL database, the QL query language is used. QL is an expressive, declarative, logical query language for identifying patterns in the database, that is vulnerabilities, for example, SQL injection. CodeQL queries are open-source, and anyone can create and contribute to CodeQL.
There are a lot of products, technologies, and concepts relating to CodeQL. That’s why we’ll start with introducing the most beginner-friendly technologies and work our way towards the more advanced topics. All of them can be useful for security researchers and developers, so feel free to choose the ones you enjoy using the most. As always, you don’t need to know or be familiar with all of them, but being aware of them and learning their fundamentals will certainly make auditing codebases and debugging easier, as well as give you more accurate results later on.
The easiest way to try out CodeQL is by enabling the code scanning with CodeQL GitHub Action on a repository. GitHub Actions is a continuous integration and continuous delivery (CI/CD) platform that allows you to automate your build, test, and deployment pipeline. An action is a custom application for the GitHub Actions platform that performs a complex but frequently repeated task. One of such actions is code scanning, which includes scanning with CodeQL. Enabling CodeQL on public repositories is free. Adding code scanning with CodeQL to repositories that use interpreted languages is straightforward and automatic in most cases. See the guide here if you’d like to enable code scanning with CodeQL on a repository with a compiled language.
Let’s try to enable code scanning with CodeQL on a public repository and see what results it gives us.
Fork GitHubSecurityLab/codeql-zero-to-hero repository and follow the instructions in the repository for enabling code scanning with CodeQL. Look in the “Security” tab of your fork to see all the vulnerabilities found by CodeQL. The repository contains several intentionally vulnerable code snippets and the code scanning with CodeQL action will find several vulnerabilities.
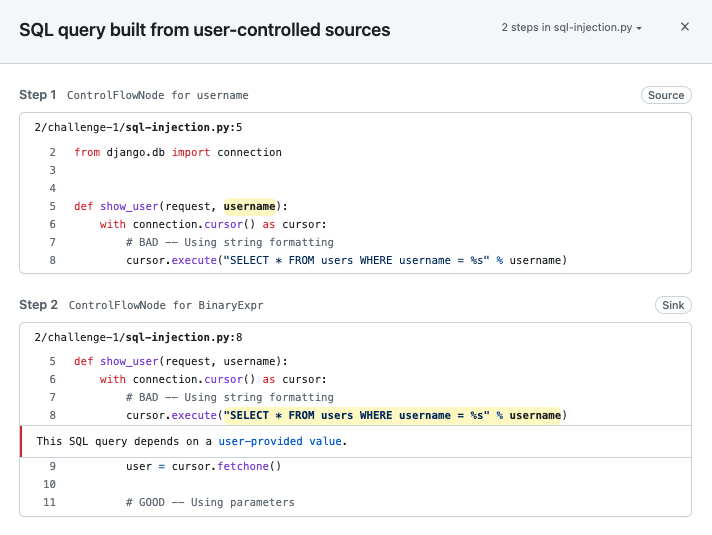
The setup took less than a minute, plus a few minutes of scanning to generate alerts. Let’s have a look at one of the SQL injection alerts. Clicking on the “Show paths” button will show you the data flow path from the source to the sink. This path is very short, because the repository contains simple and deliberately vulnerable code for learning purposes. Most real vulnerabilities will have a longer path, likely spanning through several files.
What are the advantages of using code scanning with CodeQL as a security researcher?
It’s worth mentioning that the default code scanning with CodeQL action uses the default suite of CodeQL queries designed to be as accurate as possible with a very low false positive rate, but there are more (for example, experimental queries, false positive-prone queries, or exploratory queries), which can be enabled by changing the action configuration—see docs.
We mentioned earlier that to analyze the source code, a CodeQL database is needed. A CodeQL database is created automatically when you enable the code scanning with CodeQL action on a repository, but what if you would like to modify a query or query for specific artifacts yourself?
Let’s first have a look at how CodeQL databases are created and what they contain.
At a high level, the process works as follows: for each language CodeQL extracts the source code, converting it to understand it either by parsing the code directly or by instrumenting executions of a compiler that already exists for that language within a running build. The database itself is a relational representation of the code base, which contains information about the different source code elements, such as classes and functions, and puts each of those into a separate table of data. Each language has its own database schema, but generally there is a table for classes, a table for functions and so on, and relationships between these tables. CodeQL standard libraries for each language provide wrappers and layers around that database schema. We use the QL query language to query these tables and relationships. There are some differences in how CodeQL databases are extracted for each language and what information they contain stemming from the intrinsic differences between the languages. We will see these differences when using QL to query the databases, but at a high level that most people use, the differences are barely visible.
CodeQL databases already exist for many of the most popular open source projects on GitHub. GitHub hosts over 200,000 of them, and they are available to download by using the CodeQL extension in VS Code or GitHub via the GitHub API. If it happens that a CodeQL database is not available for your favorite open source repository, requesting it will trigger an attempt for database creation. Downloading a CodeQL database from GitHub is the quickest way to get started with analyzing a codebase. We will be using the CodeQL extension in VS Code to request a database in the challenges.
In this challenge, you will set up CodeQL for the challenges. You can do so via a preconfigured codespace (recommended) or locally. The preconfigured codespace is your own mini container in a virtual machine, which comes with everything you need to query a codebase using CodeQL: VS Code, CodeQL extension for VS Code, CodeQL command line tool preinstalled, and a pre-existing CodeQL database. The workspace will enable you to run your own CodeQL queries in the later challenges.
Follow the instructions in the GitHubSecurityLab/codeql-zero-to-hero challenge 2 directory.
The rest of the challenges will assume that you have the VS Code with CodeQL extension and CodeQL starter workspace setup with a CodeQL database of your choice.
You can also create a CodeQL database yourself locally, using the CodeQL command line tool. Again, the process is quite straightforward for interpreted languages and may require a few more steps for compiled languages. The easiest way to install the CodeQL CLI locally is as an extension to the gh CLI tool—GitHub’s official CLI tool. We will do that in the challenge below. Before we begin, please note that CodeQL is free for use on open source repositories. See the CodeQL license for more information.
The CodeQL command line tool allows you to create databases from locally-sourced code. In this challenge, you will create a database for the vulnerable code we used in earlier exercises. Follow the instructions for the challenge 3 in the GitHubSecurityLab/codeql-zero-to-hero repository.
In the challenge, we created a CodeQL database by downloading the project we want to analyze and installing all the libraries and dependencies needed to run the project. For successfully creating a CodeQL database, we generally need to include the code that is “outside” of our program—namely libraries and dependencies.
For creating a CodeQL database in an interpreted language, dependencies are not required to be installed.
For interpreted languages in general, dependency source code will only be in the database if that dependency source code was part of the scanned codebase on the filesystem at database creation time. Most CodeQL libraries for interpreted languages are designed to reason about which APIs are called without having to see the source code of those APIs.
For creating a CodeQL database in a compiled language, dependencies are required to be installed to the extent required by the build. Simply put, do what is needed to make the build work.
The database will contain some compile-time information about dependencies (for example, method signatures) but will not have the source code elements of the dependencies (unless the dependency was built from source code as part of the observed build). Most CodeQL libraries for compiled languages are designed to reason about which APIs are called using the signature information available at compile-time without having to see the source code of those APIs.
We have established that to get a CodeQL database for a certain repository, we can either download it from GitHub or create it yourself. Does it then make a difference if you download a CodeQL database of a project from GitHub or if you create one yourself? For the majority of the cases, not really.
Do remember though, that a CodeQL database is a snapshot of a certain state of the repository and GitHub stores only CodeQL databases for the newest version of all repositories. Let’s give an example—let’s say that you wanted to analyze not the newest version of a repository, but an older one. It could be that you wanted to analyze a vulnerability that was present in that previous version. GitHub stores only the newest version of a database, often made from the latest commit on the codebase. To conclude, in this case you wouldn’t be able to download an older version from GitHub, because GitHub only stores the latest version. If you’d like to analyze an older version of a database, you would need to download an older version of the software and create the database yourself using CodeQL CLI, as presented in challenge 3.
Last note: CodeQL uses Static Analysis Results Interchange Format (SARIF) files to report on results of code scanning. The SARIF format has been widely accepted in the industry as a standardized output format, which allows for ease of sharing static analysis results with other tools.
Now that we have the necessary set up, we can begin to learn how to query the CodeQL database and write our own CodeQL queries using the QL query language. Let’s start with a short introduction to QL and then test our knowledge on how to write queries in challenges.
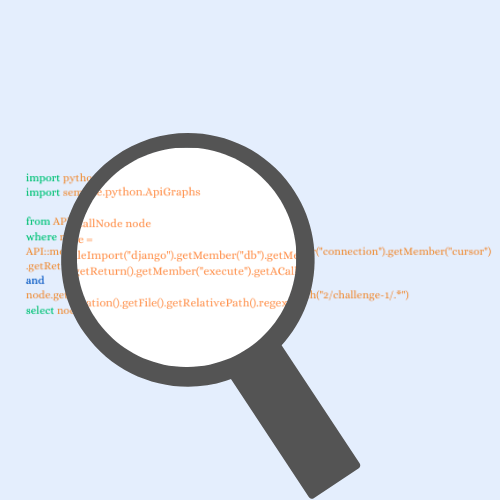
We previously learned that a CodeQL database is a relational representation of the code base, which contains information about the different source code elements, such as classes and functions. And so we can query the CodeQL database for such elements—syntactic elements—such as abstract syntax tree (AST) nodes (for example, a function call or a function definition), and for semantic elements, such as the nodes in the data flow graph of a program. The data flow graph is one of the structures that CodeQL creates on top of the AST and contains information about the data flow within a program. Using the data flow graph we can query if there is a connection between, for example, a source of user-controlled data and a SQL injection sink.
When we query the database with QL, we “ask questions” to the database. For example:
eval”eval”django.db library”django.db library that do not take a string literal as input”These examples are pretty easy to understand and the idea behind them is to get comfortable with using QL. We’ll start by going through them and later introduce more complex queries.
The basic syntax and structure of a CodeQL query resembles SQL syntax and consists of three statements—from, where and select, which describes what we are trying to find.
from defines the types and variables that are going to be queried.where defines conditions on these variables in the form of a logical formula. where can be omitted if there are no conditions.select defines the output of the query.Let’s say we would like to ask CodeQL for all function calls in a Python codebase. The query would look like below.
1. import python
2.
3. from Call c
4. where c.getLocation().getFile().getRelativePath().regexpMatch("2/challenge-1/.*")
5. select c, "This is a function call"
Let’s go through the query line by line.
Call class, in our own query.Call is the type, while the c is the variable name. Types represent a set of values, for example, Call represents all calls in a program. In our case we restrict variable c to only Call values.c.getLocation() is an operation provided on the type Call which returns the location in the codebase of each particular call. With the subsequent operations, c.getLocation().getFile().getRelativePath().regexpMatch("2/challenge-1/.*") restricts the c variable to only the calls that are in any source file in the 2/challenge-1 folder, which contains vulnerable code snippets. If you are not following along with the challenges, then you can safely delete this line or customize it for your own codebase.With the setup that you created in the earlier challenges, run the query to show all function calls.
Explorer tab and create a new file in the codeql-custom-queries-python folder. Call the file call.ql and copy the query into the file.Call in the third line. This will show you the definition of the Call type. You can always hover over any part of the query to see if there is a definition for it.If you are having issues, check the instructions for challenge 4 in the GitHubSecurityLab/codeql-zero-to-hero repository.
After you have run the query, you should see all the function calls in your codebase.
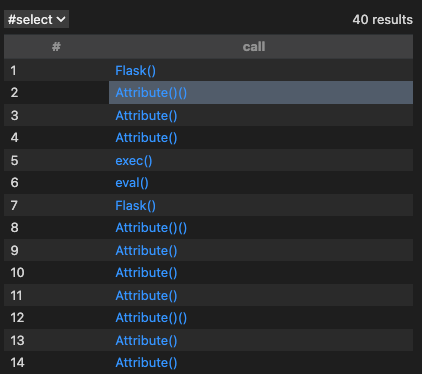
It’s interesting to see all the function calls in a codebase, but most codebases will have way too many to audit them one by one. We should refine the query to find more precise results.
Let’s say we want to look for all function calls to eval. The query for it will look as follows.
1. import python
2.
3. from Call c, Name name
4. where name.getId() = "eval" and
5. c.getFunc() = name and
6. c.getLocation().getFile().getRelativePath().regexpMatch("2/challenge-1/.*")
7. select c
QL is a logical language—it allows for specifying logic conditions for patterns in code using common logical operators and, or, not. It is also a declarative language–order for specifying conditions does not matter. We can see these qualities in the query.
In comparison to the previous query, this time we put three filters in the where clause, connecting them with an and. The filters use equality signs “=” to assert equality between expressions on the two sides, which might be confusing at first glance. Note that using an equal sign in CodeQL does not mean assignment, but an assertion of equality—it means that the two sides are equal. Whether you write c.getFunc() = name or name = c.getFunc() the result will be the same.
Let’s have a look at each of the filters separately.
Call c and Name name. As we already know, Call type refers to calls to functions in our codebase. The Name type refers to variables and it contains their name. What might be a bit confusing is that in some languages, such as Python, every named entity is a variable. In our eval() example, eval is really a variable read and () is the call operator. In this context we are calling whatever function is held by the eval variable. You can think of Name as a variable read expression.name variable to only expressions that have eval as its name with name.getId() = "eval". As we said, the Name type represents a name expression. With the getId() operation on the name variable we get the string representation of the node. At last, we restrict the values of the name variable by comparing it to “eval”.where clause with c.getFunc() = name”, we first call the getFunc() operation on c to get the callable of the call, so the function itself. Then, we restrict it with the value of the name variable (which as we remember, we restricted to “eval”).where clause with c.getLocation().getFile().getRelativePath().regexpMatch("2/challenge-1/.*"), we limit the functions to the ones present in the folder 2/challenge-1/select c, we output the calls that comply with all the conditions above.These “operations” that we called on the variables are called predicates (to be more precise—built-in predicates) and are similar to functions. Practice running it and querying a CodeQL database using other types than Call in the challenges.
Run the query to show all function calls to functions named “eval.” Check out the subsection “Available types and predicates on types” and use the ideas to explore available types and predicates in the query. The challenge is also available in the GitHubSecurityLab/codeql-zero-to-hero repository.
Call is one of the many types that are available in CodeQL for Python. Try to write a query for showing all function definitions.
Check the GitHubSecurityLab/codeql-zero-to-hero repository challenge 6 for the solution. In CodeQL, we can often achieve the same results in many different ways, so don’t worry if your solution is different from the provided solution. Just check that you have the intended results.
A QL predicate is like a mini from-where-select query—it encapsulates a portion of a logic in a program, so it can be reused. For example, the built-in predicate getFunc() on the Call type returns the callable (the function or method that is being called). As an example, querying for a call gives us eval(“some code”), while call.getFunc() gives us just eval. the function name that we called). We can create our own predicates—we could, for example, create a predicate to encapsulate the logic from the query above.
import python

predicate isEvalCall(Call c, Name name) {
  c.getFunc() = name and
  name.getId() = "eval"
}

from Call c, Name name
where isEvalCall(c, name) and
  c.getLocation().getFile().getRelativePath().regexpMatch("2/challenge-1/.*")
select c, "call to 'eval'."
This query does the exact same thing as the previous query—it searches for all functions with “eval” in their name. To create a predicate we do the following:
import python

predicate <name>(<variable type>:<variable name>) {
}

from Call c, Name name
where name.getId() = "eval" and
  c.getFunc() = name and
  c.getLocation().getFile().getRelativePath().regexpMatch("2/challenge-1/.*")
select c
isEvalCall). Note that predicates names must start with a lowercase character and it’s recommended to use camelCase casing. Next, copy the variable declarations from the from clause (Call c, Name name) and paste them into the predicate variable declarations. Copy the desired functionality from the where clause (c.getFunc() = name and name.getId() = "eval") into the body of the predicate.import python
predicate isEvalCall(Call c, Name name) {
c.getFunc() = name and
name.getId() = "eval"
}
from Call c, Name name
where c.getFunc().toString() = "eval" and
c.getLocation().getFile().getRelativePath().regexpMatch("2/challenge-1/.*")
select c, "call to 'eval'."
import python

predicate isEvalCall(Call c, Name name) {
  c.getFunc() = name and
  name.getId() = "eval"
}

from Call c, Name name
where isEvalCall(c, name) and
  c.getLocation().getFile().getRelativePath().regexpMatch("2/challenge-1/.*")
select c, "call to 'eval'."
Predicates make your query reusable, more readable, and easier to test.
There exist also member predicates, which are predicates that only apply to members of a particular class and require casting to that specific class, but it’s a bit more advanced topic and we will not be introducing them further in this blog.
Follow the steps outlined above to write your own external predicate. The challenge is also available in the GitHubSecurityLab/codeql-zero-to-hero repository.
QL is an object-oriented language. It allows for creating classes and use of object-oriented type patterns like inheritance, encapsulation and composition.
Classes allow you to define new types in CodeQL. Like all types, they describe sets of values. In a similar way as we created the predicate, we can modify the query to include a class instead. We can define a new CodeQL class to represent a set of function calls to functions named “eval.” Here is how the class will look like.
import python

class EvalCall extends Call {
  EvalCall() {
    exists(Name name |
      this.getFunc() = name |
      name.getId() = "eval")
  }
}

from Call c
where c instanceof EvalCall and
  c.getLocation().getFile().getRelativePath().regexpMatch("2/challenge-1/.*")
select c, "call to 'eval'."
We followed a similar process to create the class.
import python

class <name> extends <type> {
  <characteristic predicate>() {
  }
}

from Call c, Name name
where name.getId() = "eval" and
  c.getFunc() = name and
  c.getLocation().getFile().getRelativePath().regexpMatch("2/challenge-1/.*")
select c
EvalCall) and type (Call). Note that type names are always written in PascalCase. Next, extend the one of the types that is defined in the from clause (Call). Mind that Call is a supertype. All new classes in CodeQL need to have at least one supertype, which defines the initial set of values in our class.EvalCall). We restrict the values of the class in the characteristic predicate by defining constraints with the this keyword. this refers to the Call we are starting with, and allows us to define logical conditions which define the characteristics of an EvalCall instance.where clause (c.getFunc() = name and name.getId() = "eval") and change it to use the this keyword (this.getFunc() = name and name.getId() = "eval"). Since we extended the Call type, we replace the variable c with this.name of type Name, which we don’t have defined in our new EvalCall class. For these cases, we can introduce the exists() construct, which allows us to define local variables. We first define the local variables, then separate them from the conditions with a pipe |. All next conditions are can be separated by a pipe or an and—the form looks like this exists( | | ). All in all our exists() will look like this: exists(Name name | this.getFunc() = name | name.getId() = "eval")import python
class EvalCall extends Call {
EvalCall() {
exists(Name name |
this.getFunc() = name |
name.getId() = "eval")
}
}
from Call c, Name name
where name.getId() = "eval" and
c.getFunc() = name and
c.getLocation().getFile().getRelativePath().regexpMatch("2/challenge-1/.*")
select c
where clause with the class (call instanceof EvalCall)import python
class EvalCall extends Call {
EvalCall() {
exists(Name name |
this.getFunc() = name |
name.getId() = "eval")
}
}
from Call c
where c instanceof EvalCall and
c.getLocation().getFile().getRelativePath().regexpMatch("2/challenge-1/.*")
select c, "call to 'eval'."
What’s interesting about CodeQL is that there are often many ways to achieve the same result, as we have seen by creating a predicate and a class that do the same thing. It doesn’t matter which one you use, because later the CodeQL compiler will optimize the query to the same form. It’s more important that the query is readable to you and to the people you might share it with.
Note that in this case, if we didn’t need the Name name variable in our conditions, we wouldn’t have needed to use the exists() construct. Nevertheless, the exists() construct is very often used when writing your own queries and we decided to provide an example which would showcase how it works. There are more useful formulas in the QL language reference.
Follow the steps outlined above to write your own class. The challenge is also available in the GitHubSecurityLab/codeql-zero-to-hero repository.
In an earlier challenge, you wrote a query for function calls. Refine that query further to report all functions which have “command” as part of its name (hint: there’s a predicate that allows you to write regexes).
Check the GitHubSecurityLab/codeql-zero-to-hero folder for the solution.
An observant reader might think: it was easy to guess the type for a function and a function call, but what if I don’t know the type that I am looking for? And that’s a good point. In that case, you might want to look at the Abstract Syntax Tree of the code you want to query for.
Access the code in a CodeQL database of your choice using “Query the AST” option. The challenge is also available in the GitHubSecurityLab/codeql-zero-to-hero repository.
To get a better understanding of how to use the QL query language, do the QL tutorials available in the CodeQL documentation.
Let’s stop for a second and revisit what we said in the introduction. CodeQL allows for querying syntactic elements (for example, functions or function calls) and semantic elements (for example, a data flow between a source and a sink). Until now, we have queried only for syntactic elements. It was mentioned before that CodeQL allows to track data flow and taint through an application.
It does so by the so-called “taint tracking configuration” in which the user defines the sources, the sinks and then calls a predicate that checks if there is a path from the source to the sink. There’s also a possibility to define sanitizers, which would stop the data flow and not report a vulnerability, in case this sanitizer is found on its path. All CodeQL queries use the taint tracking configuration. We will explain taint tracking at a later date, but if you feel you’d like to try it out now, check out some of the workshops available in the “Other resources” section, which introduce the topic. For now, let’s try running a few prewritten taint tracking queries.
In the “Code scanning with CodeQL” section, we enabled code scanning with CodeQL on a repository, which showed a lot of vulnerabilities in the codebase. Generally, there’s a separate taint tracking query for each vulnerability, but there are a few queries that cover several CWEs. CodeQL for Python stores all its security related queries in python/ql/src/Security/ folder in the github/codeql repository. Other languages store it in similar folder structures, for example, Ruby in ruby/ql/src/queries/security or C# in csharp/ql/src/Security Features. They should be easy to find. You can view the full CWE coverage list for each language here.
Note that you will need the VS Code Starter Workspace (see the set up in challenge 2 Option B).
Run the SQL injection query against the database. For Python it’s located in:
ql/python/ql/src/Security/CWE-089/SqlInjection.ql
Review the results. Try running a few other queries. The challenge is also available in the GitHubSecurityLab/codeql-zero-to-hero repository.
If you didn’t have enough CodeQL (or you’d like to try other challenges), there are plenty of workshops, tutorials, and challenges for various languages. As for workshops, if you can, try to see workshops from different presenters—you will see how each of them approach a vulnerability target differently:
We hope that with the information shared in this blog you’ll be able to use CodeQL with the built-in queries, understand modeling in CodeQL, and write your own simple queries in CodeQL with more confidence. There is a lot more that you can do in both security research and CodeQL, and I hope this blog gives you a good introduction and that it enables you to find your own vulnerabilities in the future. In the next blog, we will dive into taint tracking and security research with CodeQL.
If CodeQL and this post helped you to find a vulnerability, we would love to hear about it! Reach out to us on GitHub Security Lab Slack or tag us @ghsecuritylab on Twitter.
If you have any questions, issues with challenges or with writing a CodeQL query, feel free to join and ask on the GitHub Security Lab server on Slack. The Slack server is open to anyone and gives you access to ask questions about issues with CodeQL, CodeQL modeling or anything else CodeQL related, and receive answers from a number of CodeQL engineers and security researchers from GitHub Security Lab. If you prefer to stay off Slack, feel free to ask any questions in CodeQL repository discussions or in GitHub Security Lab repository discussions.

AI can help you code faster, but knowing why the code works—and sharpening your human-in-the-loop skills—is what makes you a great developer.

Learn how to spin up a GitHub Issue, hand it to Copilot, and get a draft pull request in the same workflow you already know.

We’ll decode these two tools—and show you how to use them both to work more efficiently.