Lee Reilly
Senior Program Manager, GitHub Developer Relations. Open source hype man, AI whisperer, hackathon and game jam wrangler. I write && manage programs, support dev communities, and occasionally ship something.
At GitHub we place an emphasis on stability, availability, and performance. A large component of ensuring we excel in these areas is deploying services on bare-metal hardware. This allows us…
At GitHub we place an emphasis on stability, availability, and performance. A large component of ensuring we excel in these areas is deploying services on bare-metal hardware. This allows us to tailor hardware configurations to our specific needs, guarantee a certain performance profile, and own the availability of our systems from end to end.
Of course, operating our own data centers and managing the hardware that’s deployed there introduces its own set of complications. We’re now tasked with tracking, managing, and provisioning physical pieces of hardware — work that is completely eliminated in a cloud computing environment. We also need to retain the benefits that we’ve all come to know and love in cloud environments: on-demand compute resources that are a single API call away.
Enter gPanel, our physical infrastructure management application.

gPanel is a Ruby on Rails application that we started developing over three years ago as we were transitioning from a managed environment to our own data center space. It was identified early on that we’d need the ability to track physical components of our new space; cabinets, PDUs, chassis, switches, and loose pieces of hardware. With this in mind, we set out building the application.
As we started transitioning hosts and services to our own data center, we quickly realized we’d also need an efficient process for installing and configuring operating systems on this new hardware. This process should be completely automated, allowing us to make it accessible to the entire company. Without this, specific knowledge about our new environment would be required to spin up new hosts, which leaves the very large task of a complete data center migration exclusively in the hands of our small Operations team.
Since we’d already elected to have gPanel act as the source of truth for our data center, we determined it should be responsible for server provisioning as well.
The system we ended up with is overall pretty straight-forward and simple — goals for any of our new systems or software. We utilize a few key pieces to drive the entire process.
Our hardware vendor configures machines to PXE boot from the network before they arrive at our data center. Machines are racked, connected to our network, and powered on. From there, our DHCP/PXE server tells the machines to chainload iPXE and then contact gPanel for further instructions. gPanel can identify the server (or determine that it’s brand new) with the serial number that’s passed as a parameter in the iPXE request.
gPanel defines a number of states that chassis are in. This state is passed to our Ubuntu PXE image via kernel parameters so it can determine which action to take. These actions are driven by a simple set of bash scripts that we include in our Ubuntu image.
The initial state is unknown where we simply collect data about the machine and record it in gPanel. This is accomplished using Facter for gathering system information, exporting it as JSON, and then POSTing it to gPanel’s API. gPanel has a number of jobs that process this JSON and create the appropriate records. We try to model as much as possible in the application; CPUs, DIMMs, RAID cards, drives, NICs, and more are all separate records in the database. This allows us to track parts as they’re replaced, moved to a different machine, or removed entirely.
Once we’ve gathered all the information we need about the machine, we enter configuring, where we assign a static IP address to the IPMI interface and tweak our BIOS settings. From there we move to firmware_upgrade where we update FCB, BMC, BIOS, RAID, and any other firmware we’d like to manage on the system.
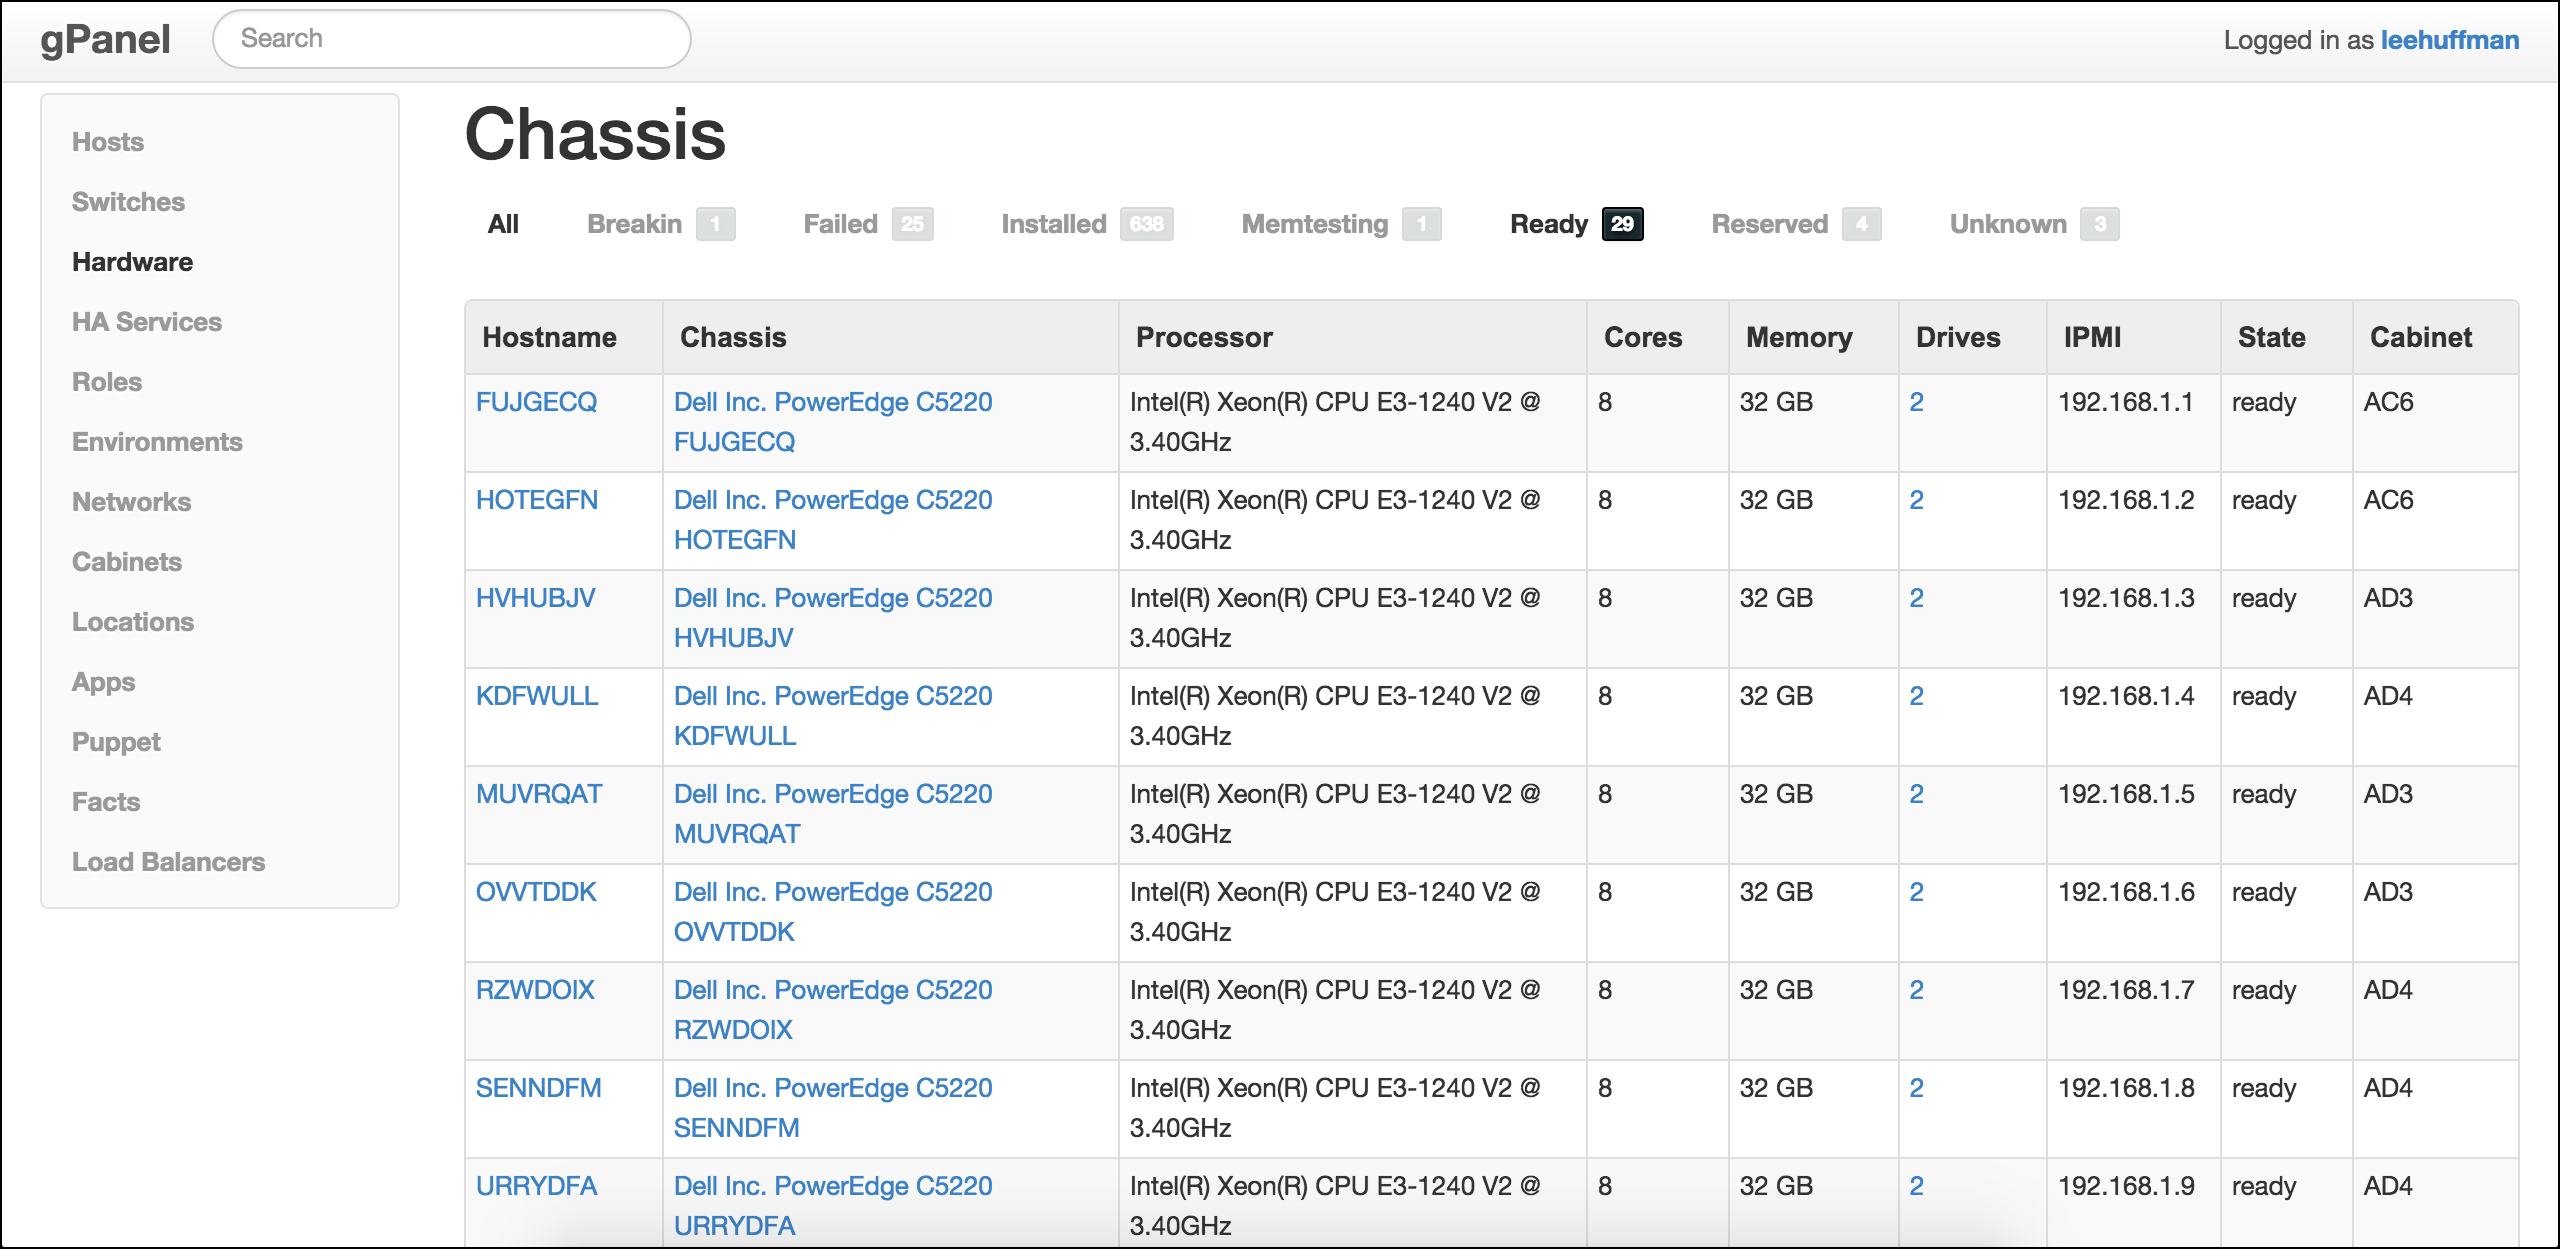
At this point we consider the initial hardware configuration complete and will begin the burn-in process. Our burn-in process consists of two states in gPanel; breakin and memtesting. breakin uses a suite from Advanced Clustering to exercise the hardware and detect any problems. We’ve added a script that POSTs updates to gPanel throughout this process so it can determine whether we have failures or not. If a failure is detected, the chassis is moved to our failed state where it sits until we have a chance to review the logs and replace the bad component. If the chassis passes breakin, we’ll move on to memtesting.
In memtesting we boot a custom MemTest86 image and monitor it while it completes a full pass. Our custom version of MemTest86 changes the color of the failure message to red which allows us to detect trouble. We’ve hacked together a Ruby script that retrieves a console screenshot via IPMI and checks the color in the image to determine if we’ve hit a failure or not. Again, if a failure is detected, we’ll transition the chassis to failed, otherwise it moves on to ready.
The ready state is where our available pool of machines will sit until someone comes along and brings it into production.
Once machines have completed the burn-in process and deemed ready for production service, a user can instruct gPanel to install an operating system. Like the majority of our tooling, this is driven via Hubot, our programmable chat bot.
First, the user will need to determine which chassis they’d like to perform the installation on.
Once the chassis is selected, you can initiate the installation.
If the user needs a different RAID configuration, or to have the host brought up on a different Puppet branch, they can specify those with the install command as well.
If we’re looking to spin up a number of hosts to expand capacity for a certain service tier, we can instruct gPanel to do this with our bulk-install command. This command takes app, role, chassis_type, and count parameters, selects the appropriate hardware from our ready pool, and initiates the installations.
At this point gPanel will transition the chassis to our installing state and reboot the machine via IPMI. In this state we PXE boot the Ubuntu installer and retrieve a preseed configuration from gPanel. This configuration is rendered dynamically based on the hardware configuration and the options the user provided in their install command. Once the installation is complete, we move to the installed state where gPanel will instruct machines to boot from their local disk.
When we’re ready to decommission a host we simply tell Hubot, who will ask for confirmation in the form of a “magic word”.
gPanel transitions the chassis back to our ready state and makes it available again for future installations.
We’ve been pleased with the ease at which we’re able to bring new hardware into the data center and make it available to the rest of the company. We continue to find room for improvement and are constantly working to further automate the procurement and provisioning process.

Learn how GitHub built an accessible, multi-terminal-safe ASCII animation for the Copilot CLI using custom tooling, ANSI color roles, and advanced terminal engineering.

User feedback led us to clean up outdated mitigations. See why observability and lifecycle management are critical for defense systems.

GitHub is introducing post-quantum secure key exchange methods for SSH access to better protect Git data in transit.