Completing urgent fixes anywhere with GitHub Copilot coding agent and mobile
Unlock the full potential of the GitHub platform. See how Copilot coding agent and GitHub Mobile combine to help you tackle development tasks and urgent fixes, no matter where you are.

In a video game, a single upgrade enhances your abilities, while combining multiple can create an unstoppable power-up. In the world of software development, this combined power does something similar: At GitHub, we believe it can empower developers with an incredible force to tackle any challenge, whether that’s fixing a critical bug, adding a new feature, or shipping your release to production.
My recent quest
“Stay a while and listen,” as the old Diablo line goes.
One morning, while on a walk, I received an urgent call. A critical feature on a website I collaborate on was displaying errors. This happened just before a high-visibility demo. I was miles from my laptop, and a traditional fix seemed hours away. That would be far too late to address this immediate need. Rolling back wasn’t an option, as it would remove functionality vital for the presentation.
The only tool I had available was my cell phone. Instead of rushing home, I realized I could leverage two powerful GitHub features: GitHub Copilot coding agent and the GitHub Mobile app. I could quickly create an issue on mobile and delegate the problem to Copilot, in order to expedite a resolution.
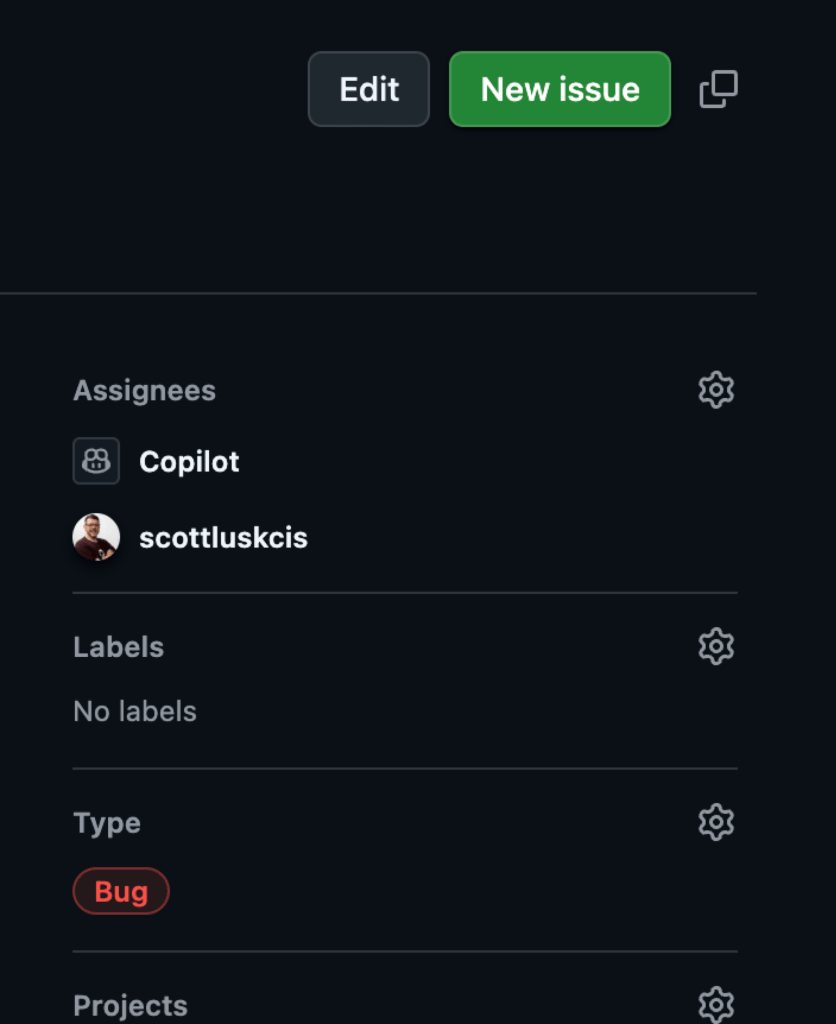
From GitHub Mobile, I scanned recent pull requests and identified a likely culprit: a pull request that added markdown rendering and a rich text editor. I created a new issue, describing the problem and referencing the suspicious pull requests, while also relying on my repository’s copilot-instructions to help guide the agent. With a few taps, I assigned the issue to GitHub Copilot coding agent.
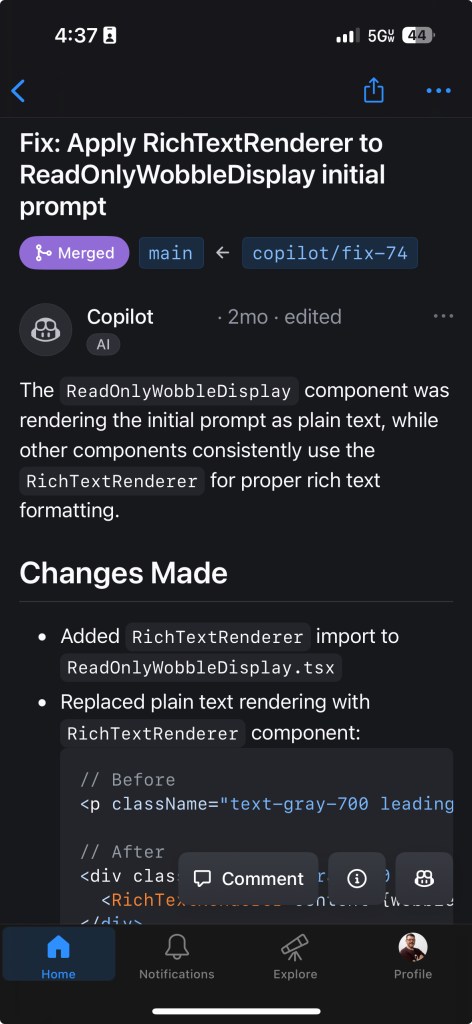
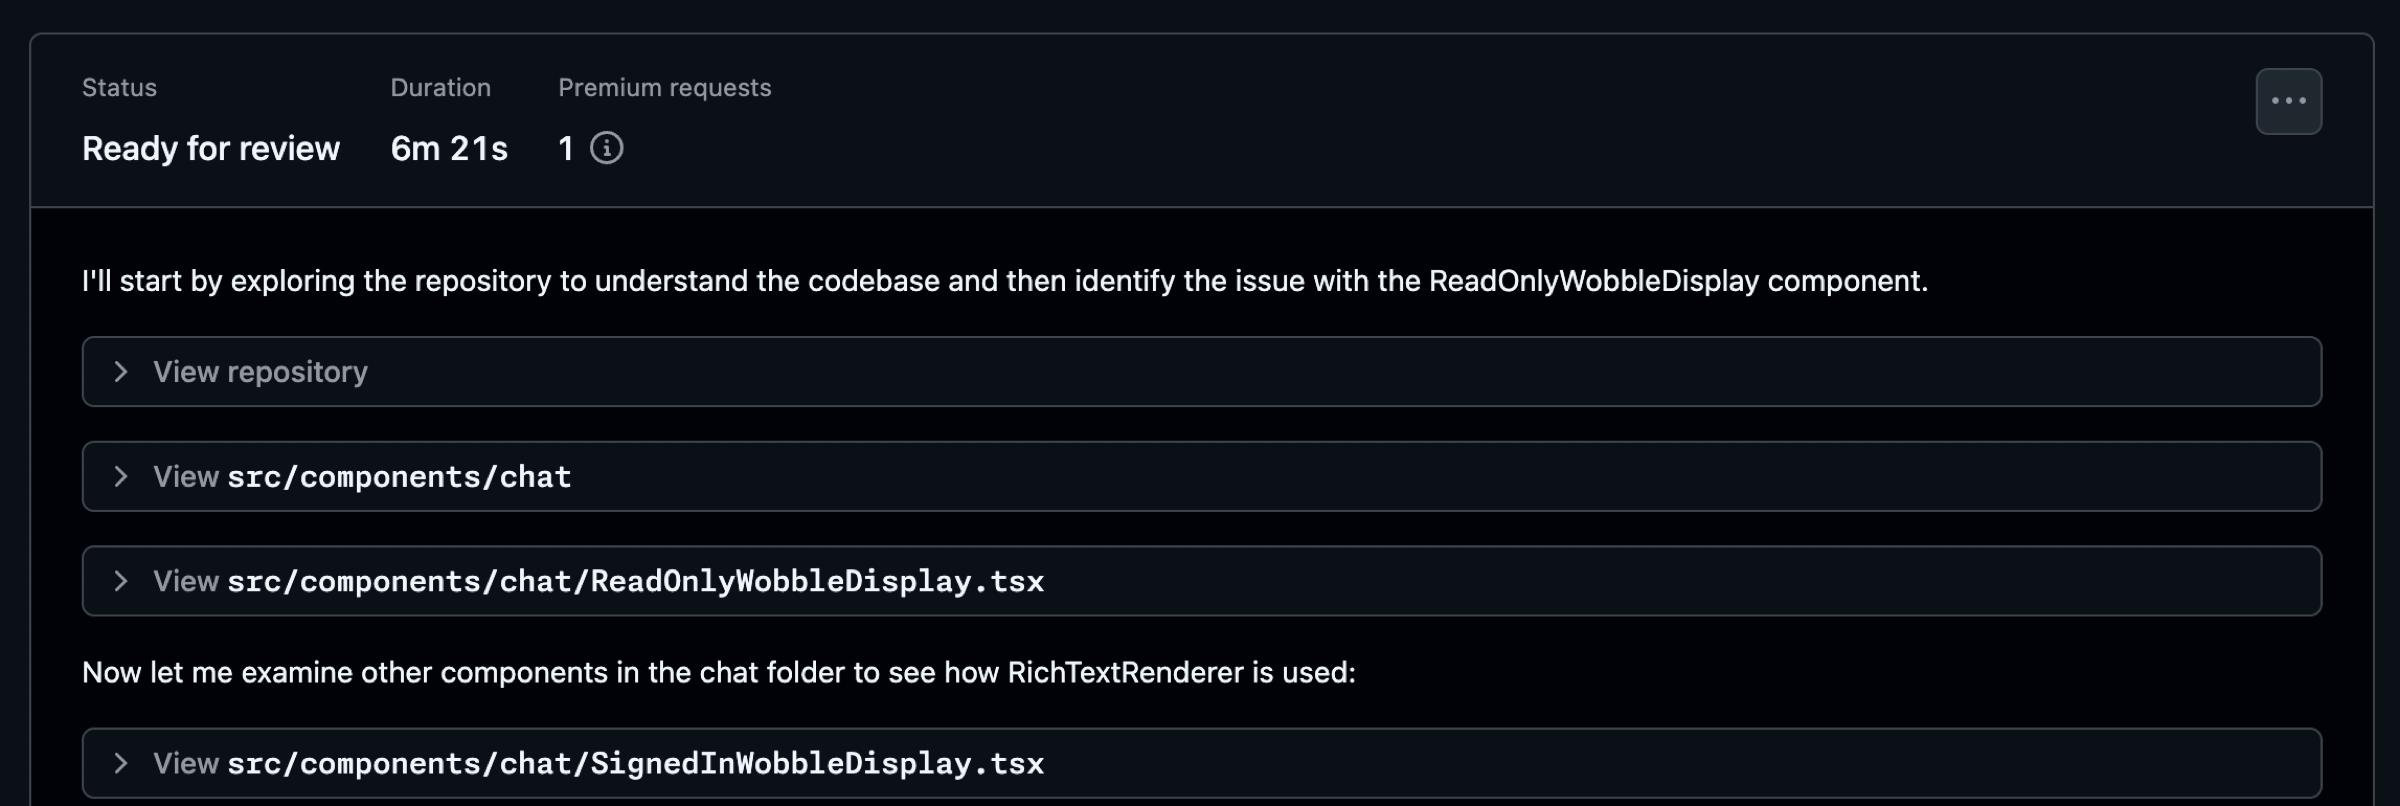
Just six minutes later, a notification appeared on GitHub Mobile. GitHub Copilot had generated a pull request with a fix! I reviewed it immediately from my phone. It was a clear, simple solution to the problem. Leveraging existing workflows, I could even test the fix on a preview branch right from my mobile device.
Satisfied, I approved the pull request, which was deployed to production through automated workflows managed with GitHub Actions in my repository. By the time I reached my car, the director confirmed the issue was resolved, and they were ready to proceed with their demo.
This experience, all managed from my phone, revealed a powerful capability within the GitHub Platform. Combining these two features—GitHub Copilot coding agent and GitHub Mobile—unlocked a new ability for me, and prompted me to explore what other combinations within the platform could further power-up my work.
Here is a view from my phone using the GitHub Mobile app after reviewing the pull request and approving. We see a summary of Copilot’s fixes for the issue.
Using the right tool at the right time
It’s important to clarify that I’m not suggesting you delegate all development to Copilot from your mobile device, nor that every fix can be approved instantly from your phone. However, my experience highlights a crucial point: having the right tools for the right situation makes all the difference. GitHub Copilot as an AI pair programmer is a game-changer. By incorporating GitHub Copilot coding agent and GitHub Mobile into my workflow, alongside existing features like GitHub Issues and GitHub Actions, I’ve discovered a new level of efficiency. Here’s how you can gain this same power-up.
Keys to unlock this power-up
Key 1: Leverage instructions files
There is a plethora of knowledge available on how you can effectively use GitHub Copilot. One area you’ll certainly come across is custom instructions for GitHub Copilot. These instructions are the guidelines and rules that can influence the results you get from Copilot. A well-defined set of instructions can go a long way.
In my scenario, I used repository custom instructions to give Copilot additional context for understanding important information about my repository. This included the core purpose of the repository, the tech stack used, architecture constraints, coding standards, testing strategy, dependency management, observability, documentation, error handling, and more. It’s important to define the things that are important for GitHub Copilot to have and to understand about your project.
For me, identifying things like directory structure, coding standards, and project dependencies were important for identifying a fix with less churn. Custom instructions are written using markdown and including them provide specific guidance to GitHub Copilot Coding Agent, Copilot Chat, and Copilot code review. It’s important to note that instructions in this file apply to all chat requests for the repository. This file exists in the .github directory in your repository right off of the root level.
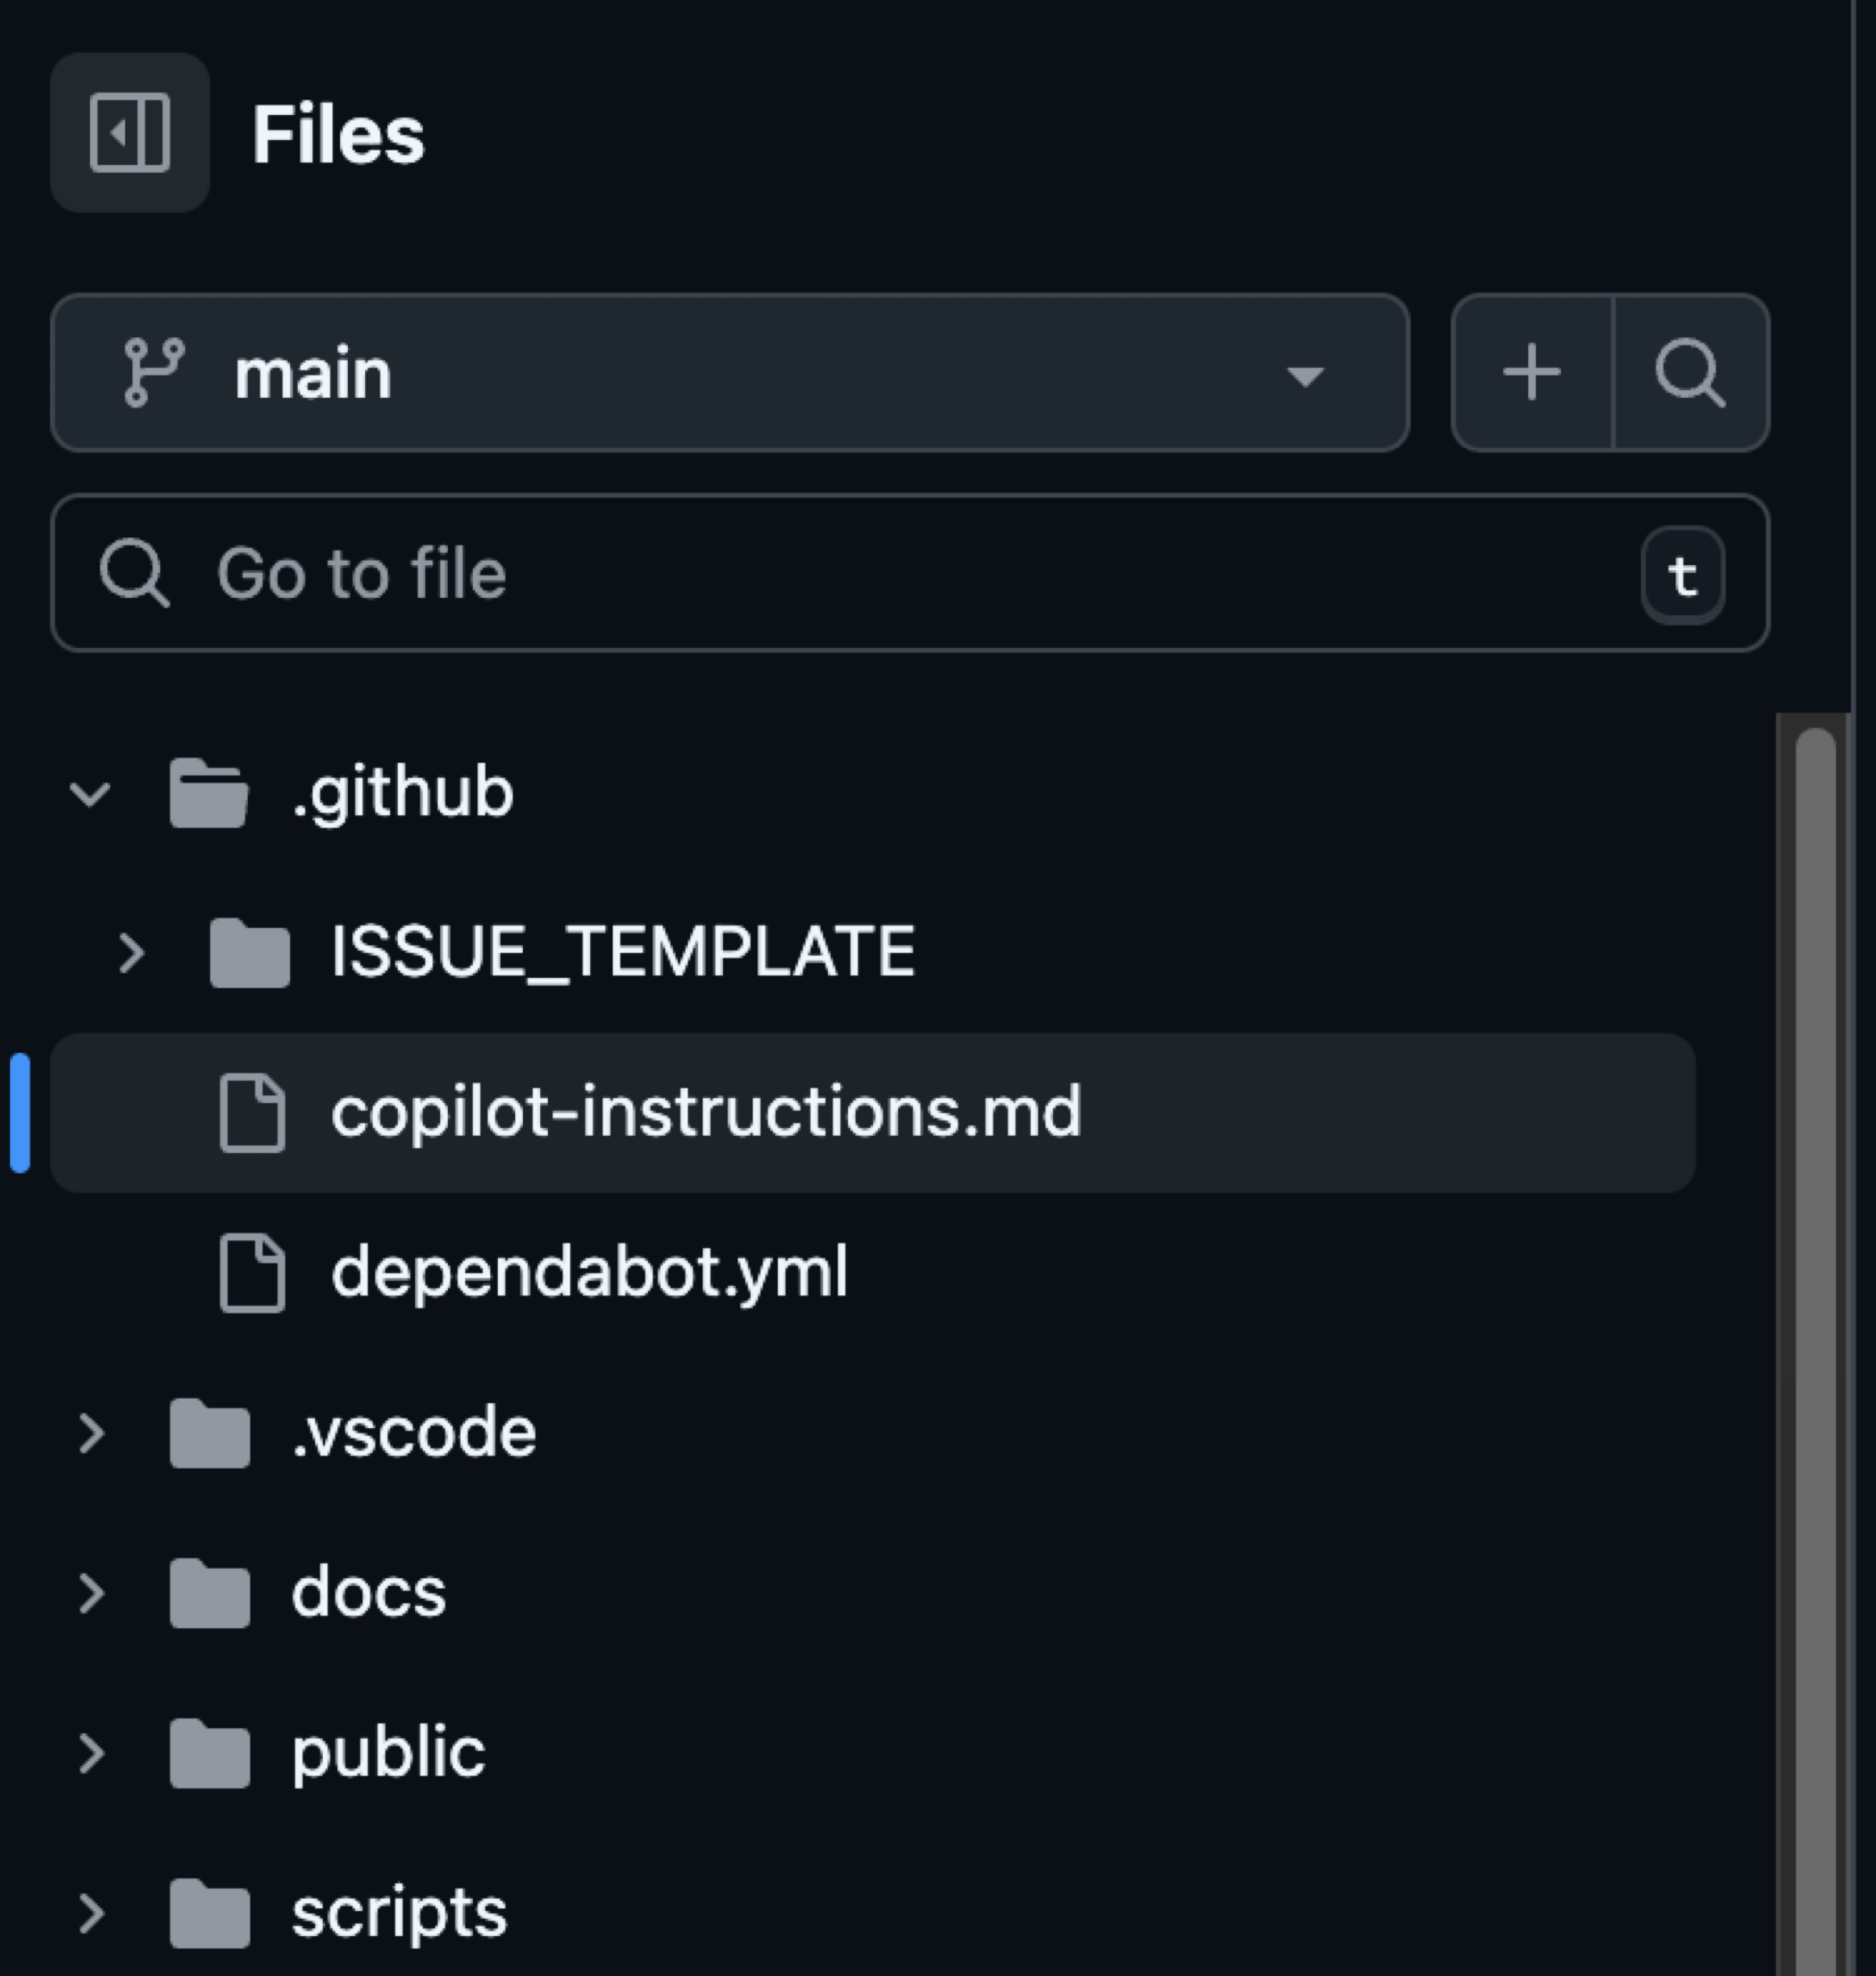
EXAMPLE: Here’s an example of an instructions file you might see in the .github/copilot-instructions.md file. Remember to tailor these to your project.
# Copilot Instructions
- Use Next.js App Router with React and TypeScript across the project.
- Use pnpm for all package management commands (not npm or yarn).
- Use Tailwind CSS v4 with a mobile-first approach; enhance with sm:/md:/lg:/xl: as needed.
- Prefer shadcn/ui components before creating new UI; place shadcn/ui in src/components/ui and shared components in src/components/shared.
- Always use next/link for internal navigation and next/image for images.
- Prefer server components by default; add "use client" only when needed (event handlers, browser APIs).
- Implement server actions where appropriate; place them in src/lib/actions.
- Put utilities in src/utils and Supabase utilities in src/utils/supabase; define shared types in src/types.
- Write tests with Vitest for critical business logic and components; place tests in __tests__ directories.
- Follow Next.js performance best practices and implement proper error boundaries and error handling.
- Use environment variables (NEXT_PUBLIC_ for client exposure); keep secrets server-side only.
- Use Vercel for deploys and GitHub Actions for CI/CD with pnpm scripts (pnpm dev/build/test).
- Keep code idiomatic: functional components + hooks, async/await for async, and idiomatic Next.js/React patterns.
## Folder structure reference (high-level)
```text
.
├─ app/ # Next.js App Router: route groups, page.tsx, layout.tsx, loading.tsx, error.tsx, route.ts
├─ public/ # Static assets served at /
├─ src/
│ ├─ components/
│ │ ├─ ui/ # shadcn/ui components
│ │ └─ shared/ # Shared app-specific components
│ ├─ lib/
│ │ └─ actions/ # Server actions ("use server") and server-side logic
│ ├─ utils/
│ │ ├─ supabase/ # Supabase client utilities (server-side)
│ │ └─ index.ts # General utilities (example)
│ └─ types/ # Shared TypeScript types
├─ __tests__/ # Vitest tests (or co-located __tests__ near source)
├─ docs/ # Project documentation
└─ .github/ # Workflows, issue templates, Copilot instructions
```
### Directory-specific conventions
- app/: Follow App Router conventions (page.tsx, layout.tsx, route.ts, loading.tsx, error.tsx). Use the Metadata API for SEO.
- src/components/ui: Prefer existing shadcn/ui components; extend consistently if needed.
- src/components/shared: Reusable app-specific components; keep presentational components server-rendered if possible.
- src/lib/actions: Mark server actions with "use server" and keep client-only imports out.
- src/utils/supabase: Reuse a shared Supabase client; do not re-instantiate ad hoc clients.
- __tests__: Use Vitest; write descriptive, focused tests for critical logic and components.
## Commands
- pnpm install — Install project dependencies.
- pnpm dev — Start the Next.js development server with hot reloading.
- pnpm build — Create a production build of the app.
- pnpm start — Run the production server locally from the built output (if defined).
- pnpm test — Run the Vitest test suite.
- pnpm lint — Lint the codebase (if defined in package.json).
- pnpm typecheck — Type-check the codebase using TypeScript only (no emit), if defined.
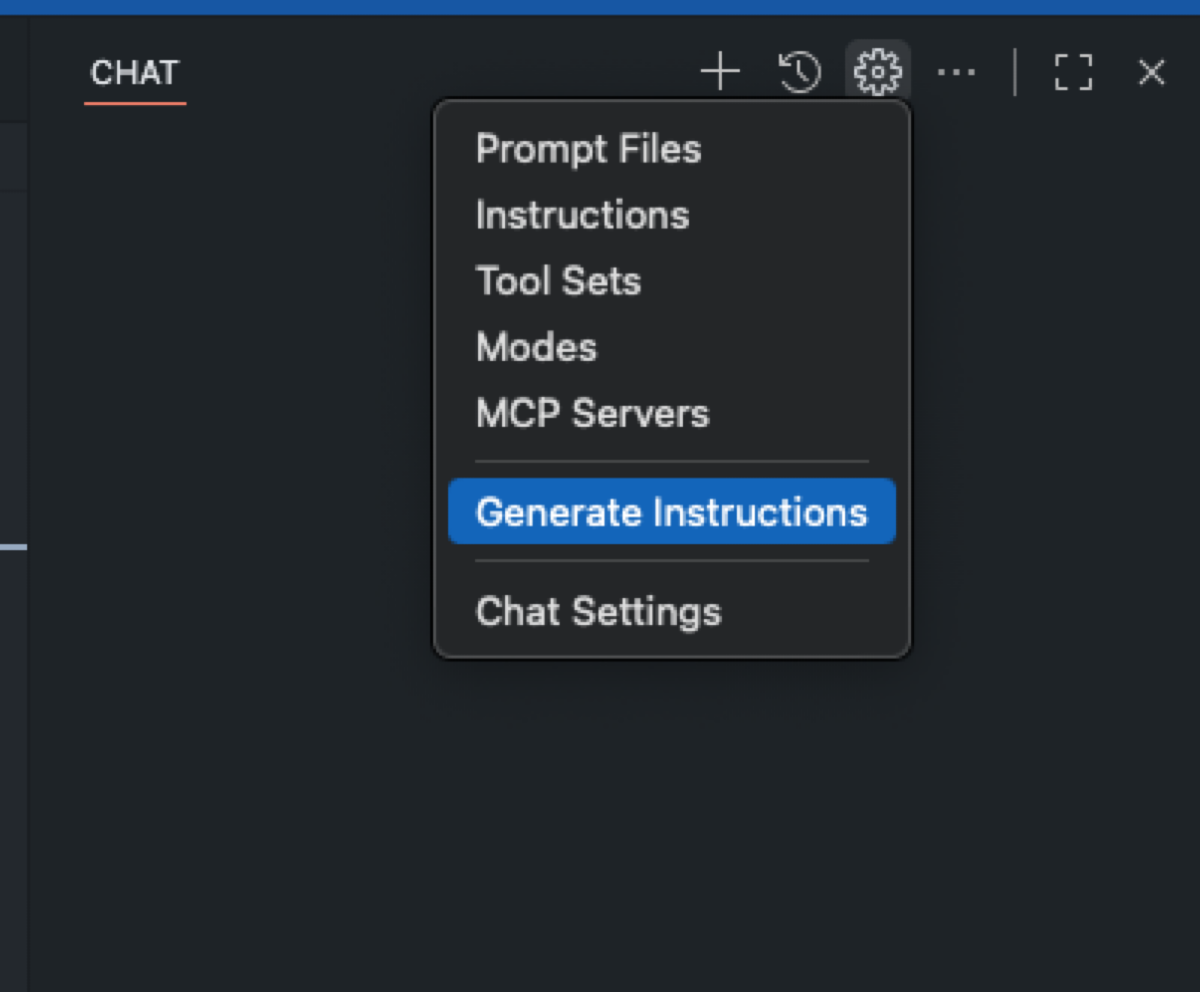
- pnpm format — Format files with Prettier (if defined).TIP: If you don’t already have an instructions file and are using VS Code, navigate to Configure Chat and choose Generate Instructions as noted at use custom instructions in VS Code.
In addition to repository-wide custom instructions, you can define path-specific custom instructions and make use of the applyTo keyword to target only the directories, file patterns, languages or task contexts you care about. Path-specific instructions files allow you to scope the guidance you provide to Copilot with details relevant to a specific scenario based on what is provided in the applyTo keyword.
EXAMPLE: Here is one example of a path specific instructions file that I use to ensure any components Copilot helps create follow already established conventions. A file like this gets placed in the .github/instructions folder as noted at adding repository custom instructions.
---
applyTo: "src/components/ui/**/*.tsx,src/components/shared/**/*.tsx"
---

- Prefer existing shadcn/ui components; check for an existing component before creating a new one.
- Style with Tailwind v4 using mobile-first classes; add responsive variants for larger screens.
- Use Lucide React icons (import from 'lucide-react'); avoid inline SVGs unless necessary.
- Ensure accessible interactions (keyboard focus, ARIA where applicable) and touch targets ≥44px.
- Avoid client components unless interactivity is required; keep pure presentational pieces server-rendered.
- Co-locate component tests in __tests__ where applicable; use Vitest.
IMPORTANT: When it comes to writing good instruction files, check out some community-contributed instructions, prompts, and more for examples and inspiration.
TAKEAWAY: Instructions help provide concrete context such as rules, standards, and preferences that GitHub Copilot can follow. Well written instructions noticeably improve the quality and relevance of its suggestions. By helping Copilot to internalize your project and coding standards, you’ll see higher-quality output and can finish tasks faster.
Key 2: Get acquainted with copilot coding agent
Treat Copilot coding agent like you would any team member: Everyone has skills and abilities in which they are strong, and those are the skills you want to leverage the most. Check out the post GitHub Copilot: Meet the new coding agent for more details on where the coding agent excels.
In order to become better acquainted with Copilot coding agent, assign Copilot to work on an issue, create a pull request, and track Copilot’s sessions in your repository. The more you know about what this teammate can do, the more comfortable you’ll get delegating tasks.
Just like the guidelines and rules you establish in the instructions files are important, it’s also important to provide specific instructions when creating issues to assign to Copilot.
When you create a new issue in your repository, before you assign it to Copilot, be sure that the description accomplishes the following:
- Gives the right context
- Is very intentional in what the issue is aimed to accomplish
- Is well-defined
After ensuring these criteria are met, then simply assign the issue to Copilot, and it will take it from there.

TIP: When providing details in areas such as your issue description, keep in mind you don’t have to specify anything you’ve already provided in your instructions file.
As Copilot works, you have the ability to view the session and understand how Copilot is approaching an issue. In this example, Copilot diagnosed the problem and notified me by requesting a pull request review in just over six minutes. Seeing how Copilot works helps you better understand ways you might tweak your approach and refine the results.
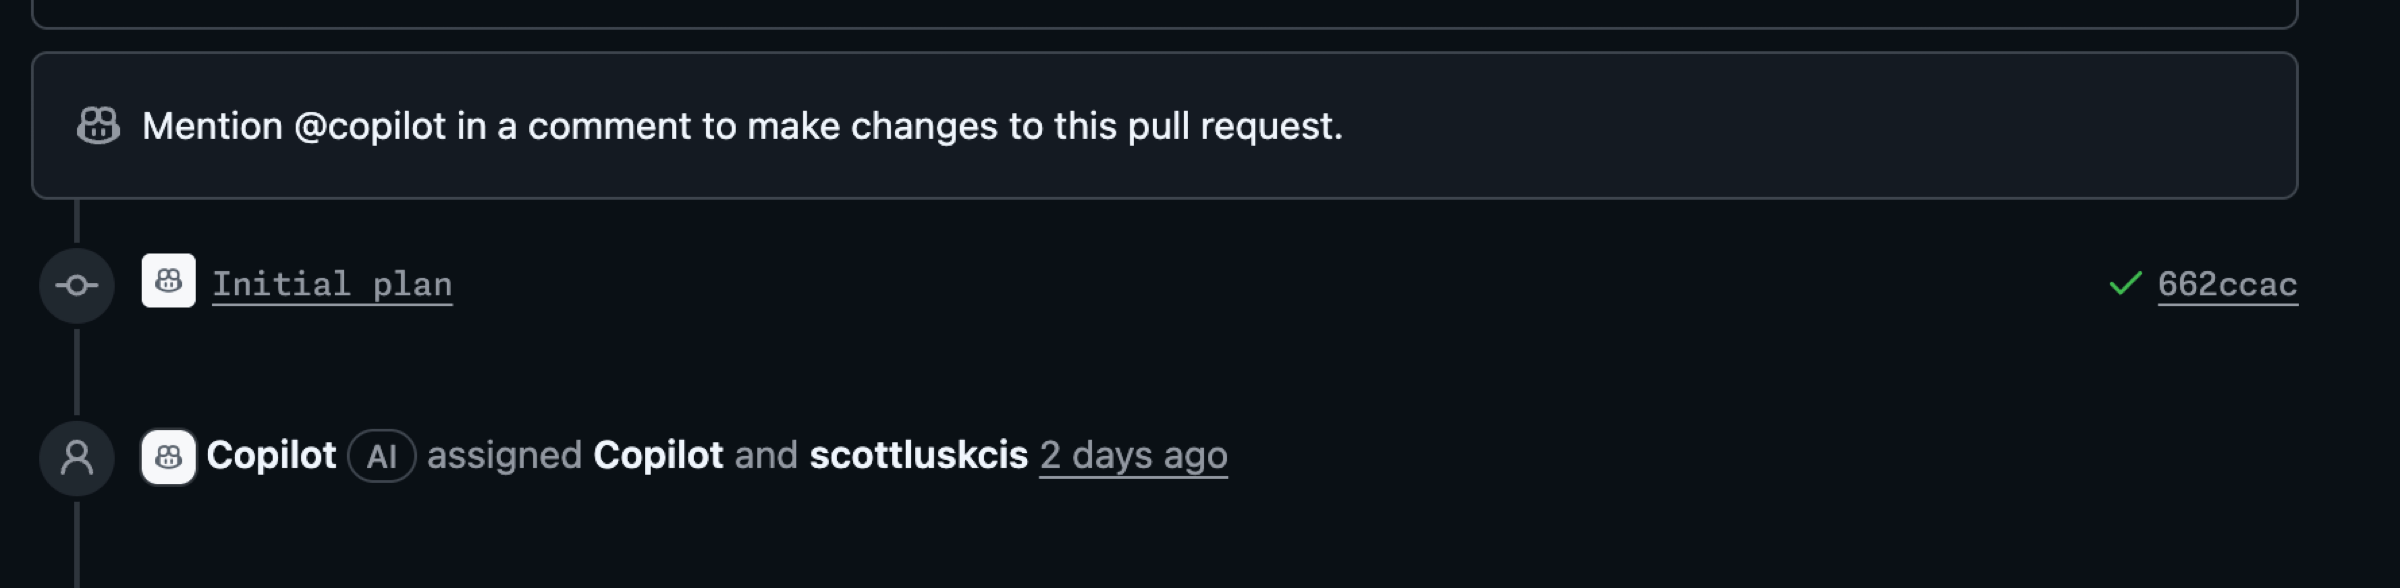
As Copilot works, be certain you review the work and chat with Copilot using @copilot in the comments to ask for changes. Don’t just blindly accept the changes and rubber stamp the pull request. Give this a good review.
TAKEAWAY: Ultimately, whatever you can delegate to GitHub Copilot coding agent frees up your focus for other critical tasks. This doesn’t mean you don’t review the results. Be very specific and intentional in the instructions you provide in areas such as issues.
Key 3: Establish best practices and automations
Another important aspect of the power-up I shared earlier is leveraging IssueOps and automations with GitHub Actions. IssueOps turns GitHub Issues into a controlled command interface for automation. These structured commands trigger GitHub Actions workflows that parse arguments, enforce auth/guardrails, run operational tasks (deploy, provision, migrate, etc.), and write results back to the issue for auditability. For more details on what IssueOps is, see the post IssueOps: Automate CI/CD (and more!) with GitHub Issues and Actions.
In my scenario, I used an issue template that I had previously created for bugs. This template helps me provide details and context, and saves me time when I create issues.
EXAMPLE: Issue templates are placed in the .github/ISSUE_TEMPLATE folder in your repository. See configuring issue templates for your repository for more details.
name: "Bug (Copilot Coding Agent-ready)"
description: "Report a bug with details so Copilot can propose a fix via PR."
title: "[Bug]: <short summary>"
labels: ["bug", "triage", "copilot-coding-agent"]
projects:
  - "my-org/1234"
assignees: []
body:
  - type: markdown
    attributes:
      value: |
        Thanks for reporting a bug! This template collects the details Copilot’s coding agent needs to propose a fix.

  - type: input
    id: environment
    attributes:
      label: Environment
      description: OS/Browser, device, app version/commit, and environment (local, preview, production).
      placeholder: "macOS 14, Chrome 126, iPhone 13; commit abc123 on preview"
    validations:
      required: true

  - type: textarea
    id: steps
    attributes:
      label: Reproduction steps (concise and deterministic)
      description: Provide a minimal, reliable sequence.
      placeholder: |
        1) Go to /app/<path>
        2) Click <button>
        3) Enter <value>
        4) Submit
        Expected: ...
        Actual: ...
    validations:
      required: true

  - type: textarea
    id: expected_actual
    attributes:
      label: Expected vs. actual behavior
      description: Describe exactly what you expected and what actually happened, including any error text.
      placeholder: |
        Expected:
        - ...
        Actual:
        - ...
    validations:
      required: true

  - type: textarea
    id: context_links
    attributes:
      label: Related context and references
      description: Link related issues/PRs, error monitoring (Sentry, logs), designs, or documentation.
      placeholder: |
        - Related issue: #123
        - PR that introduced regression: #456
        - Design reference: <Figma link>
        - Monitoring: <Sentry link>
    validations:
      required: false

  - type: textarea
    id: screenshots
    attributes:
      label: Screenshots or screen recordings (links)
      description: Optional, but very helpful for UI bugs.
      placeholder: "https://user-images.githubusercontent.com/... or Loom link"
    validations:
      required: false
TAKEAWAY: Leverage an IssueOps type of approach in your practices to help refine your process. This can help provide a solid foundation to start from and accelerate your work, especially when pairing with Copilot.
Embracing combined power
My journey, and the keys we’ve discussed, reveal a core truth: when you combine multiple GitHub features, you get more power. Integrating GitHub Copilot coding agent with GitHub Mobile, enhanced by precise instructions and IssueOps automations, has the power to transform how you build and fix. It’s not just the tools themselves, but the holistic approach they enable that supercharges your development workflow.
The GitHub Platform offers endless combinations for your developer adventure. Embrace this combined power, empower your team, and unlock new levels of efficiency and innovation in every project. What power-up will you discover that makes your team unstoppable?
Tags:
Written by

Related posts

GitHub for Beginners: Getting started with GitHub security
Learn how to secure your projects and keep them safe with GitHub Advanced Security.
Building AI-powered GitHub issue triage with the Copilot SDK
Learn how to integrate the Copilot SDK into a React Native app to generate AI-powered issue summaries, with production patterns for graceful degradation and caching.

GitHub for Beginners: Getting started with GitHub Actions
Set up your first GitHub Actions workflow in this how-to guide.