In December 2024, we announced gh-skyline, a GitHub CLI extension that allows our developer community to generate a 3D version of their GitHub Contribution Graph into an STL file ready for printing on a 3D printer, just in time to capture all of those contributions!
Before we explain any more about Skyline or how we built it, let’s make sure you’re familiar with the GitHub CLI. Through a command line interface (CLI), you can interact with applications or the operating system in a text-based interface via your terminal. In other words, the GitHub CLI brings GitHub to your terminal and other locations where you can run command line scripts, like automated processes such as GitHub Actions. Once you’ve authenticated, the CLI can interact with a number of the core parts of GitHub, like Issues, Pull Requests, Codespaces and Actions workflows. But you’re not just limited to the commands available directly from the GitHub CLI. It’s designed to be extensible so that you can create your own GitHub CLI extensions.
GitHub has built many GitHub CLI extensions including gh-copilot, gh-gei, and gh-models, but we’re not the only ones building them. There’s a whole community of GitHub CLI extension authors, so why not take a peek at their work? gh-skyline is just one of many extensions that you can use in the GitHub CLI.
You’ll first need to have the GitHub CLI installed to get started with the GitHub Skyline CLI. You can find out more about that here.
Once you have authenticated into the GitHub CLI, you can then install gh-skyline. To do this, run the following command in your terminal:
gh extension install github/gh-skyline
Once complete, you should receive a message that the github/gh-skyline extension installed successfully. Now you can execute gh skyline in your terminal to generate the 3D version of your contribution graph, as well as an ASCII art representation while you wait! By default, it will render the current year. (I don’t know about you, but I’m still putting 2024 at the end of my dates.) You can also pass the year parameter to look back at a specific year, like gh skyline --year 2024. There are several more flags available, and you can review the README to explore further.
|
💡 Thought: While you’re there, why not star the repository so you can keep track of the project? Or even better, contribute an idea through a feature request, bug report, or make some code contributions! We’ve already had several excellent community contributions. 🙏
|
We’ve published many posts about how we use GitHub to build GitHub, including How GitHub uses merge queue to ship hundreds of changes every day, How GitHub uses GitHub Actions and Actions larger runners to build and test GitHub.com and How we build containerized services at GitHub using GitHub.
We know that many developers take pride in their contribution history and like to have something to show for that. So we also knew from the outset that we wanted to open source the codebase so the community can learn from it and contribute. That goal shaped several of the decisions we made when setting up the repository. Let’s walk through the development lifecycle to learn how and why we used various GitHub services.
GitHub Codespaces simplifies development by enabling you to provision an environment configured with the tools you need to complete your task. Codespaces are configured using a devcontainer, so you can specify the underlying container image in use, Visual Studio Code extensions, or post-creation steps that you may need as part of the creation process.
The gh-skyline devcontainer was configured with:
- A container image: We’re using a go devcontainer image as the base image of our GitHub Codespace, so that it has several of the tools we need for Go development.
- Extensions: Several GitHub extensions make it easier to work between Visual Studio Code and GitHub. Additionally, the Go for Visual Studio Code extension further improves the developer experience as the project is written in Go (statement completion, code navigation, and other features).
- Features: Installing the GitHub CLI so that we can test the GitHub CLI extension directly within the Codespace. To do that, we’ll need the GitHub CLI!
- postCreateCommand: We’re also specifying some additional go tools to be installed which are required as part of our linting process. The base image doesn’t include those, so we’re able to add that in as a final preparation step for the environment.
Remember that making gh-skyline open source was a key goal that we set off with. GitHub Codespaces are incredibly helpful with this because they lower the contribution barrier by providing a consistent development environment that is easy to set up and use, all with a click of a button.
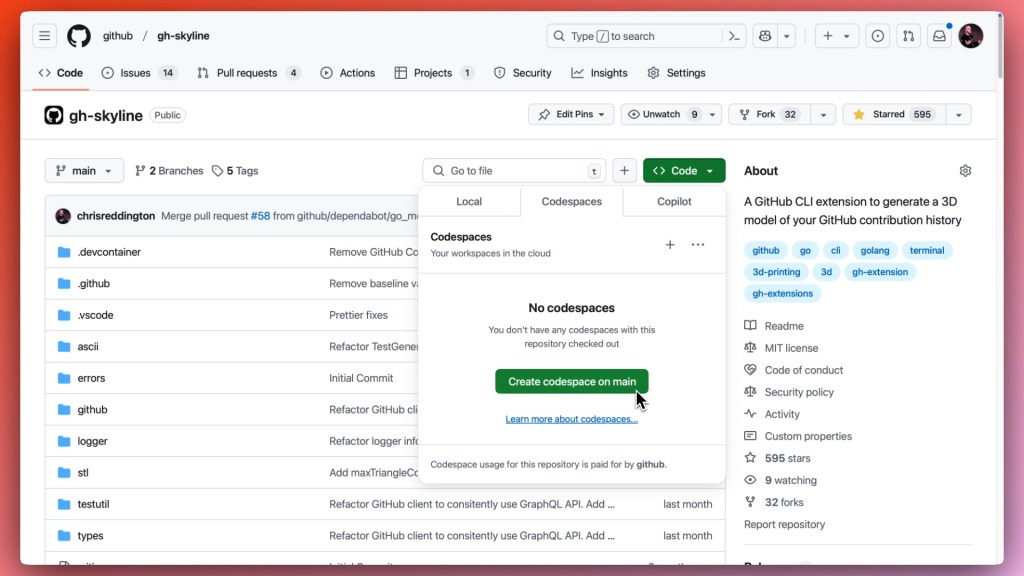
Contributors can get started quickly and focus on a new code contribution rather than spending time configuring tools and dependencies for their environment. (As an aside, you may be interested in learning how GitHub used GitHub Codespaces to bootstrap a GitHub.com development environment and reduce the timeframe from 45 minutes to 5 minutes, and then from 5 minutes to 10 seconds.)
Copilot Chat has been my preferred way of working with GitHub Copilot since the feature was introduced. Acting as a rubber duck, it allows me to explore ideas, and I use it as a thought partner.
For example, when exploring different approaches to structuring types and packages or tackling core programming decisions like whether to use a pointer or pass an object directly. Instead of reviewing documentation, community discussions, or Q&A threads, Copilot provides contextual guidance within the project, offering suggestions for me to consider and iterate on.
|
💡 Tip: In December 2024, we announced a free tier of GitHub Copilot. Check out the blog for more details and how you can get started!
|
While Copilot Chat enables me to explore ideas, Copilot Edits helps “execute” those ideas by making changes on my behalf. Many times, I’ve pointed it in the general direction of the changes I wanted to make, provided the appropriate context, and it made the changes for me.
Setting coding standards with tools such as linters is important because it ensures code consistency, readability, and helps catch potential errors early in the development process. gh-skyline has several linters configured, but that occasionally meant needing to iterate on code changes to align to those standards.
Some of those suggestions could be fixed by passing in a --fix or --write parameter, depending on the tools and errors, but some of them had to be resolved manually.
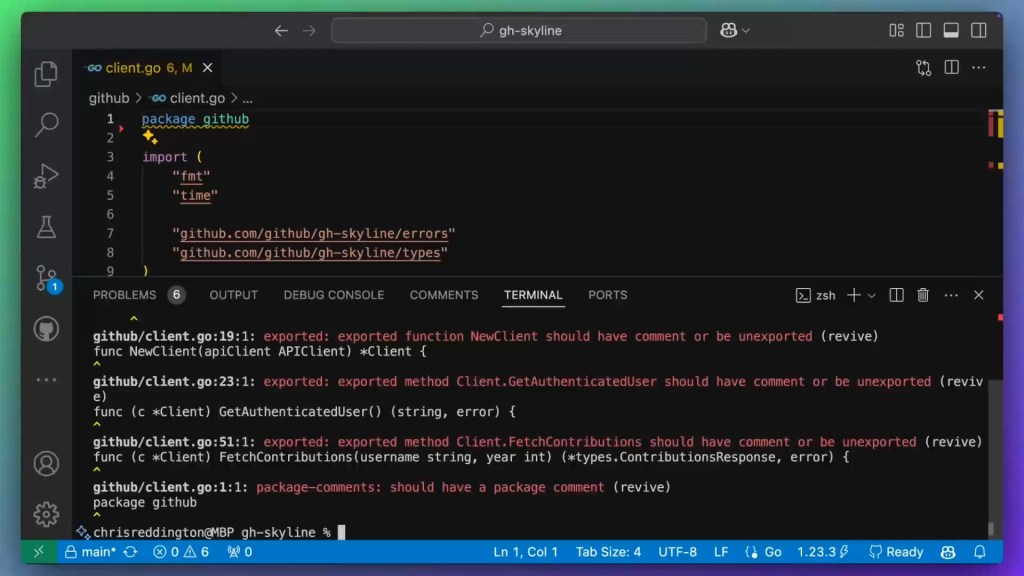
Copilot Edits proved especially helpful in this scenario. After running the linting command in the terminal, we could select the outputs and use #terminalSelection in the Copilot Edits prompt and ask Copilot to fix the issues for us. This streamlined my workflow, allowing me to efficiently resolve linter issues without manually searching for each instance in the codebase.
Refactoring is an essential part of software development, where you focus on improving code maintainability without altering its overall behavior. By using Copilot Edits, I was able to specify the general direction of the refactoring I wanted to make, and Copilot proceeded to make the edits to the files directly. I remained in control, able to accept or discard the changes,or even undo and redo changes to experiment with different ideas.
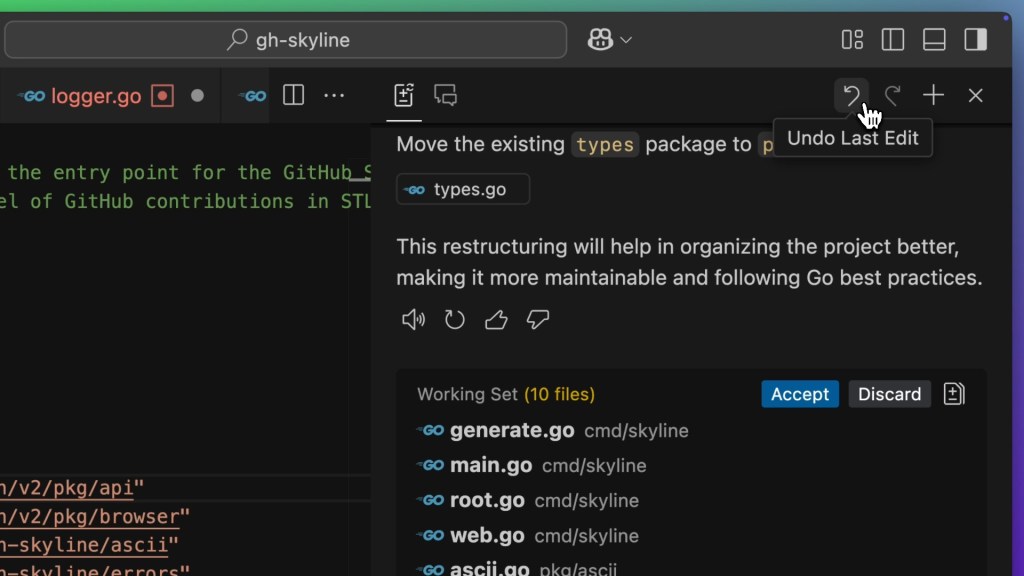
This collaboration between my intent as the developer and the automated edits introduced a new approach to refactoring, where I could iterate on the changes with Copilot, step back and forth, and make incremental tweaks as needed. This kept me in the flow and focused on the task at hand rather than on the low-level details of the refactoring process.
Software development is a team sport, and maintaining code quality is essential for a successful collaboration and to ensure the reliability of the software you’re building. Given that we planned for the project to be open source, we wanted to ensure that the codebase was well-tested, linted, and had a consistent style. Additionally, it was important to have a process to streamline the contribution review process, catch errors early, and ensure that the codebase was maintainable.
To achieve this, we set up several GitHub Actions workflows as part of our development process.
Continuous Integration (CI) ensures that every code change is automatically tested and integrated, maintaining code quality and accelerating development. So it was important to have a CI workflow that would run tests, linting, and other quality checks on every pull request. With GitHub Actions, each separate file in the .github/workflows directory represents a different workflow.
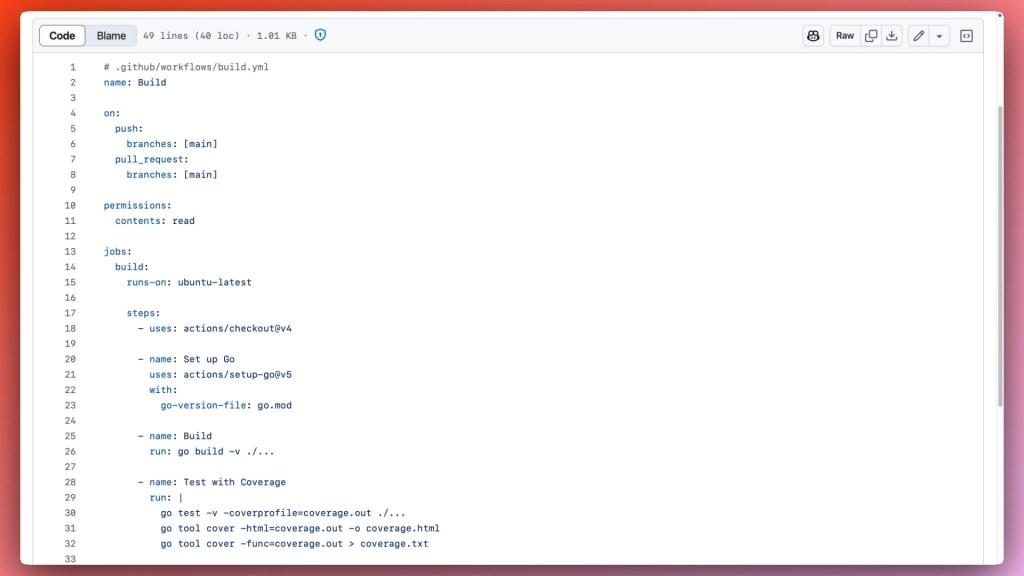
For example, we’ve configured build.yml to build the code and run tests, while linter.yml checks the code for linting errors. In fact, the linter step uses super-linter, another open source project published by GitHub. Both of those workflows are triggered on every pull request or push to the main branch.
In addition, repository branch rulesets were configured so that the main branch could only be updated through a pull request, and that the build and linter checks must pass before merging. This combination of automated checks and branch protection rules helped maintain code quality and ensure that the codebase was reliable and stable.
GitHub Actions are not just limited to CI. They can be triggered by a number of GitHub events like when an issue comment is added, a release is published, or by a manual workflow dispatch.
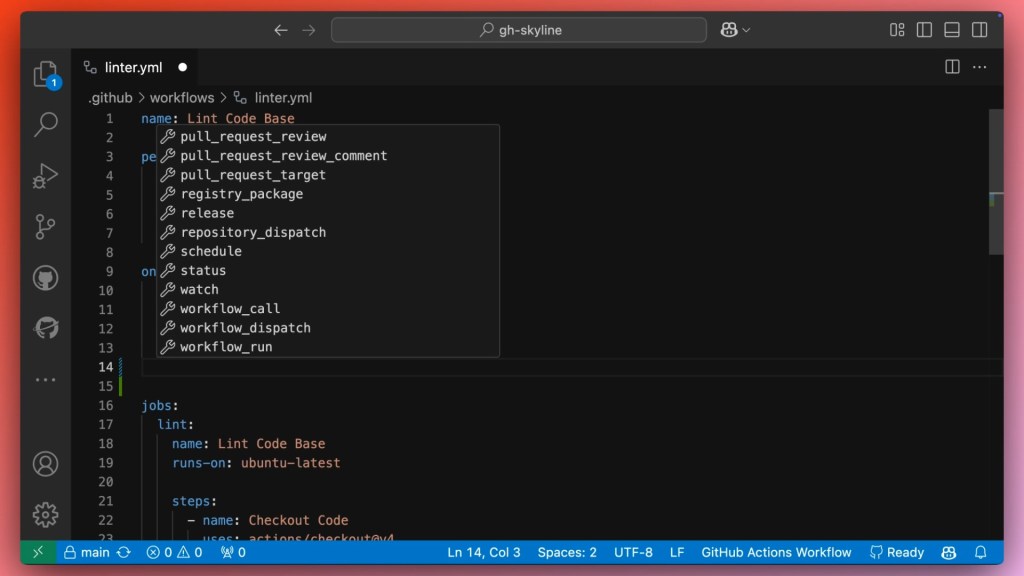
|
💡 Tip: If you use Visual Studio Code and want additional tools to help with Workflow authoring like in the above screenshot, check out the GitHub Actions extension.
|
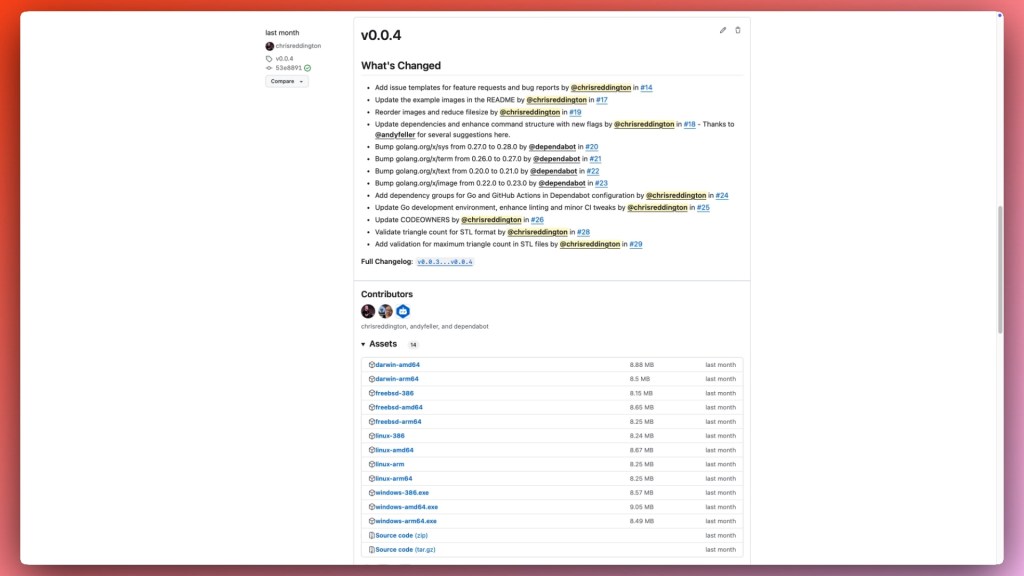
When releasing a GitHub CLI extension, we need to consider the various platforms that the extension will be available on, like Windows, macOS, and Linux. In other words, we need to make sure there is a binary available for each of those platforms. Fortunately, the GitHub CLI team had us covered. As we created a precompiled extension in go, we could use the gh extension create command to initialize the extension scaffolding, download the Go dependencies, and set up a GitHub Actions workflow to build the extension for each platform.
gh extension create --precompiled=go skyline
✓ Created directory gh-skyline
✓ Initialized git repository
✓ Made initial commit
✓ Set up extension scaffolding
✓ Downloaded Go dependencies
✓ Built gh-skyline binary

gh-skyline is ready for development!
The GitHub Actions workflow is set up in the release.yml file and is triggered when a new release is published. The workflow uses the cli/gh-extension-precompile GitHub Action, which builds the extension for each platform and uploads the binaries as assets to the release.
Security is a core requirement and table stakes for many software developers, serving as the foundation for trustworthy applications. GitHub has several tools that span supply chain security, code security, and secret scanning. When releasing an open source project like gh-skyline, or any piece of software, maintaining robust security practices is essential to ensure reliability and trustworthiness.
Managing dependencies is crucial to protect against supply chain attacks and vulnerabilities. By regularly updating and auditing third-party libraries, we minimize the risk of introducing insecure components into our project.
As gh-skyline is built as a Go Module, we used go.mod to manage the dependencies, and go.sum, which contains the hashes of the direct and indirect dependencies and ensures that the dependencies are locked to specific versions.
Staying on top of dependencies can feel like a chore, but it’s important to ensure that your project remains secure and benefits from any improvements in your upstream dependencies, contributing to the overall health of the codebase.
Dependabot can help manage dependencies, both from a vulnerability perspective (Dependabot security updates) and to ensure that you’re using the latest versions of your dependencies (Dependabot version updates). It can automatically create pull requests to update dependencies, and you can configure it to automatically merge those pull requests if the tests pass.
|
💡 Tip: As Dependabot raises these version bumps as pull requests, GitHub Actions workflows will be triggered, running the tests and linters to ensure that the updated dependencies don’t introduce any issues. It’s always worth a review, but these automated checks can help catch issues and accelerate your review process.
|
Dependabot version updates are enabled in the dependabot.yml configuration file, which specifies the update schedule and the package ecosystems to check for updates.
Dependabot is configured in the gh-skyline repository:
- With two package ecosystems,
gomod and github-actions
- So that each package ecosystem is checked for updates weekly
- Where the
gomod dependencies check for direct and indirect dependency updates
- With dependency updates for the
gomod and github-actions ecosystems are each grouped into a pull request per ecosystem
Dependabot helps us keep on top of the latest updates by automatically raising pull requests, after which GitHub Actions runs the necessary automated checks, simplifying and accelerating our process to improve our supply chain security.
|
💡 Tip: While Dependabot helps you manage your existing dependencies, you should also review any new dependencies being introduced (via a pull request). Dependency Review complements Dependabot by providing detailed insights into the dependencies you’re adding, such as whether they’re insecure, or specifying the types of allowed licenses. By adding this as a check to your pull request, you can add extra gates to make sure your software remains healthy.
|
Writing secure code involves adhering to best practices and conducting thorough code reviews. This ensures that potential security flaws are identified and addressed early to maintain the integrity of the codebase.
Manual code reviews are a key part of the development process, but they can be time-consuming and error-prone. Automated code analysis tools can help streamline the review process, catch common issues, and ensure that the code adheres to a set of standards.
Along with the linters we have configured in the GitHub Actions workflows (such as gosec), we also use GitHub’s code scanning default setup. This makes it easy to get started with code scanning, as it automatically detects the languages in your repository and scans any supported languages.
Code scanning allows us to identify potential vulnerabilities in our codebase and Copilot Autofix suggests fixes to resolve those issues for you. Or, if you depend on other security tools, you may be able to integrate them into code scanning.
I’m sure many of us have been there—the moment you accidentally commit a secret to your repository. It’s a common mistake, but one that can have serious consequences, particularly if you’re pushing changes to a public repository. Properly managing secrets, such as API keys and credentials, is vital to prevent unauthorized access to services.
Secret scanning detects a number of known patterns across your repository and provides an alert if it finds a match. We had this enabled before we made the repository public, as a safety check to ensure that we hadn’t inadvertently committed any secrets.
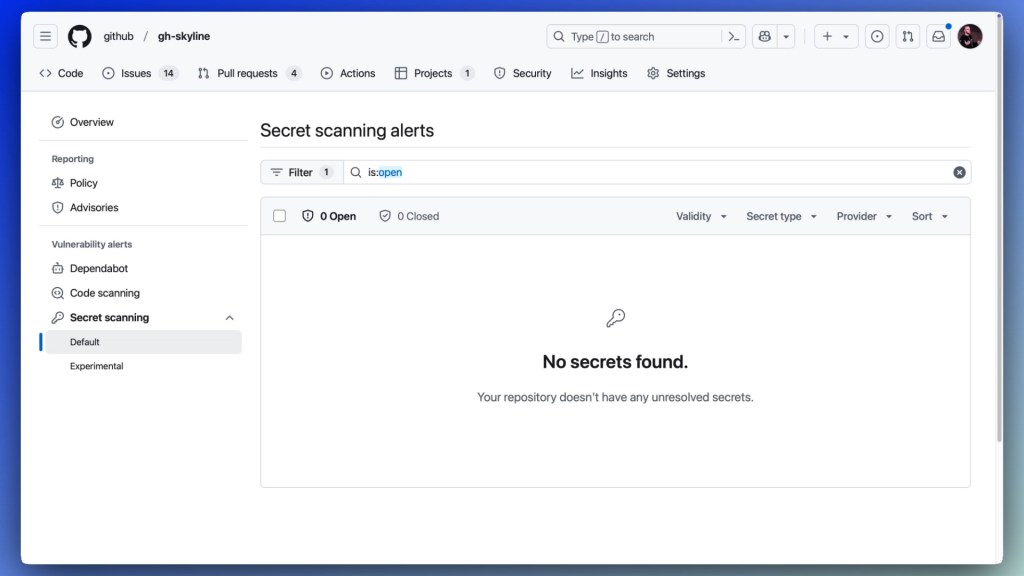
But how do you reduce the risk of secrets from making their way to GitHub once you’ve enabled secret scanning? Secret scanning push protection can help, by scanning your code when you push it to GitHub and proactively blocking the push if a secret is detected. Then, you can review the alert, review whether it’s a false positive, or whether you need to clean up the secret (and associated history) and push the changes again.
GitHub’s Open Source Program Office (OSPO) supports GitHub’s teams in open sourcing projects, responsible adoption of open source and more by sharing recommended practices, patterns and processes. At GitHub, we have an open source release process that we follow when open sourcing projects. This process ensures that we have the necessary reviews, acts as a check for any potential issues (e.g. reviewing whether there may be sensitive IP, secrets, or other information that shouldn’t be public), and ensures that the project is set up for success in the open source community.
The OSPO team have open sourced the release process and a repository release template to help share our recommended practices externally.
Flipping the project to be publicly visible is just the beginning. Engaging with the community is essential to build a healthy and sustainable open source project. This can take many forms, such as responding to issues and pull requests, providing documentation and guidance, and fostering a welcoming and inclusive environment for contributors.
- Documentation: Clear and concise documentation makes onboarding new contributors easier. It helps them understand the project, the standards, how to contribute and how to use the project. This includes a code of conduct, contributor guidelines, LICENSE, and README. These are a key part of our open source release process.
- Issues: Issues are a way for users to report bugs, request features, and ask questions. Having a clear process around these is important, so the community knows the project is actively maintained and that they’re a key part of its evolution:
- Issue templates help contributors provide the necessary information for creating an issue. This helps us streamline the issue triage process as we’ve guided the user to provide the minimum amount of information up front (such as operating system, CLI, and
gh-skyline version).
- Labels help us categorize issues. For example, we use the good first issue and help wanted labels to easily identify issues that could use support from the open source community. You can even filter and search by those labels, reducing the entry hurdle for community contributions.
- GitHub Projects helps us organize and prioritize the issues and pull requests through a visual representation. For example, the community can use this view to glance through the backlog and active items in development while the maintainers use the “Needs Review” view as part of their regular triage process.
- Pull requests: Pull requests are how contributors can submit code changes to the project. It’s important to approach this as a learning process, where you can provide feedback, guidance, and help ensure contributions are maintainable in the long term.
- Community: Building a community and supporting them is essential for the long-term success of any open source project. For example, celebrating contributions, recognizing contributors (tagging them in your releases), and fostering a welcoming and inclusive environment can help build a strong community around your project.
This snapshot into how we built gh-skyline, a GitHub CLI extension that generates a 3D version of your GitHub Contribution Graph, covered how we used GitHub Codespaces to make contributing easy, how GitHub Copilot supported the development process, and how GitHub Actions helped ensure code quality and security. We also touched on the open source release process and community engagement, which are essential for building a healthy and sustainable open source project.
You can try out gh-skyline by installing the GitHub CLI and running gh extension install github/gh-skyline. We hope you enjoy visualizing your contributions in 3D and wish you the best as you build up your 2025 Skyline! Who knows, maybe one of those could be a contribution to gh-skyline itself?
Written by
Chris is a passionate developer advocate and senior program manager in GitHub’s Developer Relations team. He works with execs, engineering leads, and teams from the smallest of startups, established enterprises, open source communities and individual developers, helping them ❤️ GitHub and unlock their software engineering potential.


