


How to automate your dev environment with dev containers and GitHub Codespaces
GitHub Codespaces enables you to start coding faster when coupled with dev containers. Learn how to automate a portion of your development environment by adding a dev container to an open source project using GitHub Codespaces.
|
8 minutes
When I started my first role as a software engineer, I remember taking about four days to set up my local development environment. I had so many issues with missing dependencies, incorrect versions, and failed installations. When I finally finished setting up all the tools and software I needed to be a productive member of the team, I cloned one of our repositories to my machine, set up my environment variables, ran npm run dev and received so many errors because I forgot to install the dependencies (and read the README) or switch to the right node version. Ugh! I can’t tell you how many times this happened to me in my first year!
Back then, I wished I had a way that was streamlined—something I set up only once, that just worked every time I accessed the repository. Although I did learn how to automate my computer setup with a Brewfile, I wish I could just get to coding in a repository without thinking about configuration.
When I think about how we work on projects in a repository, I realize that many of the processes we need to get started on that project can be automated with the help of dev containers, in this case, by using a devcontainer.json file and Codespaces.
Let’s take a look at how we can automate our dev environment by adding a dev container to this open source project—Tech is Hiring in GitHub Codespaces.
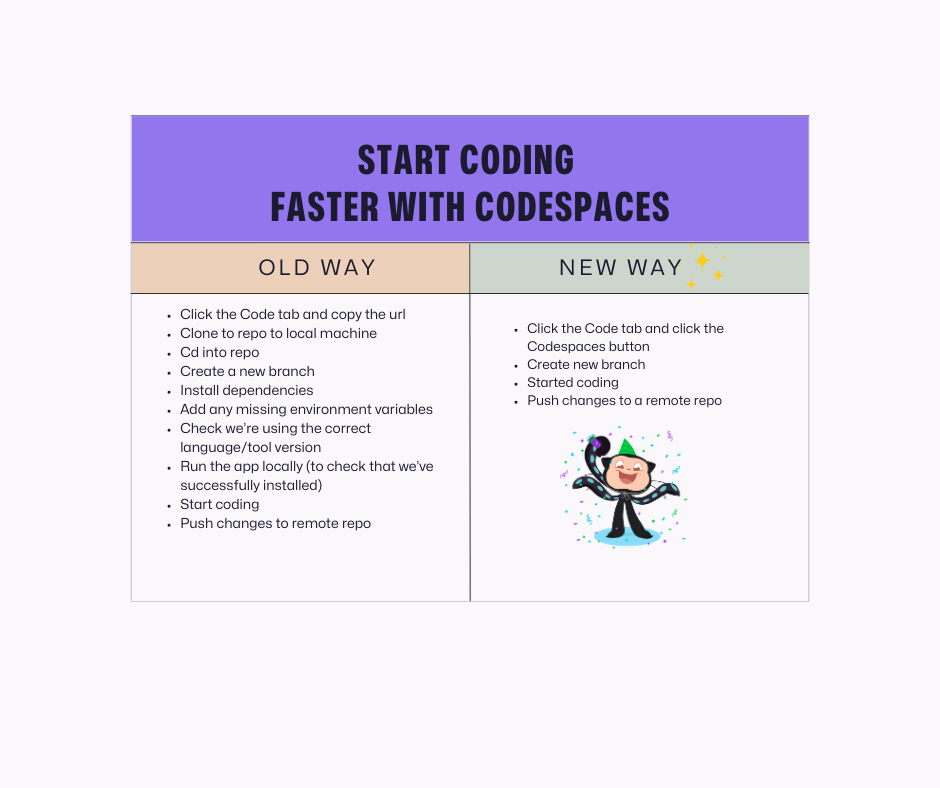
For a TLDR of this post, GitHub Codespaces enables you to start coding faster when coupled with dev containers. See image below for a summary of how:
Now, let’s get some definitions out of the way.
What is GitHub Codespaces?
GitHub Codespaces is a development environment in the cloud. It is hosted by GitHub in an isolated environment (Docker container) that runs on a virtual machine. If you’re not familiar with virtual machines or Docker containers, take a look at these videos: what is a virtual machine? and what are Docker containers?.
Currently, individual developers have 60 hours of free codespaces usage per month, so definitely take advantage of this awesomeness to build from anywhere.
What are dev containers?
Dev containers allow us to run our code in a preconfigured, isolated environment (container). It gives us the ability to predefine our dev environment in our repositories and use a consistent, reliable environment across the board without worrying about configuration files—since it’s all set up for us from the beginning with a devcontainer.json file.
What is the devcontainer.json file?
The devcontainer.json file is a document that defines how your project will build, display, and run. Simply put, it allows us to specify the behavior we want in our dev environment. For example, if we have a devcontainer.json file that includes installing the ESLint extension in VS Code, once we open up a workspace, ESLint will be automatically installed for us.
Automating your workflow with dev containers and GitHub Codespaces
To start using GitHub Codespaces, we don’t need to set up a devcontainer.json file. By default, GitHub Codespaces uses the universal dev container image, which caters to a vast array of languages and tools. This means, whenever you open up a new codespace without a devcontainer.json file your codespace will automagically load so you can code instantly. However, adding a devcontainer.json file gives us the ability to automate a lot of our dev environment workflows to our liking.
Okay, okay, that was a lot of chatter—let’s now get into what you really came here for!
Using the open source project, Tech is Hiring, let’s walk through how we typically work with a repository using our local dev environment.
What work typically looks like
At first glance, we see that this project uses Nextjs, Tailwind CSS, Chakra UI, TypeScript, Storybook, Vite, Cypress, Axios, and Reactjs as some of its dependencies. We’d need to install all these dependencies to our local machine to get this project running.
- Let’s clone the repository, and cd into the project.
-
Then, let’s install dependencies to get the project running locally.
-
This project uses storybook, so let’s run both storybook and spin up the actual app locally.
The process is not so bad, but it took a bit of time. We also need to check to make sure we’re using the correct node version, check if we need any environment variables, and if there are any runtime errors to resolve. Thankfully, I didn’t encounter any errors while working on this, but it still took a bit of time.
Going faster with GitHub Codespaces and dev containers
Let’s make the process better by adding a devcontainer.json file to this project and opening it in GitHub Codespaces to see what happens.
We can either use the VS Code command palette to add a pre-existing dev container or we can write the configuration file ourselves (which we’ll do below).
- Let’s first create a
.devcontainerfolder in the root of the project and adevcontainer.jsonfile in the new folder.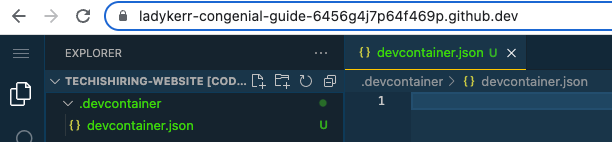
-
Now, let’s automate installing dependencies, starting the dev server, opening a preview of our app on localhost:3000, and installing vscode extensions. Once we get everything configured, your json file should look like this:
{
  // image being used
   "image": "mcr.microsoft.com/devcontainers/universal:2",
  // set minimum cpu
   "hostRequirements": {
       "cpus": 4
   },
   // install dependencies and start app
   "updateContentCommand": "npm install",
   "postAttachCommand": "npm run dev",
   // open app.tsx once container is built
   "customizations": {
       "codespaces": {
           "openFiles": [
               "src/pages/_app.tsx"
           ]
       },
       // install some vscode extensions
       "vscode": {
           "extensions": [
               "dbaeumer.vscode-eslint",
               "github.vscode-pull-request-github",
               "eamodio.gitlens",
               "christian-kohler.npm-intellisense"
           ]
       }
   },
   // connect to remote server
   "forwardPorts": [3000],
   // give port a label and open a preview of the app
   "portsAttributes": {
      "3000": {
         "label": "Application",
         "onAutoForward": "openPreview"
       }
     }
}
Sidenote: I’ve broken down the purpose of the properties in this file for you by adding comments before each. To learn more about each property, continue reading at container.dev. I also installed a few extensions that are not needed, but I wanted to show you that you could automate installing extensions, too!
- Let’s commit the file and merge it into the main branch, then open up the project in GitHub Codespaces.
When we open up the application in GitHub Codespaces, our dependencies will be installed, the server will start, and a preview will automatically open for us. If we needed environment variables to work on this repository, those would have already been configured for us as a repository secret on GitHub. We also didn’t need to install hefty
node_modulesto our machine.
I call this a win!
Comparing both ways
There’s plenty more that we can do with dev containers and GitHub Codespaces to automate our dev environment. But let’s summarize what we just did in GitHub Codespaces and with the help of dev containers:
- We clicked the GitHub Codespaces button on the GitHub repository.
- Everything was setup/installed for us (thanks json file!).
- We got to work and started coding.
Now, isn’t that better?
Wrapping up
So, what’s the point of GitHub Codespaces and why should you care as a developer? Well, for one, you can automate most of the startup processes you need to access a repository. You can also do a lot more customizations to your dev environment with dev containers. Take a look at all the options you have—and watch out for my next blog post where I’ll go through the anatomy of a devcontainer.json file.
Secondly, you can code from anywhere. I hate it when I’m not able to access one of my side projects on a different machine because that one machine is configured perfectly to suit the project. With GitHub Codespaces, you can start coding at the click of a button and from any machine that supports a modern browser.
I encourage you to get started with GitHub Codespaces today and try adding a devcontainer.json file to one of your projects! I promise you won’t regret it.
Until next time, happy coding!
Tags:
Written by
Related posts

How to review code effectively: A GitHub staff engineer’s philosophy
GitHub Staff Engineer Sarah Vessels discusses her philosophy of code review, what separates good code review from bad, her strategy for finding and reviewing code, and how to get the most from reviews of her own code.
Beginner’s guide to GitHub: Uploading files and folders to GitHub
The next step in our GitHub for Beginners series is learning how to add files and folders to your GitHub repository.
Beginner’s guide to GitHub repositories: How to create your first repo
Git started on your first repository in the third installment of GitHub for Beginners. Discover the essential features and settings to manage your projects effectively.