A beginner’s guide to learning to code with GitHub Codespaces
When you’re new to coding, it’s easy to get stuck completing endless tutorials. You can apply what you’ve learned (and learn even more) through GitHub Codespaces. The best part is you don’t need a powerful computer to get started.
It doesn’t matter what stage you’re at in your software engineering career, there’s always something new to learn. As a beginner, it’s so easy to spend more time-consuming tutorials on how to code rather than actually putting it into practice. “See one, do one, teach one” is a learning methodology that suggests effective learning happens when you observe, apply, and then teach a new concept. When you’re new to a programming concept, the “see one, do one, and teach one” is extremely valuable in building your development skills. However, one of the reasons we got stuck in the observation phase is that we don’t know how to apply it. “What projects do I build?” is a common question that new developers ask me. And I’ll admit, I sometimes find myself asking the same question.
Fortunately, GitHub Codespaces is an effective tool that can help you apply what you’ve learned. Let’s discover how to learn new languages and frameworks with GitHub Codespaces, together.
Have a GitHub account? Login to GitHub
To get started, you will need to log in to GitHub and skip to the next step titled, “Your first Codespace.”
Are you a new GitHub user?
If you’ve never used GitHub before, welcome! GitHub is a platform that developers use to store and collaborate on code. To get started, navigate to GitHub.com, click “Sign Up”, and complete the signup workflow.
Your first Codespace
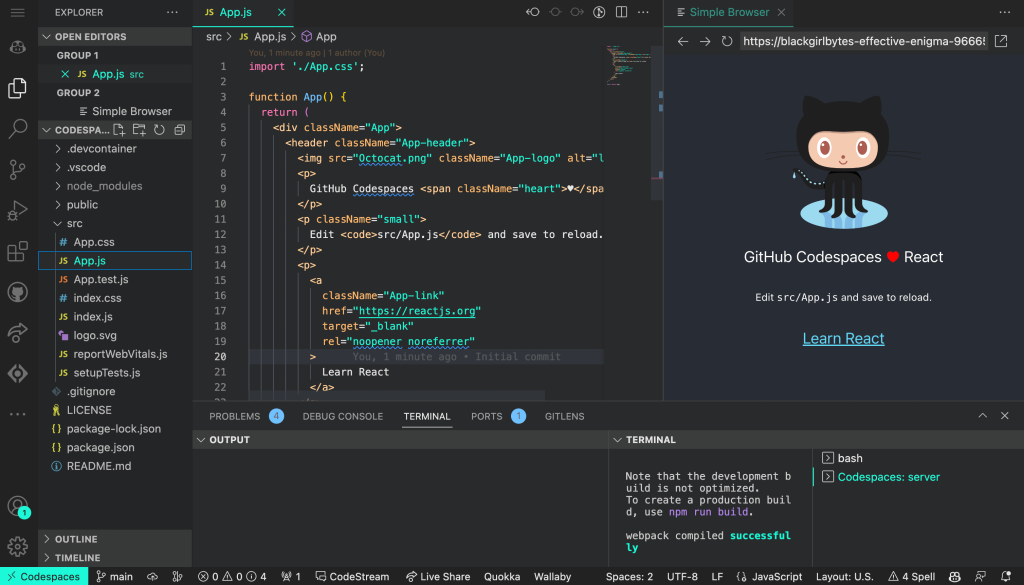
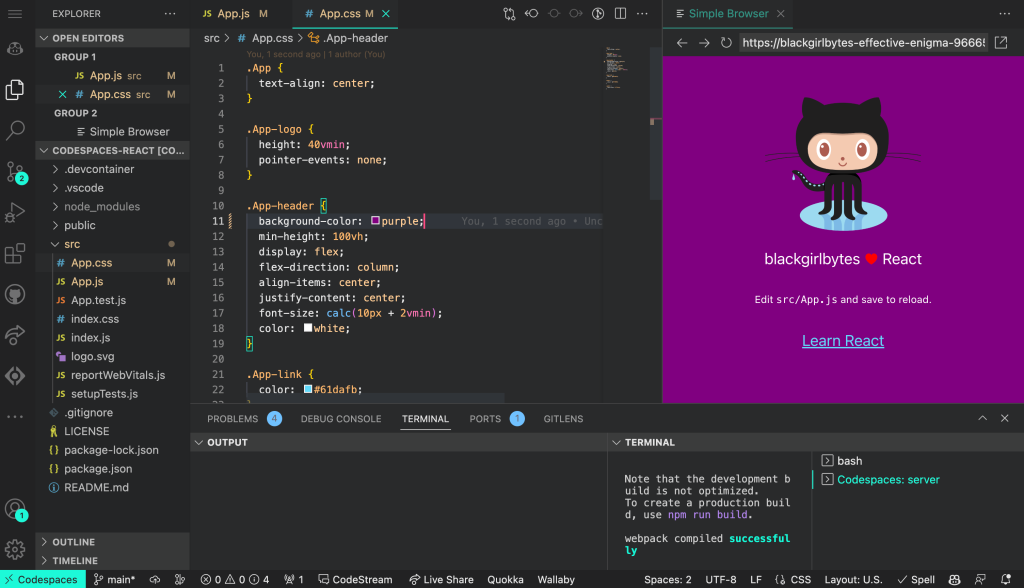
Click this link and choose “Use this template” to enter the codespace that I’ve created specially for you! Once our codespace is fully loaded, you will see a live preview of your web app on a tab titled, “Simple Browser.” (If you don’t see the “Simple Browser” tab yet, give it a few minutes to load.) It should look like the image below:
Let’s start coding!
Change some words
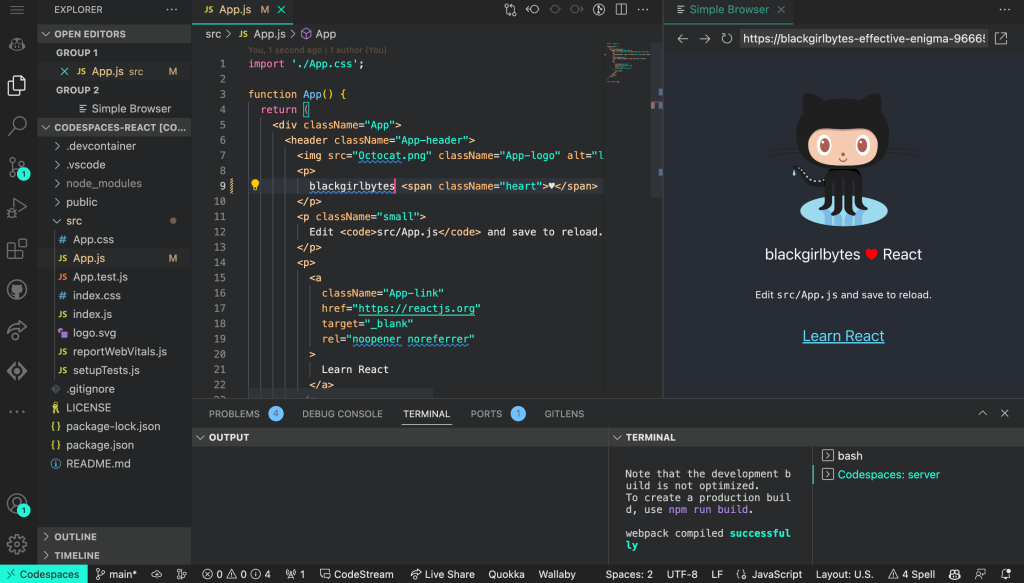
Currently, the web app states that “GitHub Codespaces ♥️ React.” Let’s replace the words “GitHub Codespaces” with our GitHub username by following these steps:
- In the Codespace, a file called App.js is already open. The App.js file is where all the content lives. (If you accidentally close the App.js file, you can find it in a folder called “src” and reopen it).
- On line 9 of the App.js file, you will see the words “GitHub Codespaces ♥️ React” wrapped in a paragraph tag represented by these characters “.
- Change the words “GitHub Codespaces” on line 9 to your GitHub username.
- Save the changes you made in your App.js file by pressing the keys “command and s” for Mac or “control and s” for Windows.
- Check for the reflected changes in your Simple Browser tab. In GitHub Codespaces, we have a process that notices saved file changes, then updates and reloads your browser “automagically.” ✨
My GitHub username is blackgirlbytes, so my web app says “blackgirlbytes ♥️ React.”
Change the background color
The background color for the React app is currently gray. Gray might be someone’s favorite color, but it’s not mine. Let’s brighten it up by following the steps below:
- Navigate to the App.css file in the src folder. This is where the styles of the web app live.
- On line 11 of the App.css file, you will see the following code:
background-color: #282c34;#282c34 is the hex code for the color gray. - Try replacing the
#282c34with the wordpurple. (That’s my favorite color!) - Save the changes you made in your App.css file by pressing the keys “command and s” for Mac or “control and s” for Windows.
- Check for the reflected changes in your simple browser tab.
The final version should resemble the image below:
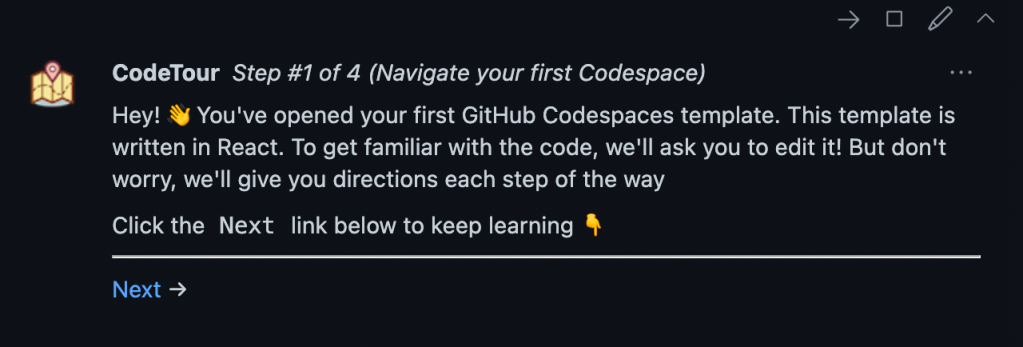
Need extra help?
I’ve included a guided tour in the codespace to help you make changes to the web app. To initiate the tour, take the following steps:
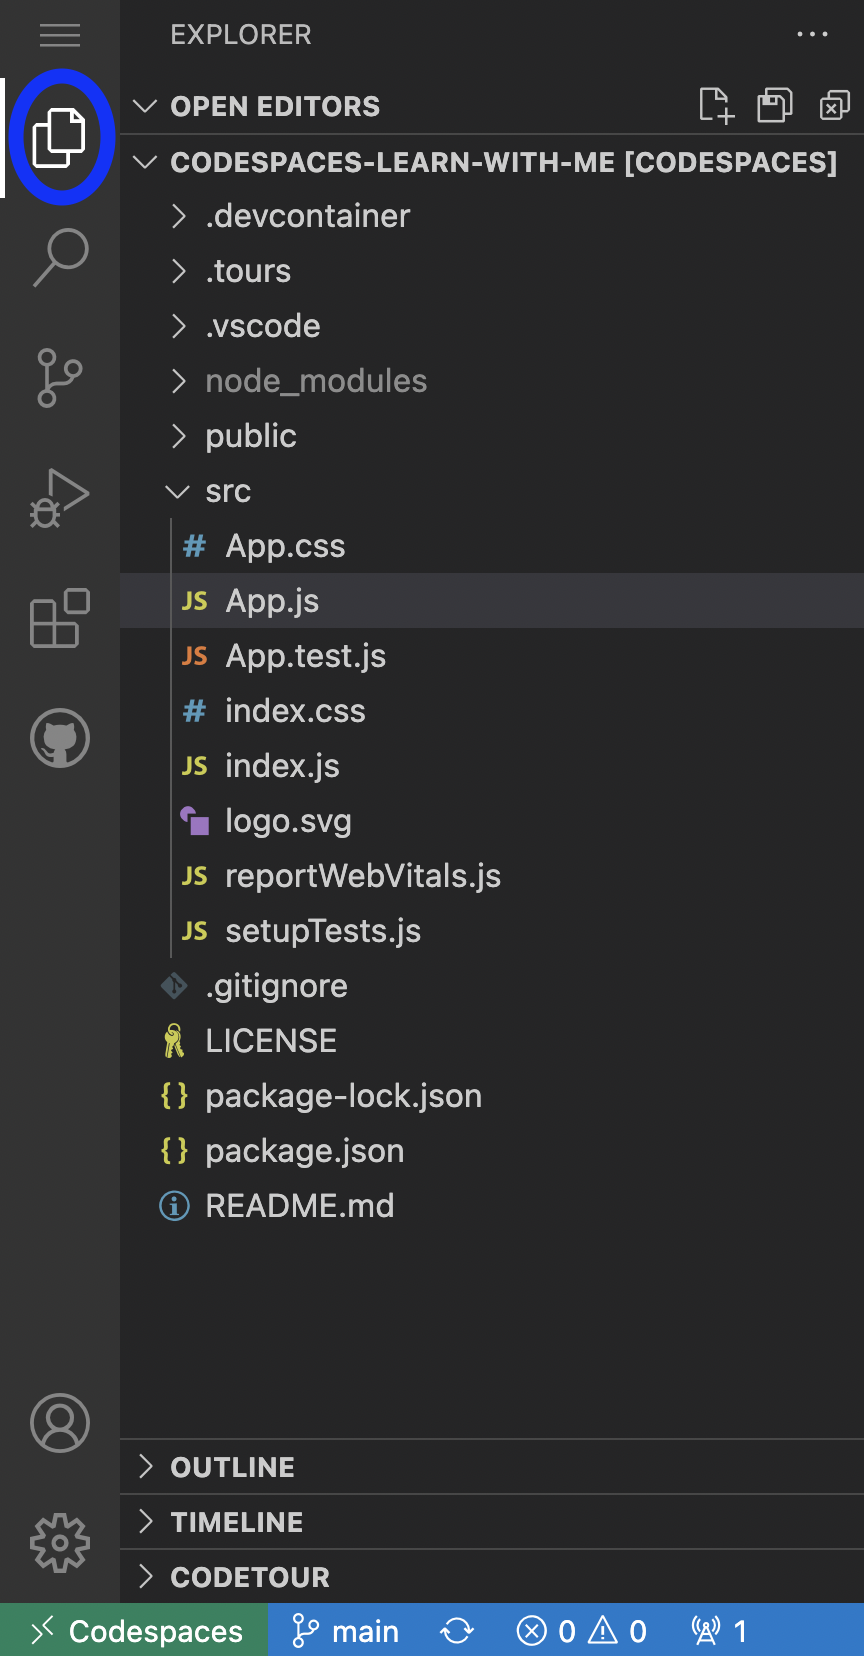
- Choose the “Explorer Icon” on the left sidebar of your editor.
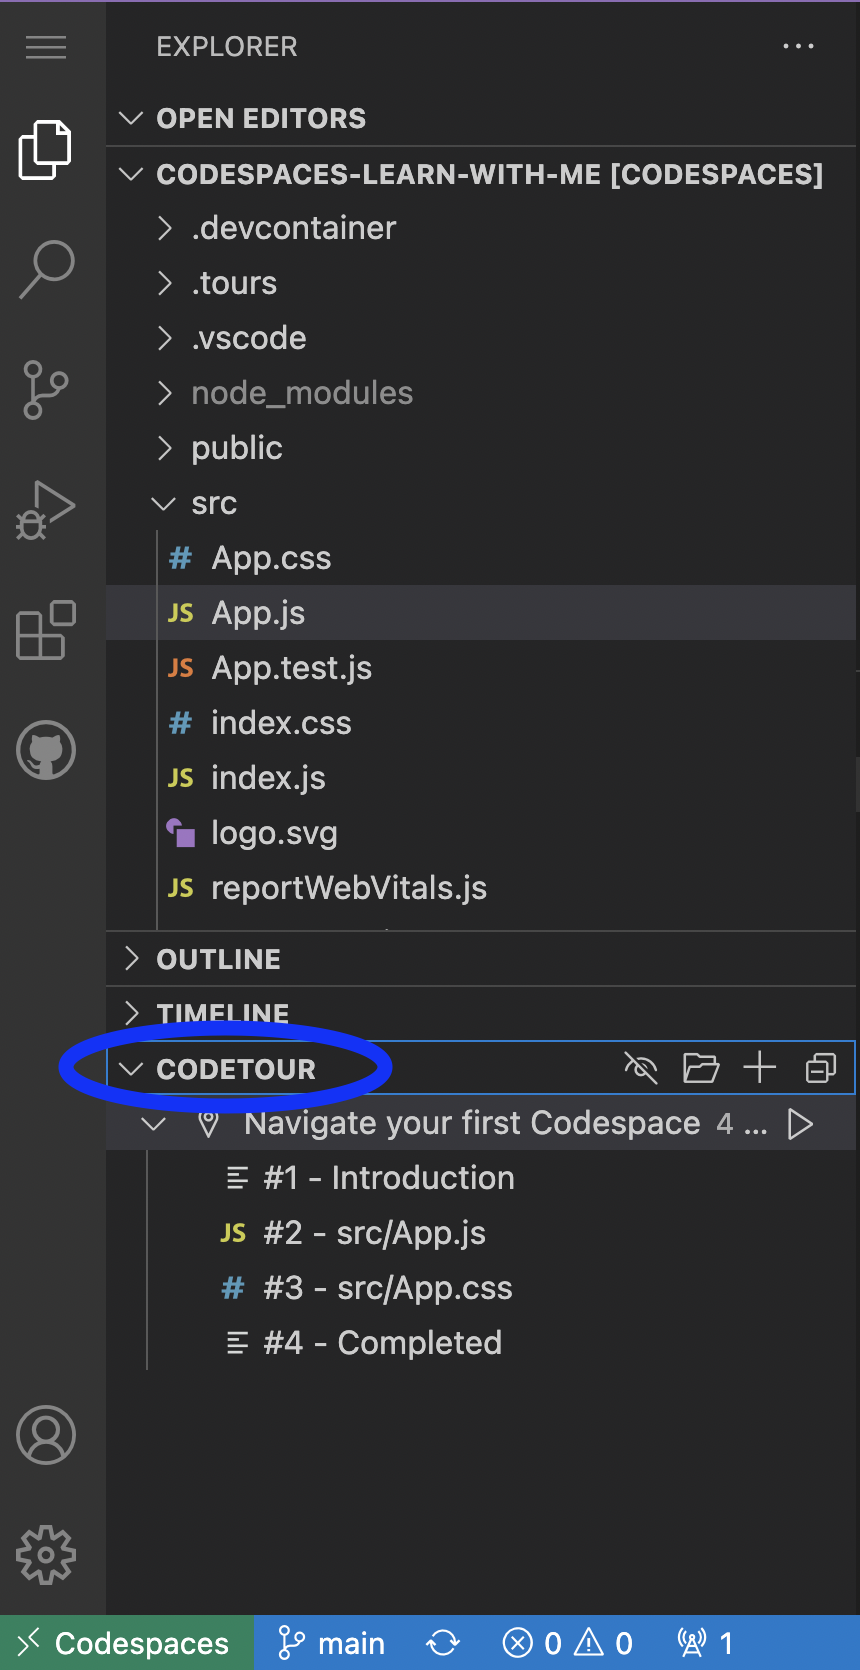
- Toggle the “CodeTour” panel on the left sidebar of your editor.
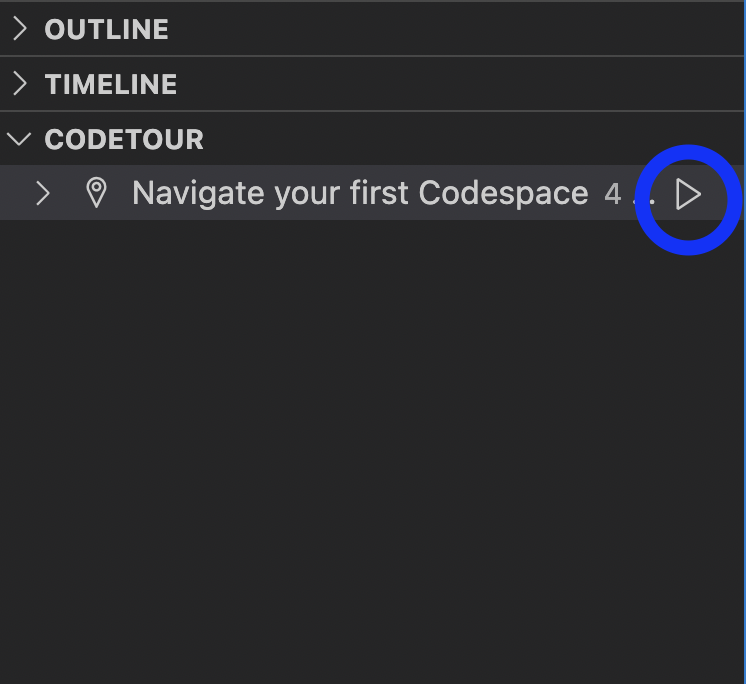
- Press the “Play button” to start the tour.
- Your CodeTour will begin! Follow the CodeTour’s steps to make updates to the web app.
Publish the codespace
This looks amazing! (If you want it to render different words or colors, feel free to experiment, but I’m happy with our creation). Let’s publish the codespace so that we can return to it in the future, continue to enhance the web app, and share it with others!
We’re going to save our code in a project folder on GitHub called a repository. To do this, follow the instructions below:
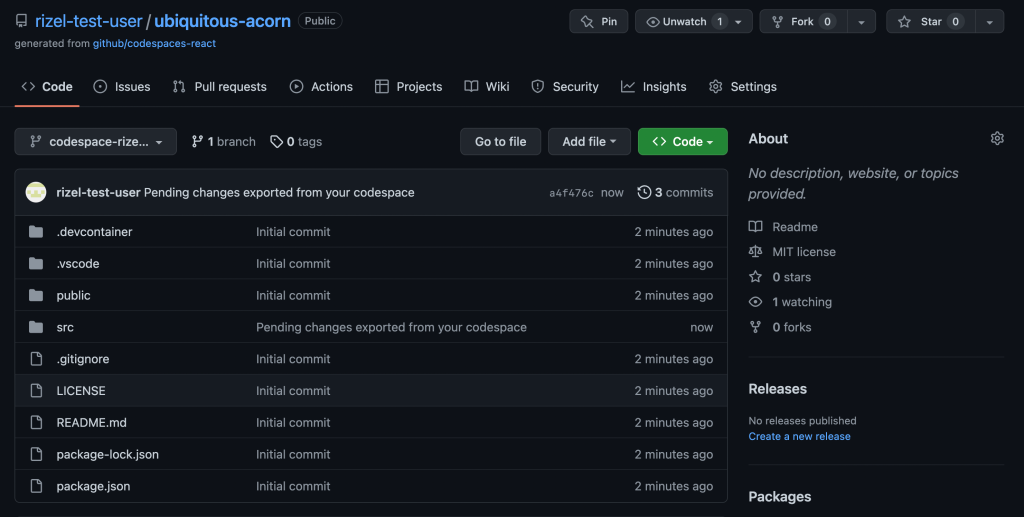
- Navigate to https://github.com/codespaces. Don’t worry about leaving the tab or window because GitHub Codespaces will save your changes.
- Scroll down to the bottom of the page, and you will see the codespace you created. It might have a silly name. GitHub Codespace automatically generates names for each codespace as a form of identification. My codespace is named “ubiquitous acorn.”

- Click the three dots on the right-hand side and choose the option “Publish to new repository.”

- Here, you can give your project a more identifiable name, make the project public, and view your repository with the button “See repository.”
- This will lead you to your repository on GitHub. It will show the different files within the project, too. You can share the link to your repository for other developers to collaborate with you or explore your codebase!
Bonus tip
Now that your code is in a repository, you can delete your codespace. Don’t worry; if you delete your codespace, you’re not going to lose your code! Your code will always live in the repository, and you can share this with folks who want to collaborate with you or learn from you.
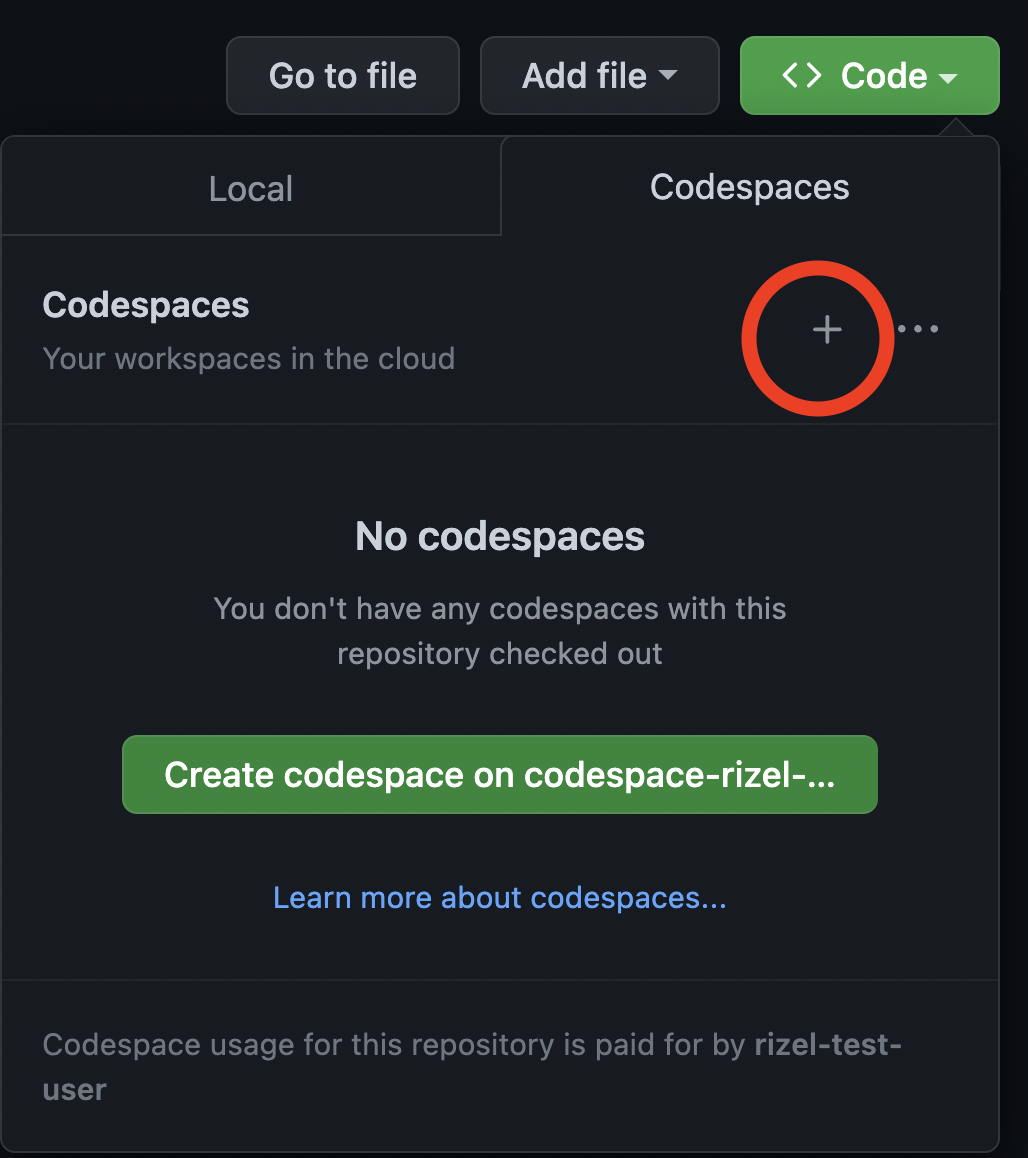
If you want to reopen your code in a codespace, choose the “Code” button in your repository and click the “+” in the codespaces tab.
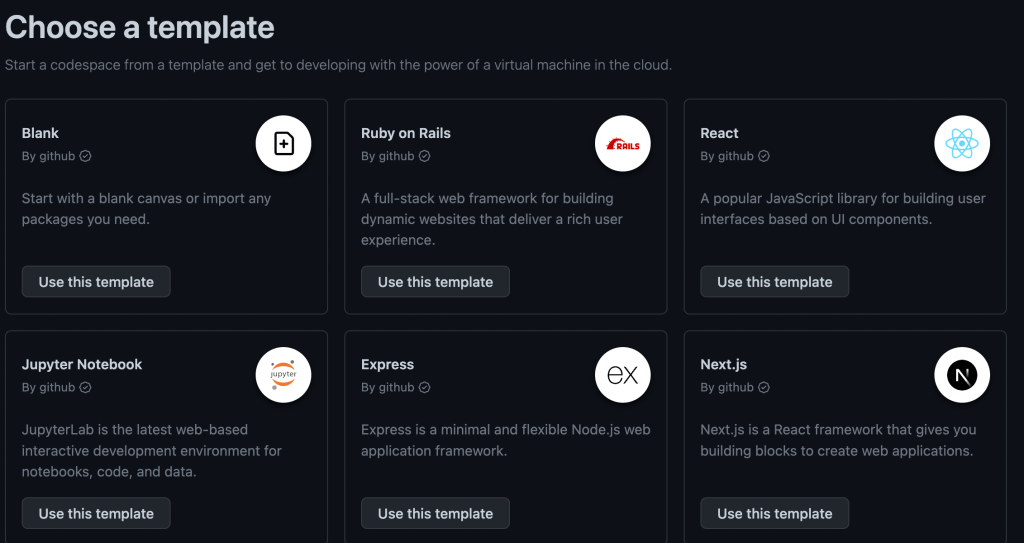
Check out the quickstart templates
Quickstart templates include boilerplate code for some of the most common application frameworks, including Next.js, React.js, Django, Express, Ruby on Rails, Preact, Flask, and Jupyter Notebook. These templates provide developers with a sandbox to build, test, and debug applications in a codespace. This means you don’t have to start from scratch with coding because we already have a working project that you can enhance into the project you’re envisioning. You can use templates to understand how developers structure their projects written in various programming languages. And you can use it to understand how different files communicate with each other.
For example, I’ve always wanted to learn more about artificial intelligence (AI) and machine learning, but I had no clue where to start. I used a Jupyter Notebooks template to generate AI images. The template already had all the tools I needed. I just had to change a few lines of code.
What’s next?
Congratulations, you just leveled up your programming knowledge. Now, you can continue experimenting with different frameworks and learning new languages in GitHub Codespaces. Check out the other templates if you’re interested in starting a project or learning a new framework language with Preact, Jupyter Notebook, Flask, Django, Express, Ruby on Rails, or Node.
If you are interested in diving into more advanced concepts around GitHub Codespaces, check out our documentation.
Share your creation
If you set up a project and GitHub Codespaces that you’re excited about, share it with us on social media with the hashtag #ShareYourCodespace! ❤️
Tags:
Written by

Related posts
Transitioning as a Hubber
How GitHub’s culture and benefits helped me be the best version of myself.

I automated my job (and it made me a better leader)
Explore how my day as a senior leader looks now that I use 40 automations to help, and learn more about some of my favorites.

GitHub for Beginners: Answers to some common questions
Find the answers to some of the most common GitHub-related questions.