Exciting new GitHub features powering machine learning
Discover the exciting enhancements in GitHub that empower Machine Learning practitioners to do more.

I’m a huge fan of machine learning: as far as I’m concerned, it’s an exciting way of creating software that combines the ingenuity of developers with the intelligence (sometimes hidden) in our data. Naturally, I store all my code in GitHub – but most of my work primarily happens on either my beefy desktop or some large VM in the cloud.
So I think it goes without saying, the GitHub Universe announcements made me super excited about building machine learning projects directly on GitHub. With that in mind, I thought I would try it out using one of my existing machine learning repositories. Here’s what I found.
Jupyter Notebooks
Machine learning can be quite messy when it comes to the exploration phase. This process is made much easier by using Jupyter notebooks. With notebooks you can try several ideas with different data and model shapes quite easily. The challenge for me, however, has been twofold: it’s hard to have ideas away from my desk, and notebooks are notoriously difficult to manage when working with others (WHAT DID YOU DO TO MY NOTEBOOK?!?!?).
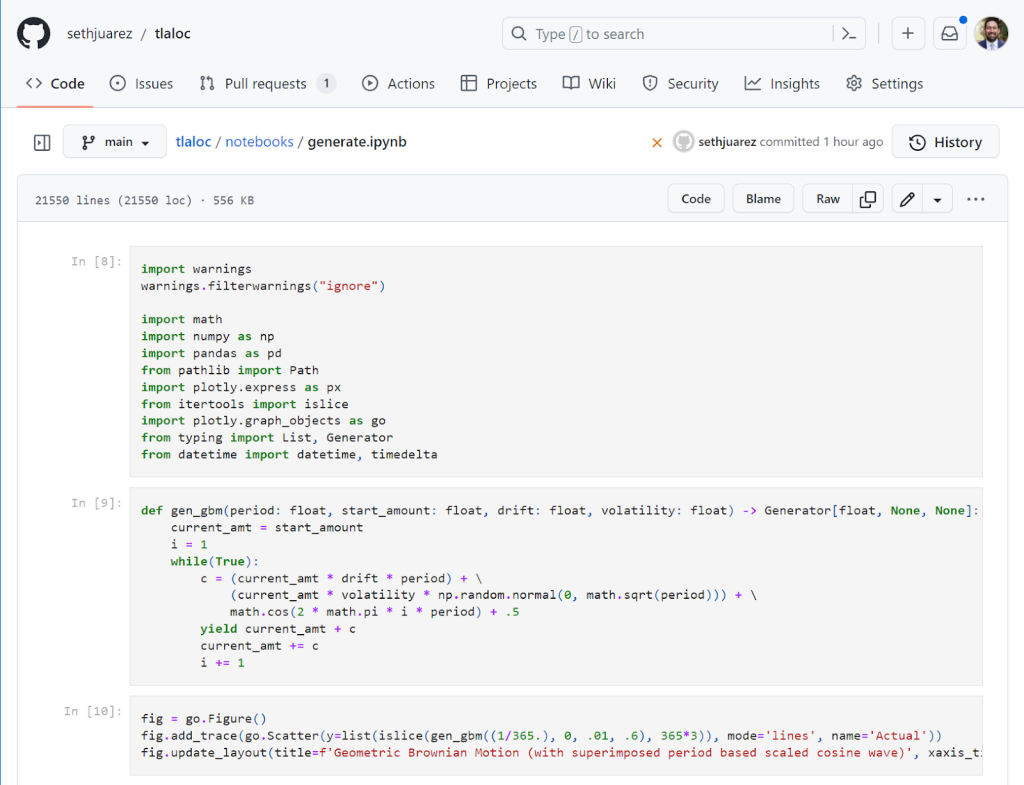
This improved rendering experience is amazing (and there’s a lovely dark mode too). In a recent pull-request I also noticed the following:
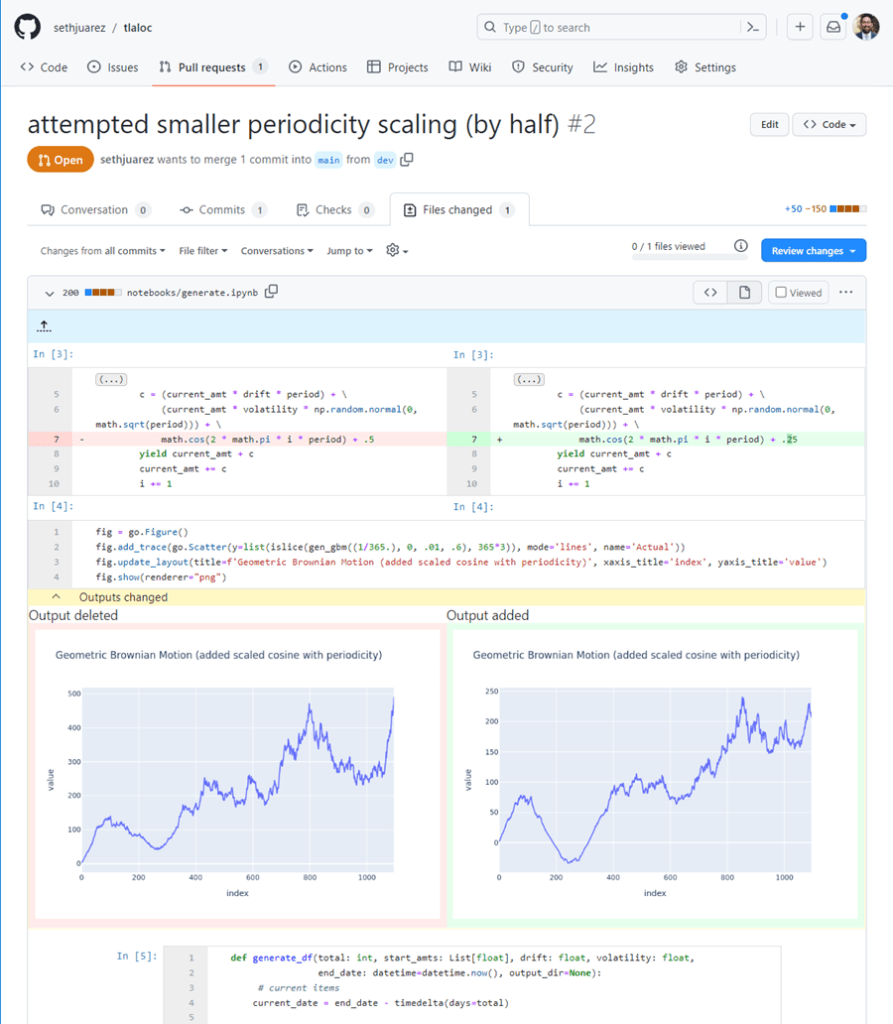
Not only can I see the cells that have been added, but I can also see side-by-side the code differences within the cells, as well as the literal outputs. I can see at a glance the code that has changed and the effect it produces thanks to NbDime running under the hood (shout out to the community for this awesome package).
Notebook Execution (and more)
While the rendering additions to GitHub are fantastic, there’s still the issue of executing the things in a reliable way when I’m away from my desk. Here’s a couple of gems we introduced at GitHub Universe to make these issues go away:
- GPUs for Codespaces
- Zero-config notebooks in Codespaces
- Edit your notebooks from VS Code, PyCharm, JupyterLab, on the web, or even using the CLI (powered by Codespaces)
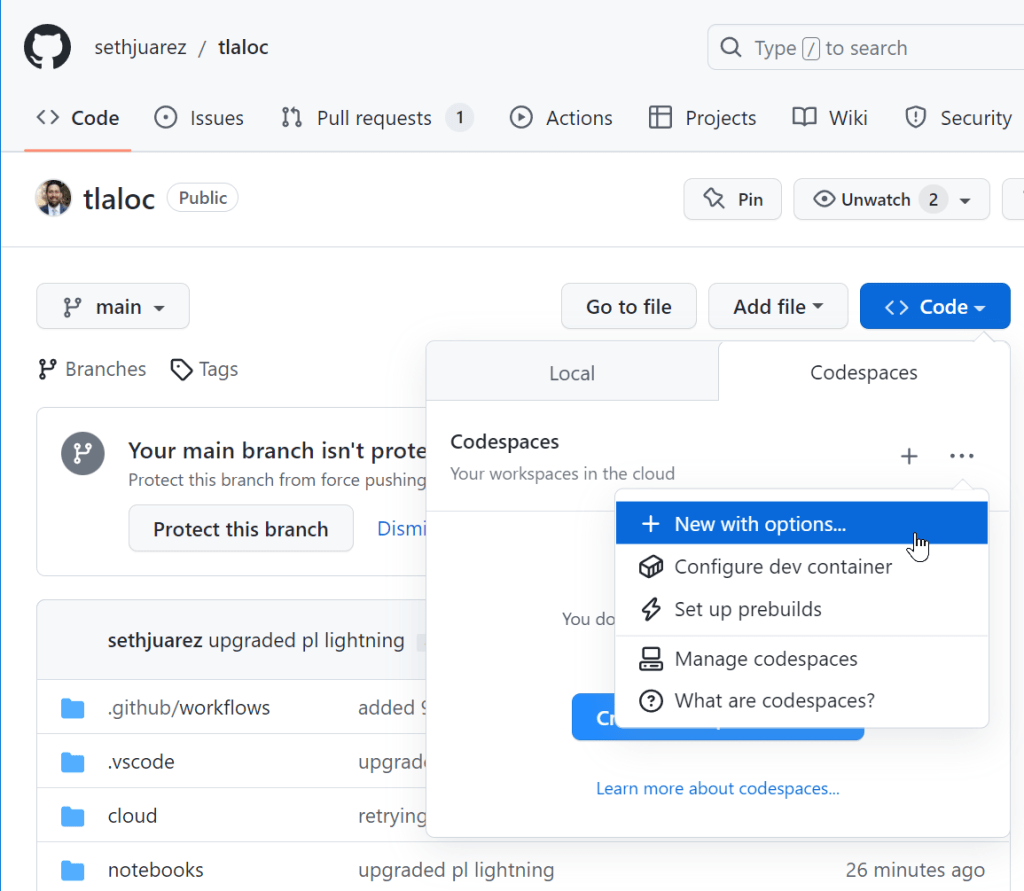
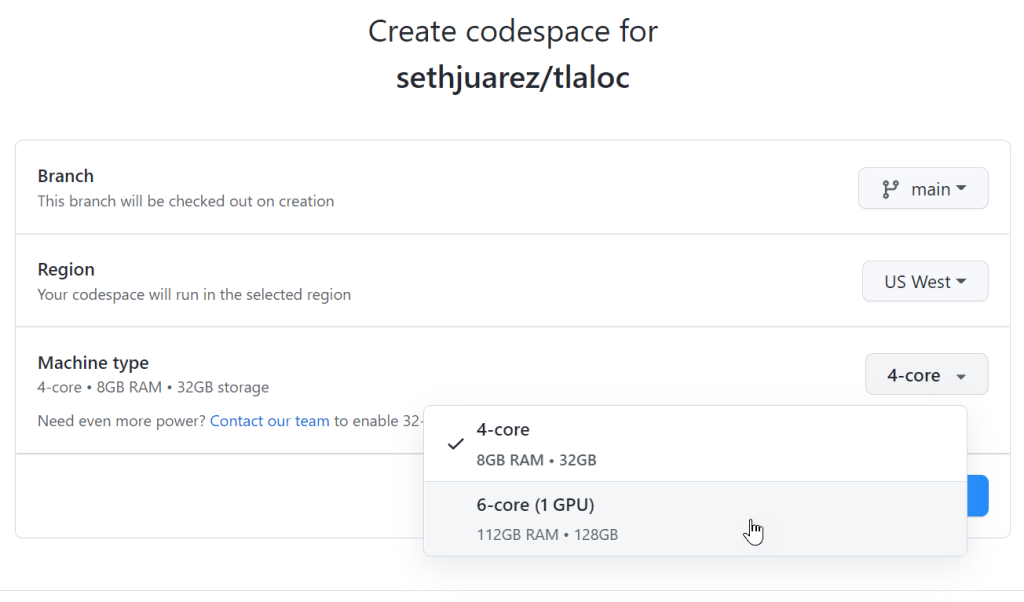
I decided to try these things out for myself by opening an existing forecasting project that uses PyTorch to do time-series analysis. I dutifully created a new Codespace (but with options since I figured I would need to tell it to use a GPU).
Sure enough, there was a nice GPU option:
That was it! Codespaces found my requirements.txt file and went to work pip installing everything I needed.
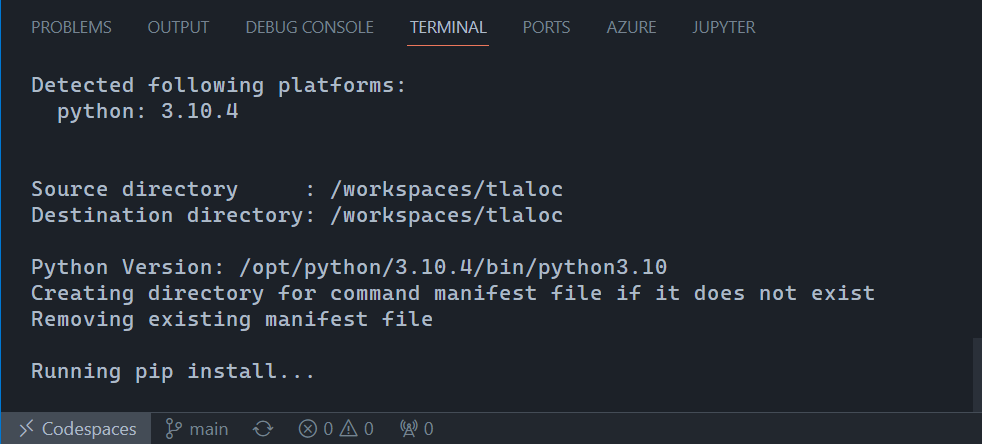
After a few minutes (PyTorch is big) I wanted to check if the GPU worked (spoiler alert below):
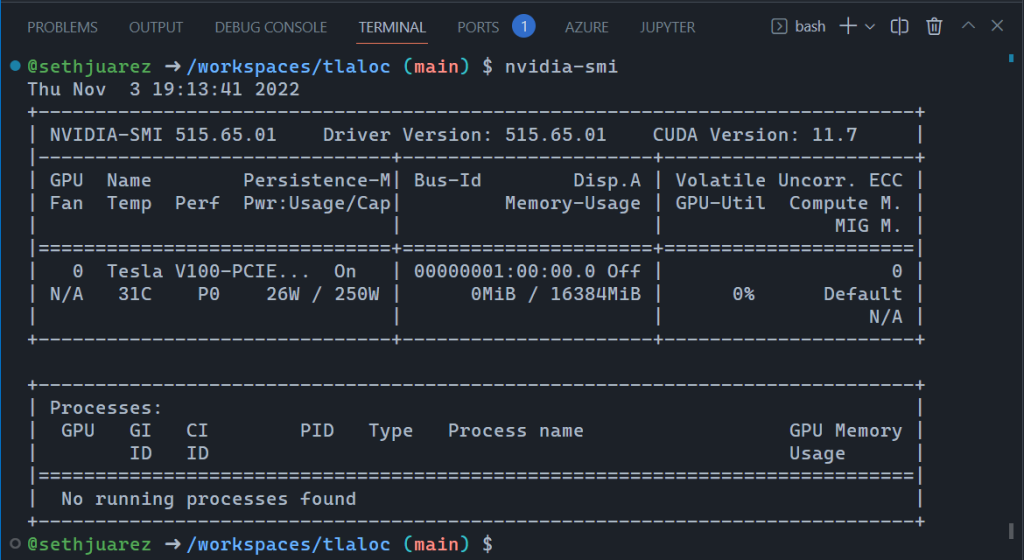
This is incredible! And, the notebook also worked exactly as it does when working locally:
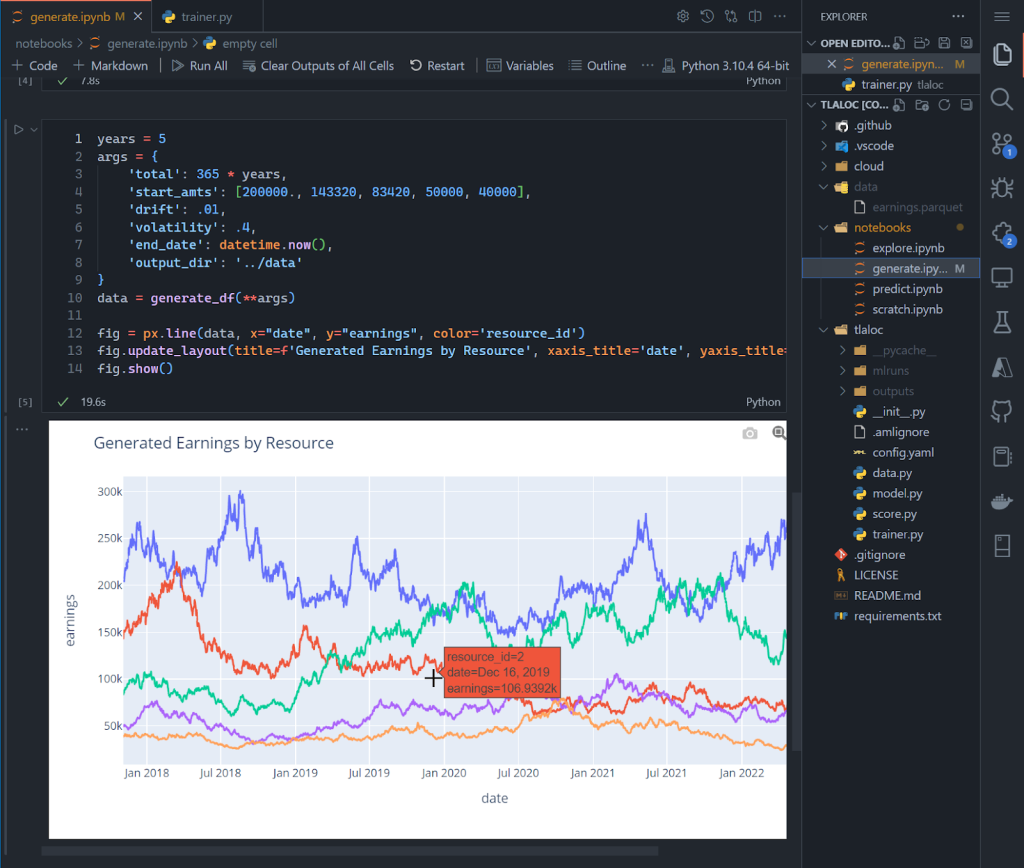
Again, this is in a browser! For kicks and giggles, I wanted to see if I could run the full blown model building process. For context, I believe notebooks are great for exploration but can become brittle when moving to repeatable processes. Eventually MLOps requires the movement of the salient code to their own scripts modules/scripts. In fact, it’s how I structure all my ML projects. If you sneak a peek above, you will see a notebooks folder and then a folder that contains the model training Python files. As an avid VSCode user I also set up a way to debug the model building process. So I crossed my fingers and started the debugging process:
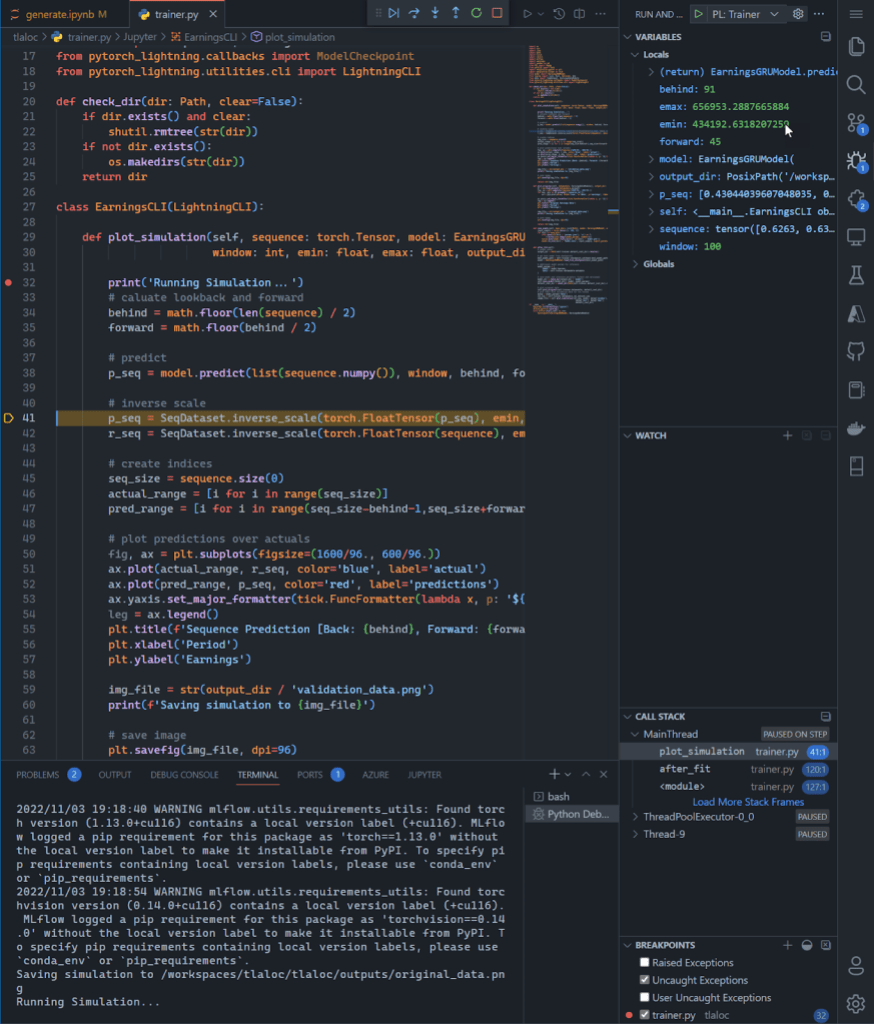
I know this is a giant screenshot, but I wanted to show the full gravity of what is happening in the browser: I am debugging the build of a deep learning PyTorch model – with breakpoints and everything – on a GPU.
The last thing I wanted to show is the new JupyterLab feature enabled via the CLI or directly from the Codespaces page:
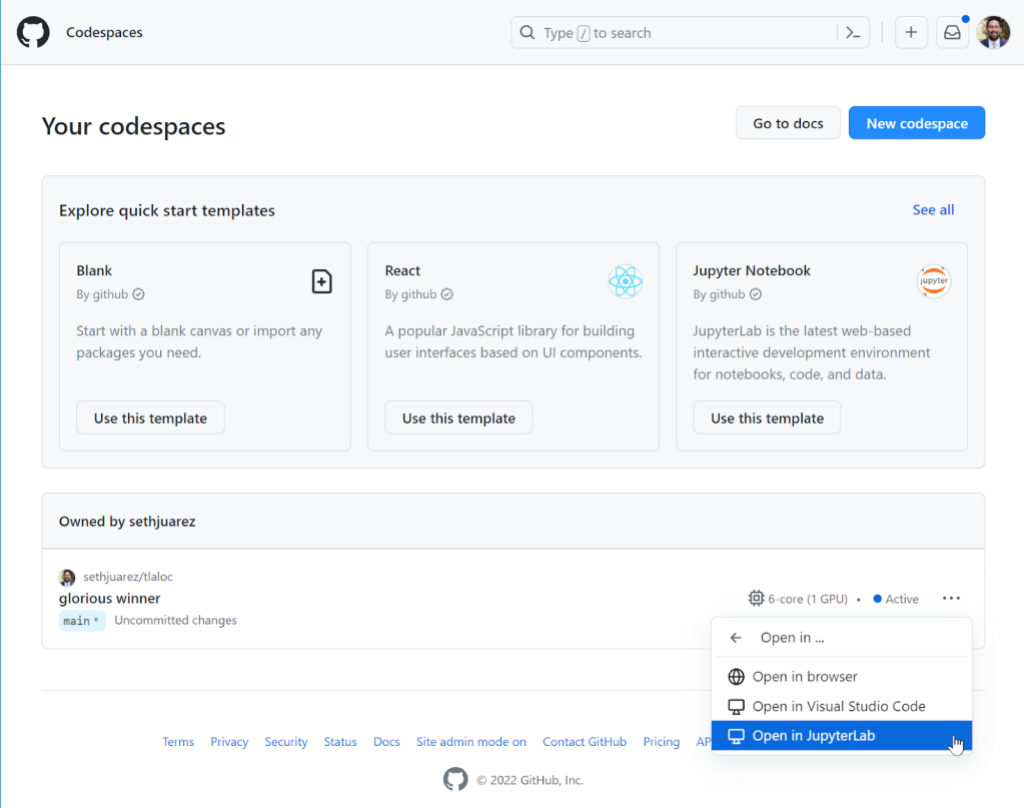
For some, JupyterLab is an indispensable part of their ML process – which is why it’s something we now support in its full glory:
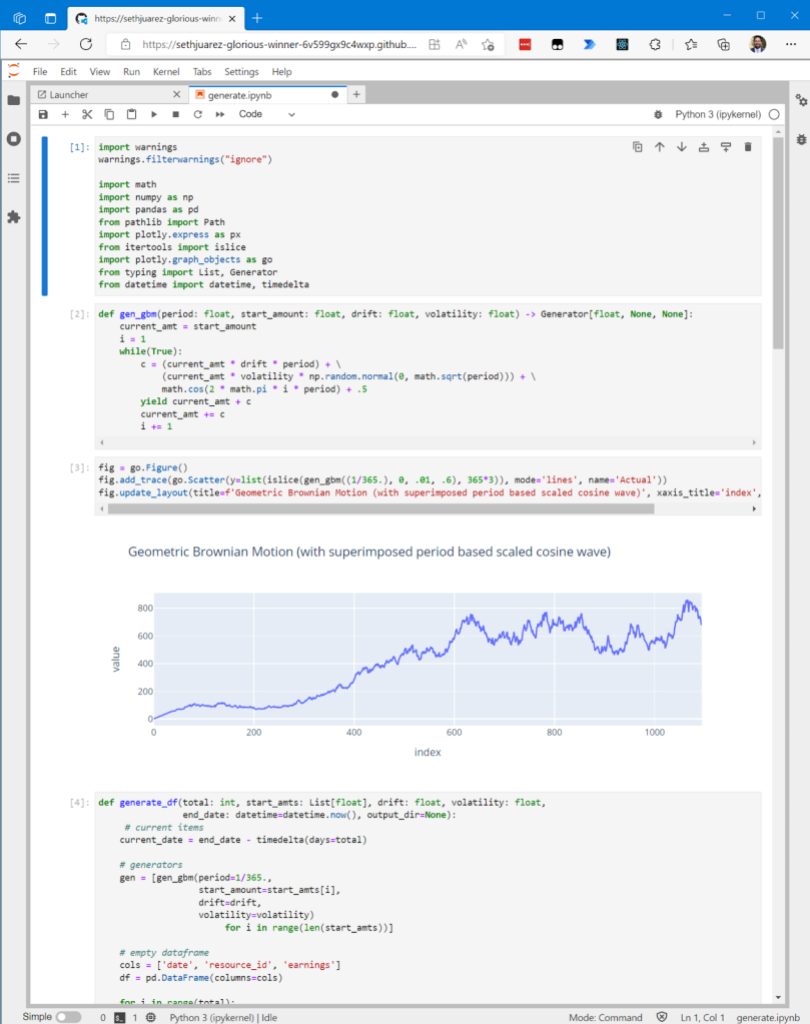
What if you’re a JupyterLab user only and don’t want to use the “Open In…” menu every time? There’s a setting for that here:

And because there’s always that one person who likes to do machine learning only from the command line (you know who I’m talking about):
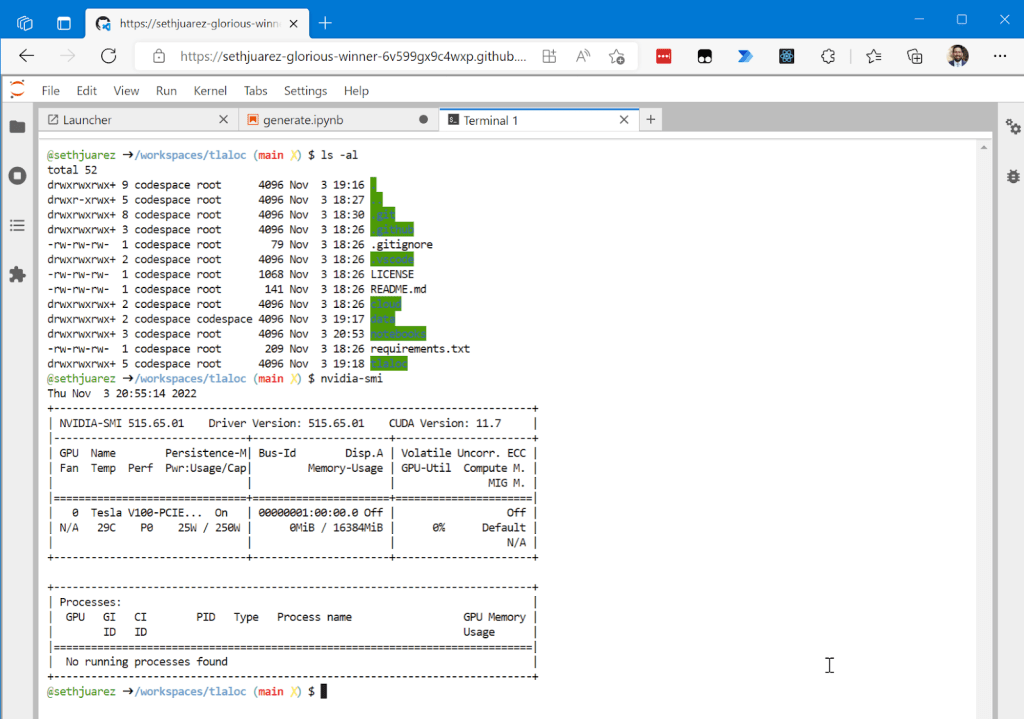
For good measure I wanted to show you that given it’s the same container, the GPU is still available.
Now, what if you want to just start up a notebook and try something? A File -> New Notebook experience is also available simply using this link: https://codespace.new/jupyter.
Summary
Like I said earlier, I’m a huge fan of machine learning and GitHub. The fact that we’re adding features to make the two better together is awesome. Now this might be a coincidence (I personally don’t think so), but the container name selected by Codespaces for this little exercise sums up how this all makes me feel: sethjuarez-glorious-winner (seriously, look at container url).
Would love to hear your thoughts on these and any other features you think would make machine learning and GitHub better together. In the meantime, get ready for the upcoming GPU SKU launch by signing up to be on waitlist. Until next time!
Tags:
Written by
Related posts

7 learnings from Anders Hejlsberg: The architect behind C# and TypeScript
Anders Hejlsberg shares lessons from C# and TypeScript on fast feedback loops, scaling software, open source visibility, and building tools that last.

Context windows, Plan agent, and TDD: What I learned building a countdown app with GitHub Copilot
Learn how I managed context to keep Copilot focused, used the Plan agent to sharpen vague requirements, and required Test Driven Development practices to catch bugs before users.

Agentic AI, MCP, and spec-driven development: Top blog posts of 2025
Explore the GitHub Blog’s top posts covering the biggest software development topics of the year.