How to build a CI/CD pipeline with GitHub Actions in four simple steps
A quick guide on the advantages of using GitHub Actions as your preferred CI/CD tool—and how to build a CI/CD pipeline with it.

Continuous Integration / Continuous Delivery (CI/CD) has long been—and continues to be—the domain of DevOps experts. But with the introduction of native CI/CD to GitHub in 2019 via GitHub Actions, it’s easier than ever to bring CI/CD directly into your workflow right from your repository.
That’s a great thing. As developers, we’re trained to use peer reviews to make sure our code works. But I’m here to tell you we need to disrupt the peer review. If you’re using Git, GitHub, and GitHub Actions to build a CI/CD pipeline, you should have confidence in your code.
I’m going to walk you through exactly how to build your own CI/CD pipeline, right from your repository on GitHub.
Find out how GitHub compares to other DevOps and CI/CD platforms >
Key advantages of using GitHub Actions for CI/CD pipelines
But first, let’s talk through some of the benefits to using GitHub Actions—because let’s be honest, there are a lot of other tools out there. Let me unpack the four big benefits that I’ve come across:
- CI/CD pipeline set-up is simple: GitHub Actions is made by and for developers, so you don’t need dedicated resources to set up and maintain your pipeline. There’s no need to manually configure and set up CI/CD. You don’t have to set up webhooks, you don’t have to buy hardware, reserve some instances out there, keep them up to date, do security patches, or spool down idle machines. You just drop one file in your repo, and it works.
-
Respond to any webhook on GitHub: Since GitHub Actions is fully integrated with GitHub, you can set any webhook as an event trigger for an automation or CI/CD pipeline. This includes things like pull requests, issues, and comments, but it also includes webhooks from any app you have integrated into your GitHub repository. Let’s say you’re going to use any one of the many tools that are out there to run part of your development pipeline. With GitHub Actions, you can trigger CI/CD workflows and pipelines of webhooks from these apps (even something simple, like a chat app message, if you’ve integrated your chat app into your GitHub repository, of course).
-
Community-powered, reusable workflows: You can share your workflows publicly with the wider GitHub community or access pre-built CI/CD workflows in the GitHub Marketplace (there are more than 11,000 available actions!). Did I mention every action is reusable just by referencing its name? Yes, that too.
-
Support for any platform, any language, and any cloud: GitHub Actions is platform agnostic, language agnostic, and cloud agnostic. That means you can use it with whatever technology you choose.
How to build a CI/CD pipeline with GitHub Actions
Before we dive in, here are a few quick notes:
- Be clear about what a CI/CD pipeline is and should do. This is a simple note, but important. A CI pipeline runs when code changes and should make sure all of your changes work with the rest of the code when it’s integrated. It should also compile your code, run tests, and check that it’s functional. A CD pipeline goes one step further and deploys the built code into production.
-
GitHub Actions takes a “choose-your-own adventure” type of approach to CI/CD. You’ll see it the first time you open GitHub Actions in a repository. There are plenty of guided options with pre-built CI workflows you can leverage, per your technology requirements. But you can also build your own CI workflow from scratch if you want to.
-
Our example features a website built on Astro and deployed via GitHub Pages. For both the CI and CD portion of this guide, we’ll be using a website I built and developed called www.opensauced.pizza. This website is intended to make it easier for first-time open source contributors to find open source projects to work on and prioritizes projects with clear onboarding flows.
-
If you’re a visual learner, we have you covered. While I’ll walk you through building a simple CI/CD pipeline with my GitHub project www.opensauced.pizza, I also have a video you can watch where I put these steps into practice and build a quick CI flow for another project of mine: hot.opensauced.pizza. This video shows you exactly where to go to start building a streamlined CI pipeline. Give it a watch if you’re a visual learner.
Okay, let’s do this.
Step 1: Create or choose a repository, and pick a project
This might sound pretty basic, but the first step to building a CI pipeline with GitHub Actions is creating or choosing a repository on GitHub. You can either use an existing project code base, fork a project you like on GitHub, or start from scratch.
For simplicity’s sake, I’m going to use the Open Sauced repository in my Open Sauced project. Feel free to take a closer look by forking this repository and contributing with a fork.

You can see that the Open Sauced repository is relatively simple. The website itself is made with OneGraph, hosted on Netlify , and built with HTML, CSS, and JavaScript. I also leverage Storybook for UI and design work. We’re also using React and npm for package management, installation, and testing—but more on that later.
Step 2: Open GitHub Actions in your repository to start building your CI/CD workflow
To begin building your CI/CD pipeline, open the GitHub Actions tab in your repository’s top navigation bar.
You should see a list of CI/CD and workflow automation templates that match the technology your project uses (side note: We just improved this entire user flow. Check out the details later, if you’re interested).
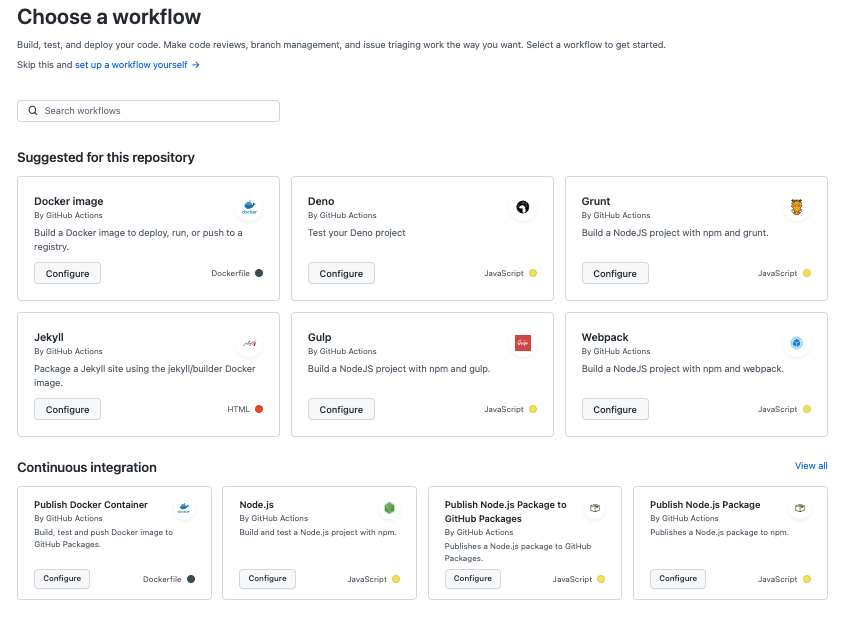
For this project, we’ll leverage a few different CI/CD workflows to test, build, stage, and deploy our code. These include:
- A development workflow: This workflow runs through a few different jobs whenever a pull request is opened, edited, synchronized, or reopened. These jobs include setting up Node, installing npm packages and dependencies, running npm test, and cycling through a number of lint jobs too (setup node, install npm@latest, install dependencies, lint code… you get the idea).
- A CodeQL Analysis workflow: This workflow runs a series of CodeQL security tests on our code after we merge it to the main branch to ensure there are no known vulnerabilities. Check out the YAML file for yourself. It’s super simple, but effective and something I’d highly recommend.
-
A release and build workflow: This workflow runs tests and enforces lint after releasing code changes to Docker and building the application. It also deploys the final code to our production environment, cuts a release using a similar structure to the automated release notes, bundles the site into a container and publishes to ghcr. From there, it bumps the version number and tag in the repository. This is one of the more complex workflows we’re running, and I’m oversimplifying it somewhat, but you can see which jobs and steps happen in the workflow for yourself.
-
A storybook deployment workflow: This workflow deploys any UI component changes to our production website through our frontend UI tech Storybook.
And those are our workflows. The point here is that if you’re working on a solo project or something small, building a CI pipeline doesn’t have to be an intimidating process. You can start with a few simple things (like what’s highlighted above) to make your workflow a little easier.
A CI/CD pipeline can and should be more complex than this if you’re building enterprise software, maintaining a big open source project, or working with a big team on any array of things. But if you’re just getting started, don’t worry about making your CI/CD pipeline meet every single need of a big team or ambitious project—just make it work for you.
Step 3: Make changes to your code to trigger your CI/CD pipeline
For the sake of this exercise, we’re going to make a small change to the website headline (“The path to your next open source contribution”) by adding in the “and more pizza” at the end. The final result will look like this: “The path to your next open source contribution and more pizza.”

Let’s get to work.
Open the src folder, and go to the components subfolder. From there, you’ll want to open the hero.js file. In that file, go to this code:
<div>
<h1>The path to your next</h1>
<h2>Open Source</h2>
<h1>contribution.</h1>
</div>
Make the change to the copy by adding in “and more pizza.” It should look like this:
<h1>The path to your next</h1>
<h2>Open Source</h2>
<h1>contribution and more pizza.</h1>
Step 4: Take a look at the workflow visualizer and live logs to get a full look into how your pipeline is running
Once you push the above change, you get to dive into the fun part: seeing your pipeline work in real time with a workflow visualizer and with live logs.
Okay, maybe this isn’t the most fun part, but knowing how to use both of these tools… you’ll thank me later.
Let’s go over the workflow visualizer first. Accessible via the Actions main page, a workflow visualizer can be pulled up by selecting whatever workflow you want to see. You’ll find something like this:

Here, you can see which job in a given workflow happens when—and if they’re working or not with a little green check mark, a yellow sign to show if something’s working, and a red sign to show if a job failed.
This is your YAML workflow, but in visual form, and it makes it easier to see what’s happening when and if it’s working.
Pro tip: Since workflow visualization graphics are color-coded to quickly show successful actions, ongoing actions, and actions that failed at a particular step, try using it after you set up a new workflow and trigger it for the first time.
Now, here’s what you should know about live logs: First off, they’re your best friend (seriously). Live logs are incredibly useful for figuring out exactly what is working, what’s broken, and why the things you think should be working aren’t working at all. But more to the point, you can go through these logs and look through timestamps, the raw logs, or even download the log itself for local reference.
Live logs can be accessed directly through the Actions menu in your repository and by clicking into any job or workflow. If you did everything right when you built out your CI/CD pipeline, you probably won’t need to look at your live logs.
But if something goes wrong, these live logs can be very helpful to reference. Whether you’re looking at timestamps or which part of the process failed, you can determine how to fix the problem.
Pro tip: Timestamps can be incredibly useful if you’re debugging a time-sensitive error. By default, a live log will color code which jobs failed and when in a given workflow, and that makes it easier to immediately address the problem.
Take this with you
Whether you’re working on an open source project, a side project, or a work project, there are some big benefits to adopting CI/CD—like producing more consistent and workable releases. But the biggest benefit of all is trusting that your code works after merging it to your main branch, testing it, and deploying it.
With GitHub Actions, building a CI/CD pipeline is a straightforward process and one that lets you focus more extensively on your code instead of all the things that come after it. Do you have any questions? Shoot me a line on Twitter at @bdougieYO, or find me on GitHub.
Additional resources
- 10 GitHub Actions resources to bookmark from the basics to CI/CD
- 5 automations every developer should be running
- 7 advanced workflow automation features with GitHub Actions

Tags:
Written by

Related posts
GitHub recognized as a Leader in the Gartner® Magic Quadrant™ for Enterprise AI Coding Agents for the third year in a row
We are committed to empowering every developer by building an open, secure, and AI-powered platform that defines the future of software development.
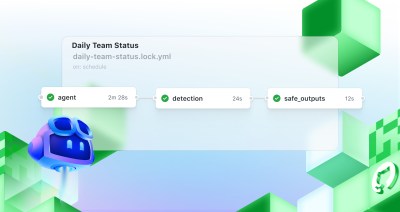
Improving token efficiency in GitHub Agentic Workflows
Agentic workflows that run on every pull request can quietly accumulate large API bills. Here’s how we instrumented our own production workflows, found the inefficiencies, and built agents to fix them.
Automate repository tasks with GitHub Agentic Workflows
Discover GitHub Agentic Workflows, now in technical preview. Build automations using coding agents in GitHub Actions to handle triage, documentation, code quality, and more.