Automating issue triage with GitHub and Recast.AI
Make managing your projects easy with automation
A few years ago, I was the lead maintainer for a handful of popular open source projects on GitHub. As you might have guessed, sometimes the people who used those projects had complaints or questions. When they did, they’d open an issue to communicate with me and the other maintainers.
The issues came in just slightly faster than our team could reasonably keep up with them. Not that we got a lot of issues, we were just very busy with other things. To help keep the queue manageable, we created a triage system using issue labels. Triage is a process of sorting incoming responsibilities into categories—urgent issues, issues to address relatively soon, and those that can be addressed later. Issue labels provide a way to sort through our issues by urgency, allowing us to perform the triage quickly.
It was a good system, but applying triage labels was tedious. Although I am no longer working on these projects, my experience has inspired me to create a tool to automate the triage process. With the advent of powerful natural language processing (NLP) APIs like Recast.AI, we can determine which labels to apply to an issue automatically.
So let’s build such a tool, and automate issue triage. It’s not as hard as it sounds. The idea is that we write a GitHub App that listens for new issues to be created. Then:
-
It extracts the issue title.
-
It passes the title to Recast.AI for classification as a bug, enhancement, or question.
-
It adds a label to the issue based on how Recast.AI classifies the title.
I’ve selected these three labels for a specific reason. Although you can create whatever labels you like to use on your repository, these are the three labels that are available to all GitHub repositories by default. Therefore, we can reasonably expect that plenty of others have used these labels in their own repositories, and we are therefore assured to find a good amount of training data.
Which brings us to the other thing we need to build: A one-shot script that we can run that takes already-labeled issues on GitHub, and uses them to train a language model with Recast.AI.
Step 1: Create a GitHub App
The first thing to do is register our app with GitHub. For this tutorial, we’re going to use Ruby, and GitHub has an excellent guide to building your first GitHub App. Go ahead and work through the tutorial to get started; I’ll wait here, patiently.
Step 2: Create a bot on Recast.AI
Once you have a basic GitHub App ready to go, and you’ve registered with GitHub, it’s time to prepare a bot model on Recast.AI.
We begin by creating a bot on Recast.AI. Bots are projects designed for building fully interactive chatbots. Keep in mind, we’re only going to use a small subset of Recast.AI’s functionality.
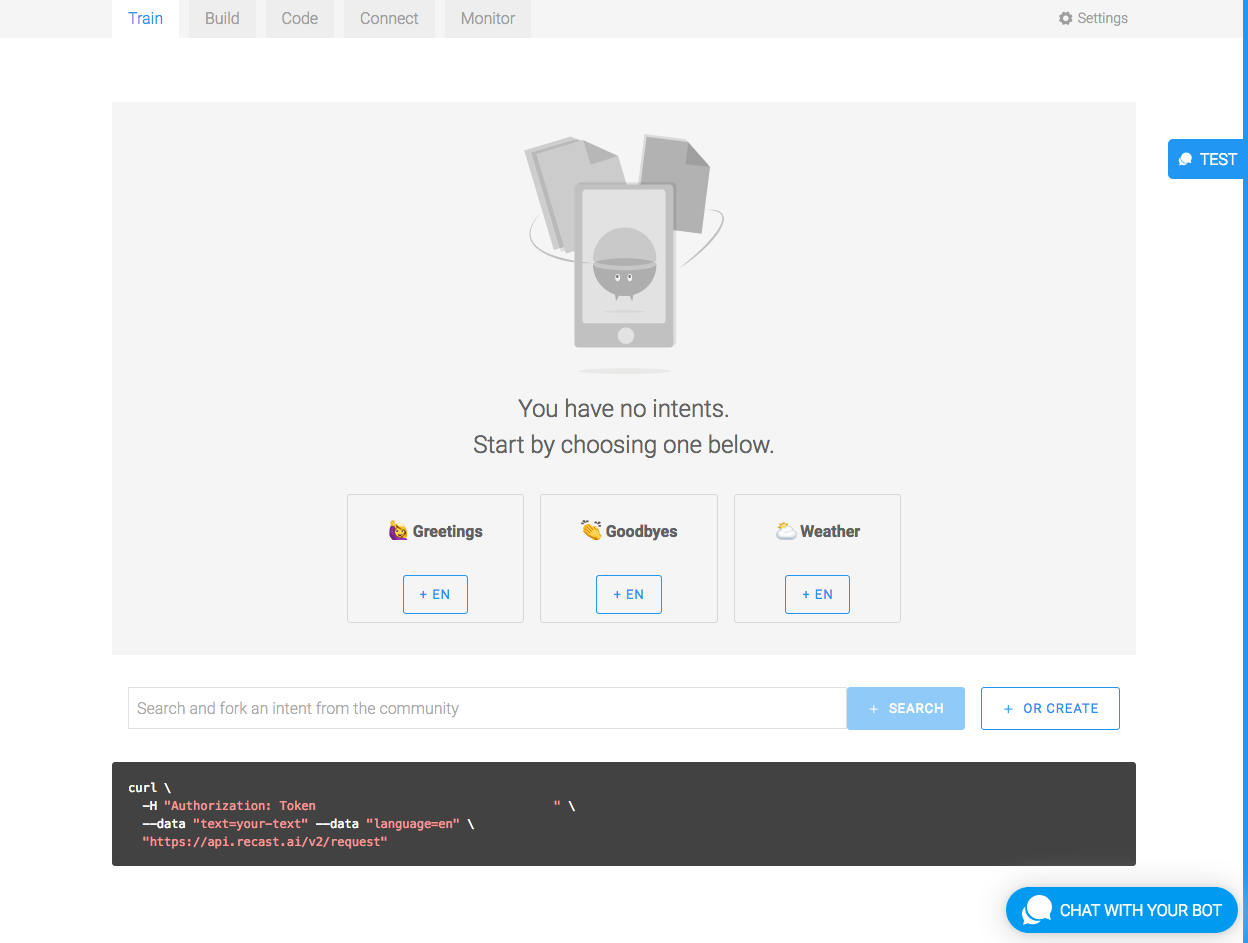
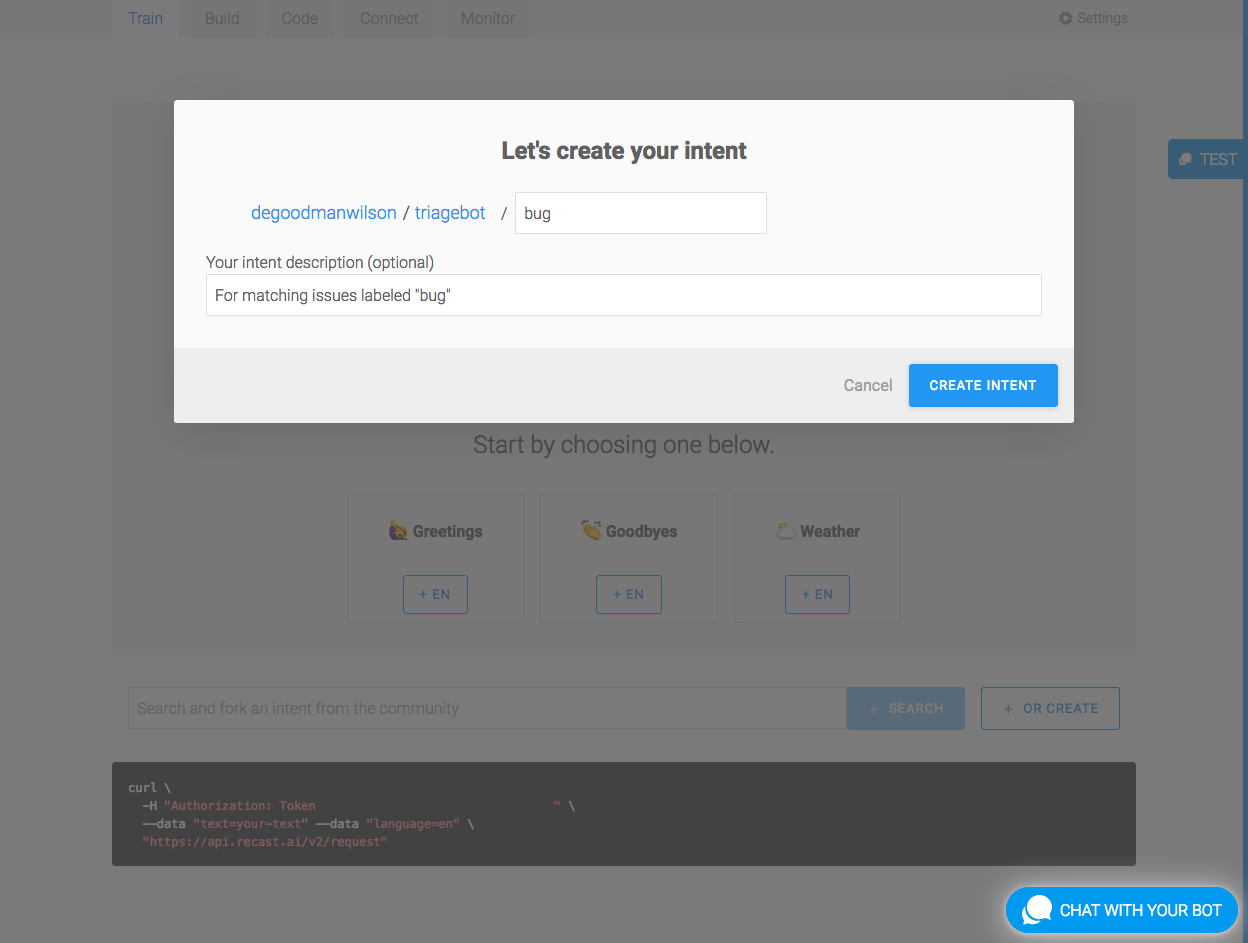
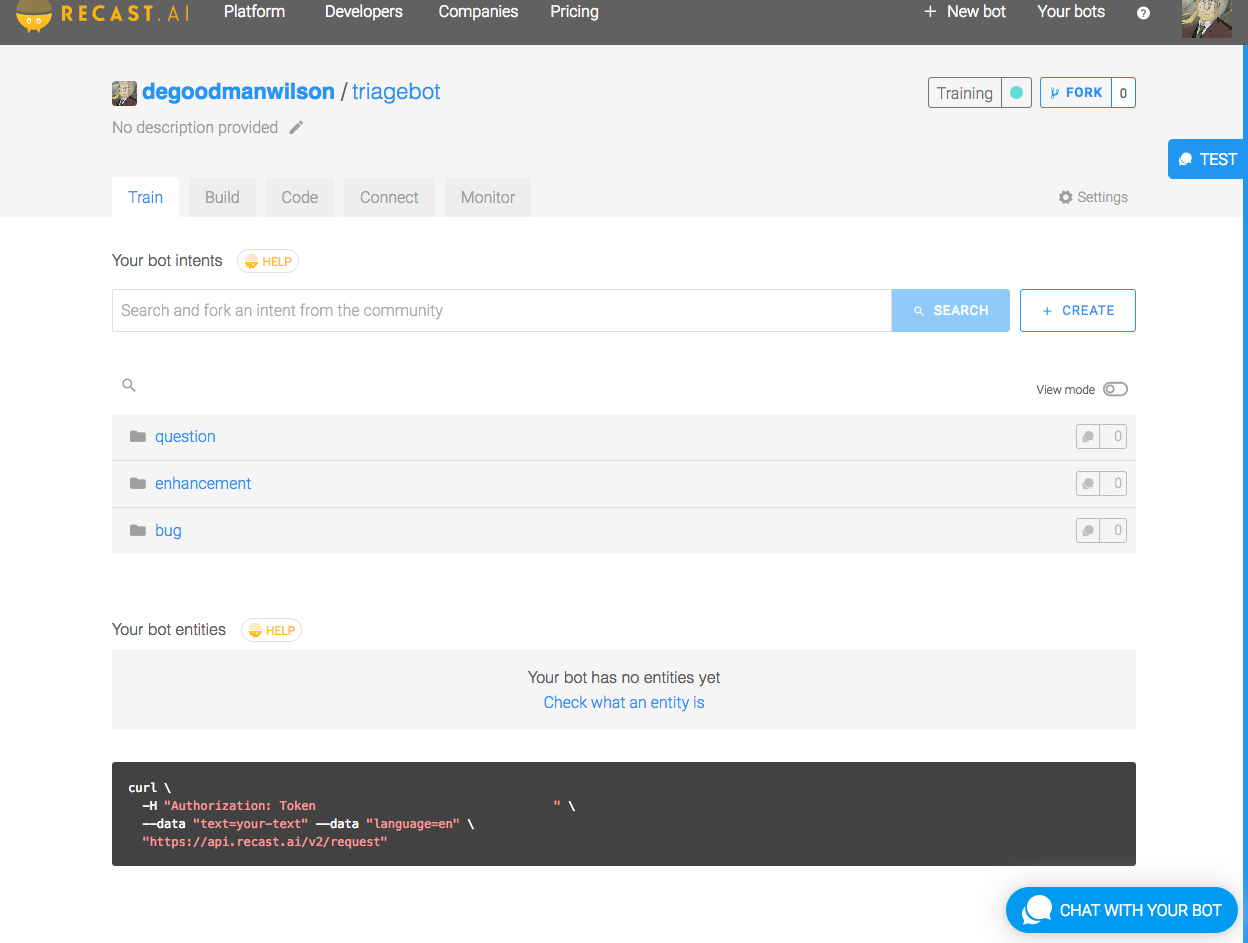
One of Recast.AI’s core features is its ability to categorize expressions into defined intents. In our case, we are going to create one intent per label: One for bugs, one for enhancements, and one for questions. We need to train the model so that Recast.AI knows the difference between each intents.
Let’s continue by deleting any existing intents in Recast.AI. Then, create three new ones:
Finally, you’ll want to take note of both the “Request access token,” and the “Developer access token.” These tokens are available on the settings page of your bot.
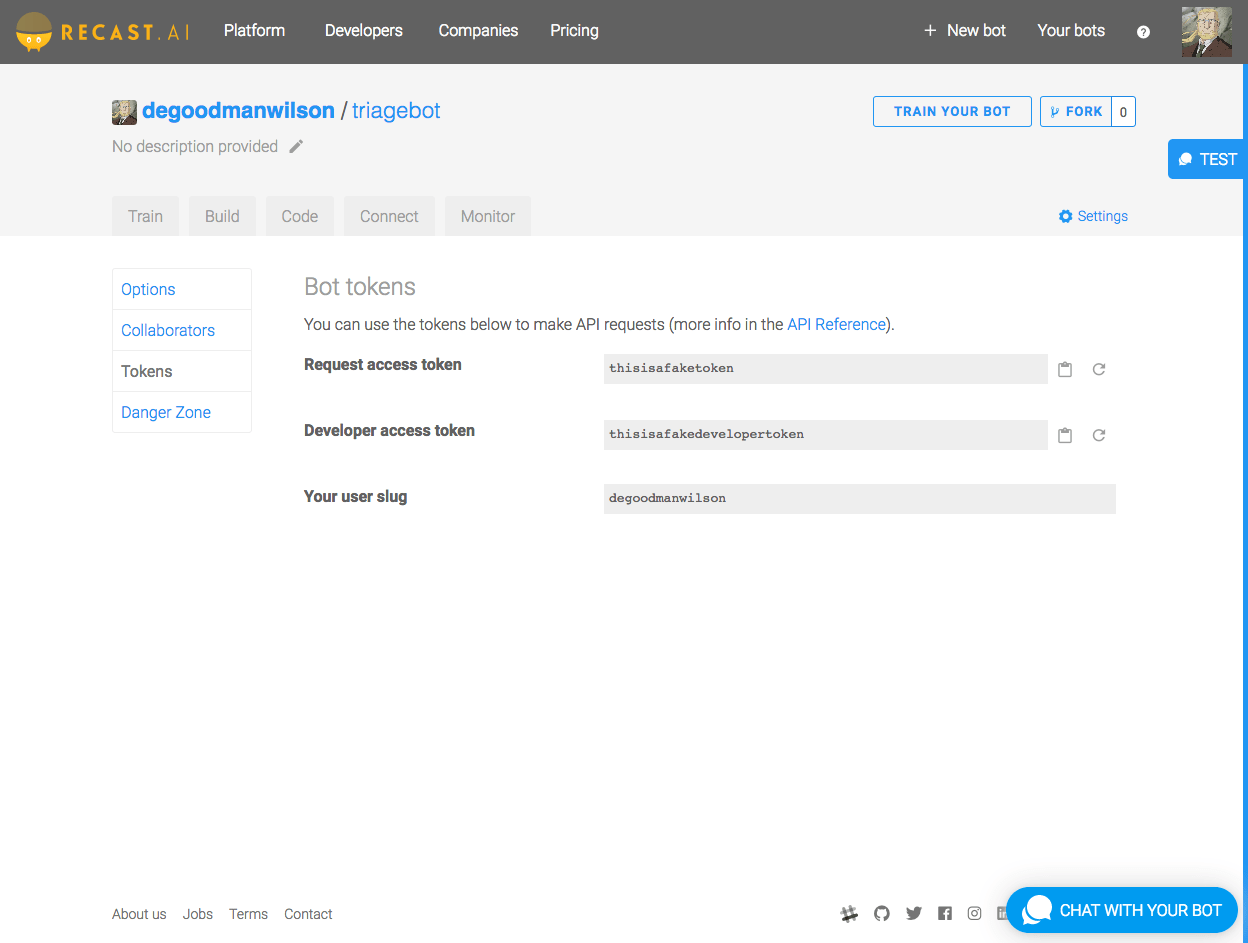
Let’s add them to our environment just like the variables we need for our GitHub App:
export RECASTAI_TOKEN = your_recastai_token_here
export RECASTAI_DEV_TOKEN = your_recastai_dev_token_here
Step 3: Use the GitHub Search API to train our model
The first code we need to write is a one-shot script to train the bot we just created on Recast.AI. This script will go through the GitHub Search API, looking for issues that have been labeled bug, enhancement, and question. Then, the script will feed the issue titles to Recast.AI.
You’ll need to install the octokit and HTTParty gems if they’re not already installed on your system:
gem install octokit
gem install httparty
Then you can run the following script directly from the command line:
require 'octokit'
require 'jwt'
require 'httparty'

# some configuration that you should change to reflect your own Recast.AI account
RECASTAI_USERNAME = 'degoodmanwilson'
RECASTAI_BOTNAME = 'triagebot'
RECASTAI_DEV_TOKEN = ENV['RECASTAI_DEV_TOKEN']

# We will time each request in order to avoid GitHub's rate limiter.
# We are allowed 10 requests per minute without authenticating.
time_between_calls = 60 / 10

# Repeat the following for each label we want to build an intent for:
for label in ['bug', 'enhancement', 'question']

    page = 1

    # GitHub currently caps search results to 1,000 entries, but we're not going to count. We'll let GitHub do the
    # counting for us—so, loop forever.
    loop do
        before = Time.now

        begin
            # Here is the centerpiece of this code: The call to the Search API.
            issues = Octokit::Client.search_issues("label:#{label}", page: page)
        rescue Octokit::UnprocessableEntity => ex
            # GitHub will only return 1,000 results. Any requests that page beyond 1,000 will result in a 422 error
            # instead of a 200. Octokit throws an exception when we get a 422. If this happens, it's because we've seen
            # all the results.
            puts "Got all the results for #{label}. Let's move on to the next one."
            break
        rescue Octokit::TooManyRequests => ex
            puts "Rate limit exceeded"
            # `kernel#sleep` often doesn't sleep for as long as you'd like. This means that sometimes we hit the rate
            # limit despite taking the necessary precautions to avoid this. If this happens, just sleep a little longer,
            # and try again.
            sleep(time_between_calls)
            next # try endpoint again
        end

        # Notice that we also have to specify the language. There is a non-trivial chance that we have several
        # non-English issue titles in our collection, but GitHub doesn't have any data on the languages the issues are
        # written in (and why should it?). For now, we will (wrongly, but not unjustifiably) assume English. Although,
        # a better implementation would be to run these titles through a separate API that can help guess the correct
        # language.
        expressions = []
        for expression in issues['items'] do
            expressions.push({source: expression['title'], language: {isocode: 'en'}})
        end

        # And now we bulk-post the tagged titles to Recast.AI. Their otherwise excellent gem doesn't support this
        # endpoint, so we need to use raw HTTP requests to upload the data.
        result = HTTParty.post("https://api.recast.ai/v2/users/#{RECASTAI_USERNAME}/bots/#{RECASTAI_BOTNAME}/intents/#{label}/expressions/bulk_create",
                               body: {expressions: expressions},
                               headers: {'Authorization' => "Token #{RECASTAI_DEV_TOKEN}"}
        )

        # Go to the next page of search results from GitHub.
        page += 1

        # Now that we have completed the call to the GitHub Search API and the Recast.AI API, let's measure how long it
        # took. We can always sleep if we need to, in order to avoid hitting the rate limiter.
        after = Time.now
        sleepy_time = time_between_calls - (after - before)
        slept = sleep(sleepy_time) unless sleepy_time <= 0

    end
end
At its heart, this script calls the GitHub Search API, searching for issues tagged “bug”, “enhancement”, and “question”, then pages through the results. As simple as this is, there are two complicating factors that we’ll go over.
The first is that GitHub returns only 1,000 results. I don’t want to hardcode this limit, in case it changes. GitHub responds with a 422 error if we try to page beyond the number of results allowed. We can take advantage of that by simply paging through the results until we receive the 422 error—that’s when we know we’re done.
The second complication is that the Search API is rate limited. We get a better rate limit if we authenticate, and you can see how that process works from the version in the triagebot repo. However, the standard rate limit is 10 requests per minute. This means that we need to wait six seconds between requests. Thus, we need to measure how long it takes to make and process each call (including the resulting calls to Recast.AI!), while simultaneously sleeping a bit between calls to avoid hitting the rate limiter.
There is a further complication with kernel#sleep in that it only guarantees that it won’t sleep more than the requested time. But it might sleep less, which means we may still hit the rate limiter. We know we’ve reached the rate limiter when GitHub returns a 429 error. If this occurs, we can simply wait for another 6 seconds. A better strategy for apps that might hit the rate limiter would be to use exponential backoff, where we wait a small amount of time, and increase that amount of time each time we get a 429 error. This exponential backoff strategy would be overkill for what we’re trying to accomplish with this script, so I’ve kept things simple.
The other key element is sending the issue title and label to Recast.AI for training. We rely on HTTParty to call the RecastAI /expressions/bulk_create endpoint, allowing us to batch send 100 tagged issue titles (since that’s what we get back from GitHub with each call to the Search API).
You’ll notice that Recast.AI requires us to indicate the language of the issue title. For now, let’s assume that it’s English—although this is generally a false assumption. The full code shows a more nuanced approach that we can take to estimate the language.
Once you’ve run the script, you should have a trained NLP model ready on Recast.AI. Let’s return to the GitHub App that will use this model.
Step 4: Build an App that uses your model to label new issues
Now we need a GitHub App that listens for newly-opened issues, uses Recast.AI to classify the issue title, and attaches a new label to the new issue based on the classification.
Because GitHub events arrive over HTTP as calls to a webhook we provide, we’re going to use a web framework like Sinatra or Grape. For this instance, we’ll use Sinatra.. The script below builds on the code in the guide to building your first GitHub App, so if you have that running, you can replace the code with the following:
require 'sinatra'
require 'logger'
require 'json'
require 'openssl'
require 'octokit'
require 'jwt'
require 'time' # This is necessary to get the ISO 8601 representation of a Time object
require 'recastai'

set :port, 3000

# Read more about GitHub Apps at https://developer.github.com/apps/
#
# Have fun and reach out to us if you have any questions, or if you just want to show
# off what you've built!

class GHAapp < Sinatra::Application

    # Never, ever, hardcode app tokens or other secrets in your code!
    # Always extract from a runtime source, such as an environment variable.

    # Notice that the private key must be in PEM format, but the newlines should
    # be stripped and replaced with the literal `n`. This can be done in the
    # terminal:
    # export GITHUB_PRIVATE_KEY=`awk '{printf "%s\n", $0}' private-key.pem`
    PRIVATE_KEY = OpenSSL::PKey::RSA.new(ENV['GITHUB_PRIVATE_KEY'].gsub('n', "**n**")) # convert newlines

    # You set the webhook secret when you create your app. This verifies that the
    # webhook is really coming from GitHub.
    WEBHOOK_SECRET = ENV['GITHUB_WEBHOOK_SECRET']

    # Get the app identifier—an integer—from your app page after you create your
    # app. This isn't actually a secret,
    # but it’s easier to configure at runtime.
    APP_IDENTIFIER = ENV['GITHUB_APP_IDENTIFIER']

    RECASTAI_TOKEN = ENV['RECASTAI_TOKEN']

    ########## Configure Sinatra
    #
    # Let's turn on verbose logging during development
    #
    configure :development do
        set :logging, Logger::DEBUG
    end

    ########## Before each request to our app
    #
    # Before each request to our app, we want to do two things:
    # 1) Verify that this request actually came from GitHub by validating the
    # attached signature
    # 2) Create a new Octokit client. Doing so requires that we construct a JWT.
    # https://jwt.io/introduction/
    # We have to also sign that JWT with our private key, so GitHub can be sure that:
    #  a) it came from us
    #  b) it hasn't been altered by a malicious third party
    #
    before do
        request.body.rewind
        payload_raw = request.body.read # We need the raw text of the body to check
        # the webhook signature
        begin
            @payload = JSON.parse payload_raw
        rescue
            halt 401
        end

        # Check X-Hub-Signature to confirm that this webhook was generated by
        # GitHub, and not a malicious third party. The way this works is: We have
        # registered with GitHub a secret, and we have stored it locally in
        # WEBHOOK_SECRET. GitHub will cryptographically sign the request payload
        # with this secret. We will do the same, and if the results match, then we
        # know that the request is from GitHub (or, at least, from someone who knows
        # the secret!). If they don't match, this request is an attack, and we should
        # reject it. The signature comes in with header x-hub-signature, and looks
        # like "sha1=123456". We should take the left-hand side as the signature
        # method, and the right-hand side as the HMAC digest (the signature), itself.
        their_signature_header = request.env['HTTP_X_HUB_SIGNATURE'] || 'sha1='
        method, their_digest = their_signature_header.split('=')
        our_digest = OpenSSL::HMAC.hexdigest(method, WEBHOOK_SECRET, payload_raw)
        halt 401 unless their_digest == our_digest

        #---------------------
        # OK, so this request came from GitHub. Great.
        # Now, construct a JWT and use that to authenticate a new Client object

        jwt_payload = {
                # The time that this JWT was issued, i.e. now.
                iat: Time.now.to_i,

                # How long is the JWT good for (in seconds)?
                # Let's say it can be used for 10 minutes before it needs to be refreshed.
                # TODO we don't actually cache this token, we regenerate a new one every time.
                exp: Time.now.to_i + (10 * 60),

                # Your GitHub App's identifier number, so GitHub knows who issued the JWT, and know what permissions
                # are available using the token.
                iss: APP_IDENTIFIER
        }

        # Cryptographically sign the JWT
        jwt = JWT.encode(jwt_payload, PRIVATE_KEY, 'RS256')

        # Create the Octokit client, using the JWT as the auth token.
        # Notice that this client will not have sufficient permissions to do many interesting things.
        # We might, for particular endpoints, need to generate an installation token (using the JWT), and instantiate
        # a new client object.
        @app_client ||= Octokit::Client.new(bearer_token: jwt)

        # And here we check whether we need that new client, that I mentioned just above. We check if there is an
        # installation associated with this event, and if there is, we instantiate a new Client object with the
        # installation token.
        unless @payload['installation'].nil? || @payload['installation']['id'].nil?
            installation_id ||= @payload['installation']['id']
            installation_token = @app_client.create_app_installation_access_token(installation_id)[:token]
            @client ||= Octokit::Client.new(bearer_token: installation_token)
        end
    end

    ########## Events
    #
    # This is the webhook endpoint that GitHub will call with events, and where we will do our event handling.
    #

    post '/' do
        case request.env['HTTP_X_GITHUB_EVENT']
        when 'issues'
            # `issue` events can have several actions associated. We are interested in issues that have been opened.
            handle_issue_opened_event(@payload) if @payload['action'] == 'opened'
        end

        'ok' # we have to return something ;)
    end

    ########## Helpers
    #
    # These functions are going to help us with tasks that we don't want clogging up the happy paths above, or
    # that need to be done repeatedly. You can add anything you like here.
    #

    helpers do

        #######
        # This is our issue opened event handler.
        def handle_issue_opened_event(payload)
            repo = payload['repository']['full_name']
            issue_number = payload['issue']['number']
            title = payload['issue']['title']

            recast_request = RecastAI::Request.new(RECASTAI_TOKEN)

            recast_result = recast_request.analyse_text(title)

            # Recast.AI will return a list of possible intents—labels—rated by their likelihood. We don't know what
            # order they’re in, so we need to search through this list for the label with the greatest likelihood.
            best_intent = nil
            best_intent_score = 0
            for intent in recast_result.intents
                if intent.confidence > best_intent_score
                    best_intent_score = intent.confidence
                    best_intent = intent.slug
                end
            end

            return true if best_intent.nil?

            @client.add_labels_to_an_issue(repo, issue_number, [best_intent])
            true
        end

    end

    # Finally this section holds the logic, which allows us to run this server directly from the command line, or with
    # Rack. Don't worry too much about this code, but for the curious:
    # $PROGRAM_NAME is the executed file
    # __FILE__ is the current file
    # If they are the same—that is, we are running this file directly, call the Sinatra run method.
    run! if $PROGRAM_NAME == __FILE__
end
All the webhook handling happens in the post '/' block above.
The real magic happens in handle_issue_opened_event. This is our helper function that is invoked when we receive an issue event with action opened. It begins by extracting some necessary information from the event—the repository name and issue number, as well as the issue title. That title is then sent to Recast.AI via their Ruby SDK. Recast.AI classifies it based on the model we’ve previously built—these classes are called “intents”—and assigns a probability to each intent it decides might fit. We need to find the intent with the greatest probability. When we do, we use that intent to label the issue by calling the GitHub Issues API.
Great! Now what?
That’s it! At its core, triagebot has only a handful of moving parts, but there are a few complications that have to be addressed. Now that we’re done, we have a reasonably competent system for automatically triaging incoming issues.
What’s next? Triagebot can be improved in a number of different ways:
-
Of course, more data is better, so continuing to add new, labeled issues will only make it better.
-
Determining the language of the issue titles will make Recast.AI’s model more robust, but it will also allow it to work better in languages other than English, too.
-
Sometimes the issue title doesn’t tell the whole story. Looking at the text of the issue for context may be worthwhile.
-
What other cues could we look at to help us triage the issue?
-
What other actions could we take beyond labeling the issue? An additional action could be something as simple as pasting a message into a Slack channel, for example.
Want to see the code for yourself? Visit my triagebot repo to see the full codebase, including a little more nuance and detail than I’ve provided in this post. It’s open source, of course, so take, use, and build something cool!
Let us know what you’ve built using this guide. Find us on Twitter at @GitHubAPI or email us at developer@github.com. Or meet other GitHub developers, share what you’ve built, and get help with your questions on the GitHub API Development Community Form.
If you have any questions regarding Recast.AI, join their Slack Community for technical support from the team, and follow them on Twitter at @RecastAI.
Written by

Related posts

From pair to peer programmer: Our vision for agentic workflows in GitHub Copilot
AI agents in GitHub Copilot don’t just assist developers but actively solve problems through multi-step reasoning and execution. Here’s what that means.
GitHub Availability Report: May 2025
In May, we experienced three incidents that resulted in degraded performance across GitHub services.

GitHub Universe 2025: Here’s what’s in store at this year’s developer wonderland
Sharpen your skills, test out new tools, and connect with people who build like you.