Managing large files with Git LFS
We recently announced that Git Large File Storage, our open source project for managing large assets with Git, had reached a 1.0 milestone and would be available to all repositories…

We recently announced that Git Large File Storage, our open source project for managing large assets with Git, had reached a 1.0 milestone and would be available to all repositories on GitHub.com. If you use GitHub Enterprise, we are happy to share the news that support for Git LFS is now officially available in our version 2.4 release. In this post, we’ll take a look at how Git LFS fits into your current workflow, whether you use GitHub’s web interface, the command line, or even the GitHub Desktop application.
For more background or to learn the basics about Git LFS, click here.
Seamless integration with GitHub
If you work on a project with assets that you’re using Git LFS to manage, one of the first things you may notice is that, despite residing in a separate environment, these large files still show up alongside your other files on GitHub. Rather than showing the text pointers that Git LFS stores in your repository, GitHub uses the pointers to retrieve the asset from the LFS server so you can view them just as you would if they lived in your repository. For renderable content, such as images, this means you have access to the same rich diffing tools available for other in-repository content.
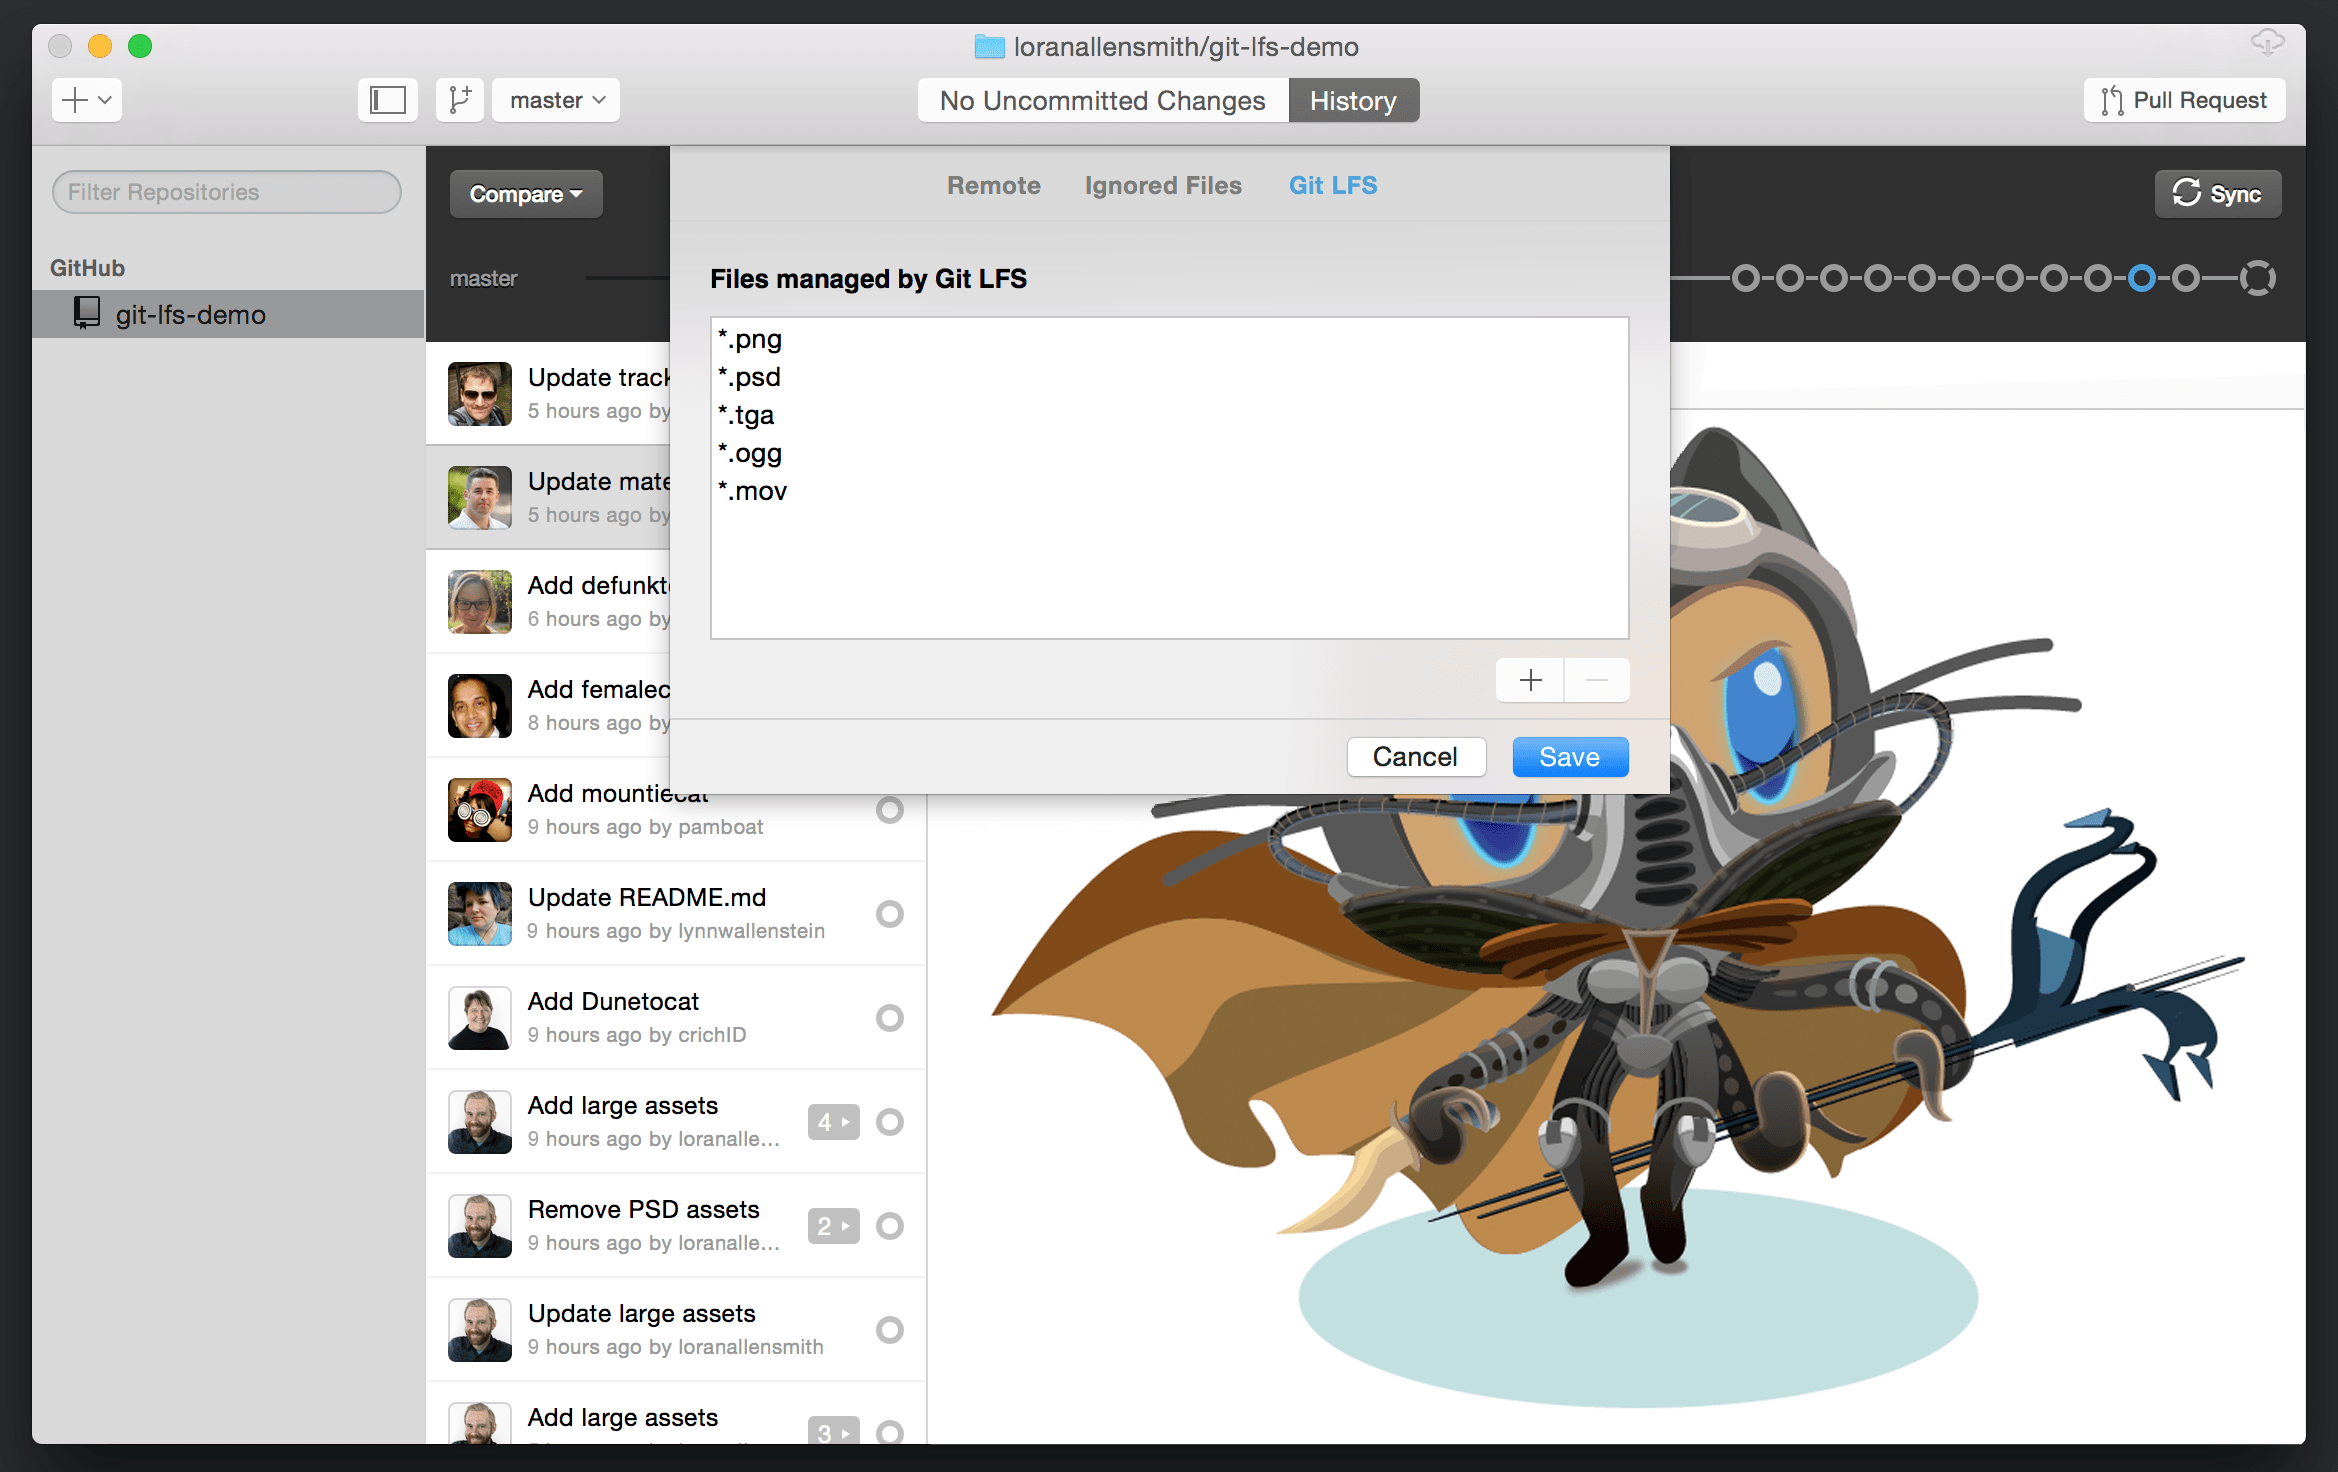
First-class LFS support in GitHub Desktop
If you use GitHub Desktop to collaborate on projects configured for Git LFS, you can use the same flow you are used to. Git LFS support is baked in, so you can make changes, commit, and sync just as you normally would. To change the list of paths Git LFS is managing, use the Git LFS tab in your repository settings to add, edit, or delete tracking rules.
Git-centric command line flow
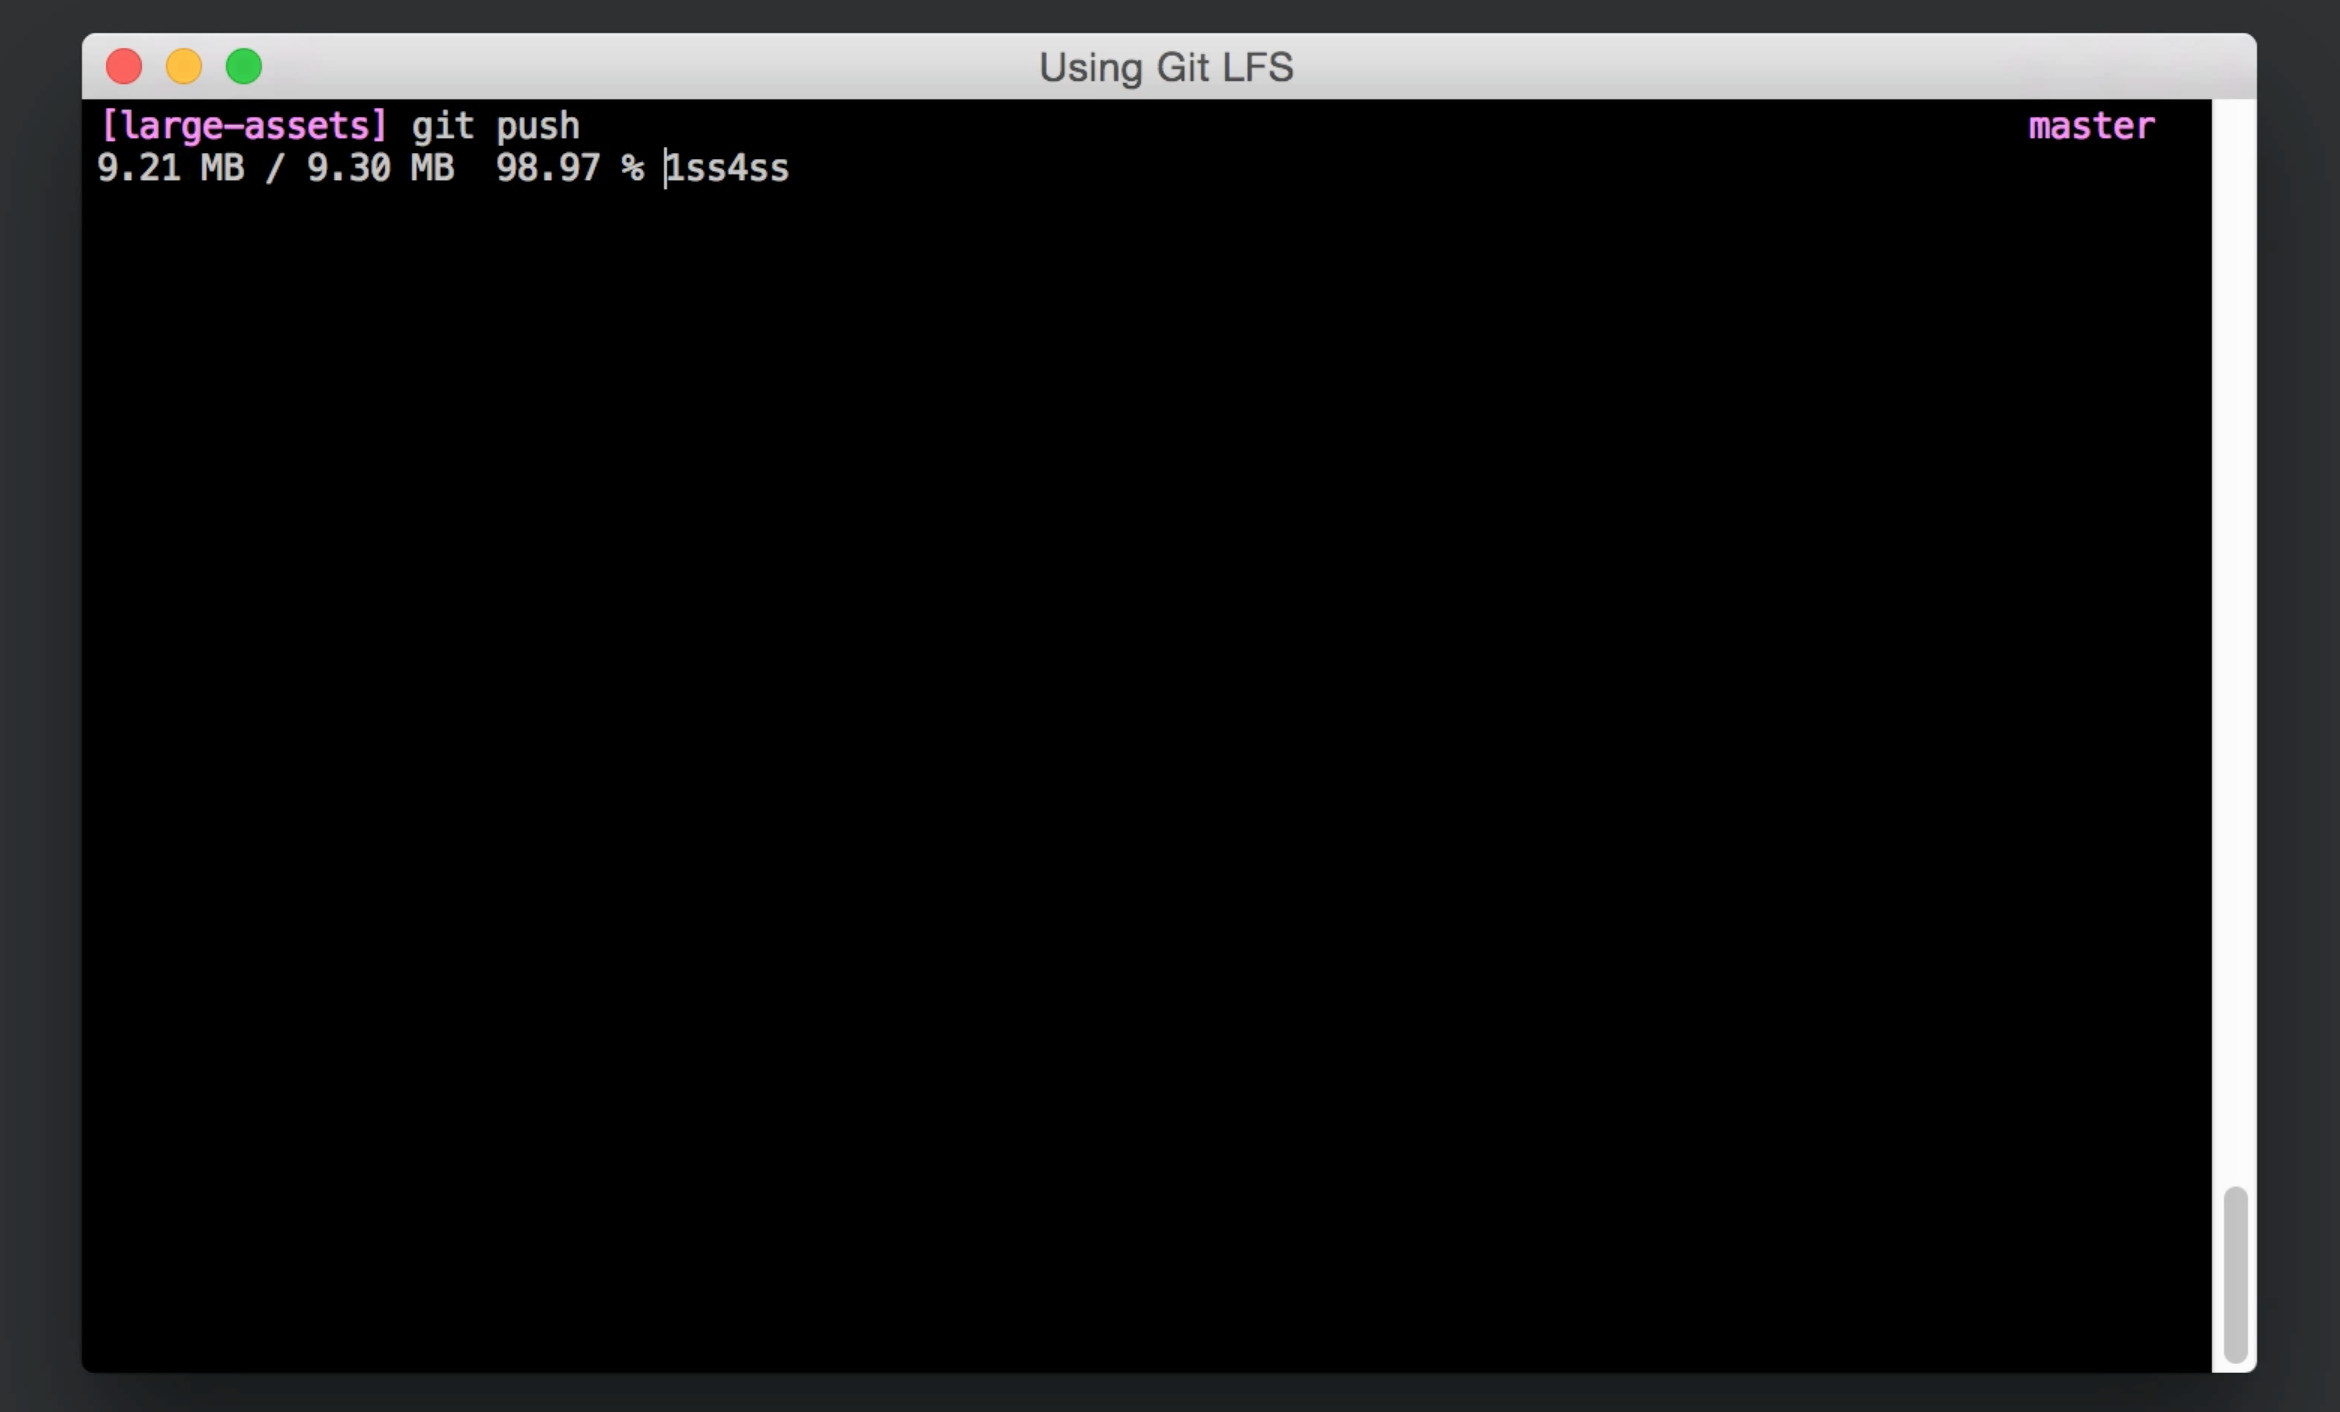
If most of your Git work takes place in a terminal window, integrating Git LFS into your workflow is as simple as adding a few extra commands to your proverbial tool belt. In addition to utilizing built-in Git functionality as part of its interface, Git LFS implements a Git-like syntax that helps it feel less like an add-on and more like a subset of topical commands.
Getting started
After you download and install Git LFS, you can start managing large files in a Git repository by running git lfs track <your-file>, where <your-file> is a command-line glob specifying a particular file, extension, directory, or any combination thereof. Git LFS writes these globs to a .gitattributes file in your repository that Git uses to pre-process files as they move back and forth from your working directory to your index and commit history.

Once you tell Git LFS which files and paths to manage, you can stage, commit, and push just like you normally would; Git LFS handles all of the details for you. When you run git push, you’ll notice a progress indicator showing the transfer status of each file as Git LFS uploads it to the LFS server.
Keeping track of things
If you ever need to find out which paths Git LFS is managing, you can run git lfs track with no arguments. You’ll get an output of all the tracking rules from the globs listed in the .gitattributes file. For a deeper view of which specific files these globs are catching, you can run git lfs ls-files to see a listing of all the files in your project that Git LFS is managing.
Other resources
- The 1.0 release of Git LFS includes a collection of new features and enhancements, such as batch uploading and selective asset fetching, that extend and optimize it to help your workflow.
- For a deeper dive into the internal workings of Git LFS, you can consult the Git LFS documentation.
- A guided video demonstration of the features outlined in this video is available on our YouTube channel.
- To learn more about the history of Git LFS or the latest features, take a look at this recording of a talk from GitHub Universe featuring the project’s core contributors.
Written by

Related posts
GitHub joins coalition advocating for fixes to California AI Transparency Act to protect open source
We’re calling for targeted amendments to resolve conflicts with open source licensing and align with international transparency frameworks while preserving regulatory intent.

GitHub availability report: May 2026
In May, we experienced nine incidents that resulted in degraded performance across GitHub services.

GitHub Universe is back: All together now, in the agentic era
GitHub Universe is back: returning to the historic Fort Mason Center in San Francisco on October 28–29, 2026.